How to Design a Chic, Modern DIY Dollhouse
Learn how to design the cutest chic, modern DIY dollhouse from scratch, from building the dollhouse to customizing the interior! This post is sponsored by Kreg Tool—without their amazing pocket hole jig, this project would not have been possible!
How to Design a Chic, Modern DIY Dollhouse
It’s finally here! I’m finally done Ramona’s dollhouse! I am so unbelievably thrilled with how it turned out. It is everything I wanted it to be and more. All of the tedious work paid off.
But let me do a bit of a tease first! If I have to wait until Ramona’s birthday to give this to her, you have to wait a little bit too. 🙂 Mike has a running bet with himself going on whether or not I’ll actually be able to make it to her birthday to give it to her. I’ve made it this far, though. I can make it to her birthday!
Here’s how we got to this point:
Post 1: Modern dollhouse build plans


Post 2: DIY dollhouse siding using balsa wood


Post 3: How to make dollhouse wallpaper


Post 4: 7 DIY dollhouse miniatures


Creating the dollhouse’s main structure
I was thrilled to work with two of my favorite companies on this project—the first of which is Kreg Tool. I love using pocket hole joinery for my projects because it’s easy and really sturdy. I’ve used pocket hole joinery on quite a few of Ramona’s projects. Her dollhouse bookcase, house-shaped big girl bed, Lego/art activity table (last year’s Christmas present), modern outdoor table, water play table…and I think that’s it! So yeah, a long list.
I wanted to use pocket hole joinery for this project because I anticipate it getting a bit beat up from toddler strength. As hard as that will be for me to accept, this is for her. Not me 🙂 So it needs to be a brick house to withstand her rough housing.
I also wanted a really slick look for this dollhouse, so using pocket holes meant I was able to hide a lot of them on backs or bottoms of pieces—and under where I knew I wanted wallpaper to go!


What is a Kreg pocket hole jig?
Pocket hole joinery works by drilling an angled hole in one piece of wood and then driving a screw through that hole into another piece of wood. This angled design creates a very strong joint, and you can also patch and cover up pocket holes, meaning you can easily hide them.
Kreg’s pocket hole jigs are perfect for novice, intermediate, and experienced woodworkers alike. I have used my K4 and my 320 (the smaller one) on quite a few projects.

Alright, alright…the modern DIY dollhouse reveal!
Alright…if you followed all of my progress updates so far, you know that I have put a lot of work into this project. So here it is…here is the interior set up with furniture. In all its glory! And the exterior with the cute little address plaque 🙂


The front of the dollhouse
Alright, so I’m going to go through the dollhouse and highlight some things. The post about the DIY dollhouse siding using balsa wood is linked at the top of this post. The siding was a huge pain. I’m not going to lie. I regretted doing it about 1/2 of the way through. But it turned out amazing.
I made the address plaque using a small piece of craft wood I cut into a hexagon with my Cricut Maker and painted black. Cricut is the other brand I worked with on this project—many of the custom items I made would not have been possible without my Cricut! I’ll note which those are.
After painting the address plaque, I used holographic vinyl to add the house number and road name. And there’s also a little peek at the faux plants I made as well! I made a bunch of different ones for inside and out.


This view also has a peek at the “tree” I made for the balcony. This is actually a faux succulent I got from Joann—I simply pushed it down through a tiny upside down terracotta pot I painted brown. Using a bit of strong glue helps to keep it in place, but it was pretty snug in there even without glue. It’s so cute.
For the little deck, I added brick scrapbook paper using decoupage to create a “patio” look. Then I added some painted wood trim around it. I also added one of the bedroom nightstands as an outdoor table—and one of the living room chairs.


Dollhouse furniture and accessories I bought
(Affiliate links below; read more about those here)
I did buy some things for the interior. Although I wanted to make the furniture as well, I just knew there wouldn’t be enough time to. So I settled on a few different doll furniture sets and dolls that ended up going really well together!
- NextX dollhouse furniture set—this included the kitchen, dining table, living room, bathroom, and master bedroom.
- Baby furniture set—and then I got this cute baby set. I was a little disappointed that it didn’t come with the little pull toy, but I know Ramona is going to go nuts over the stroller and tiny baby.
- Dollhouse pet set—I also couldn’t resist this cute little hamster and rabbit pet set. With an adorable house. Our neighbor has real guinea pigs, but this is the closest R is going to get 🙂
- 7-pack posable family with baby and 6-pack Hape family as well

Upstairs dollhouse rooms
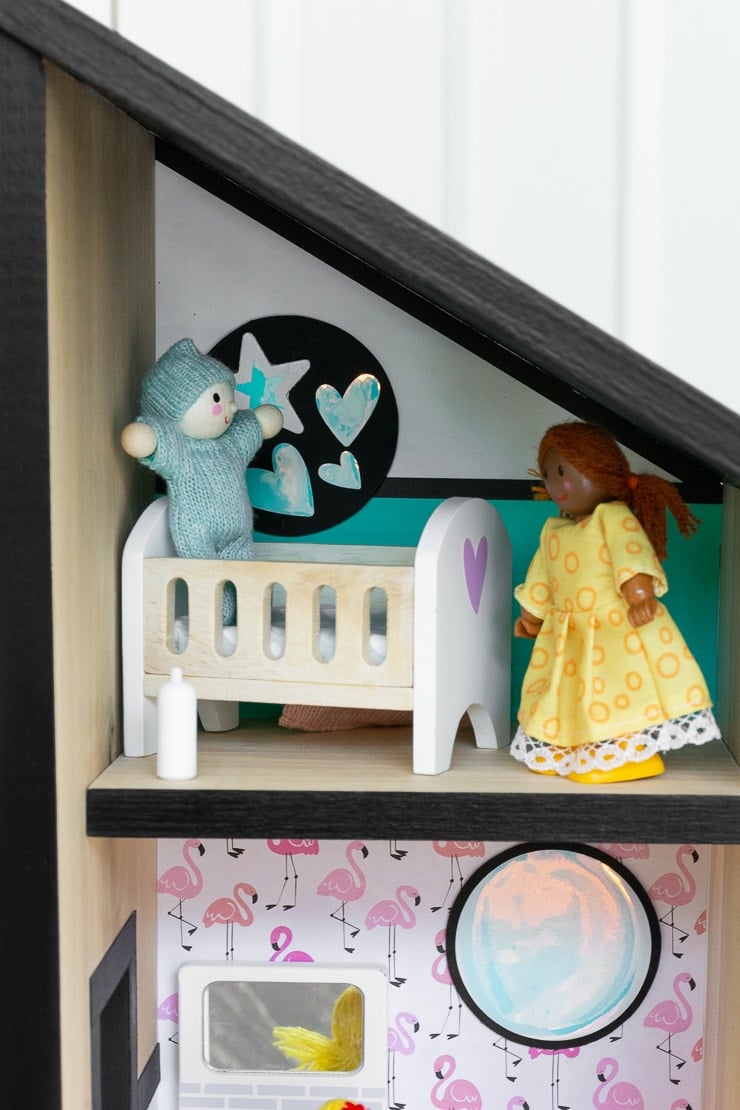
So for the upstairs rooms, there are three. The bathroom, the baby loft, and the master bedroom. The bathroom and the master bedroom both have scrapbook paper as the wallpaper, and the baby loft has a half/half white and turquoise vinyl wallpaper. The art on the wall with the white star and hearts is also special because the star is from the mobile I made Ramona before she was born. 🙂
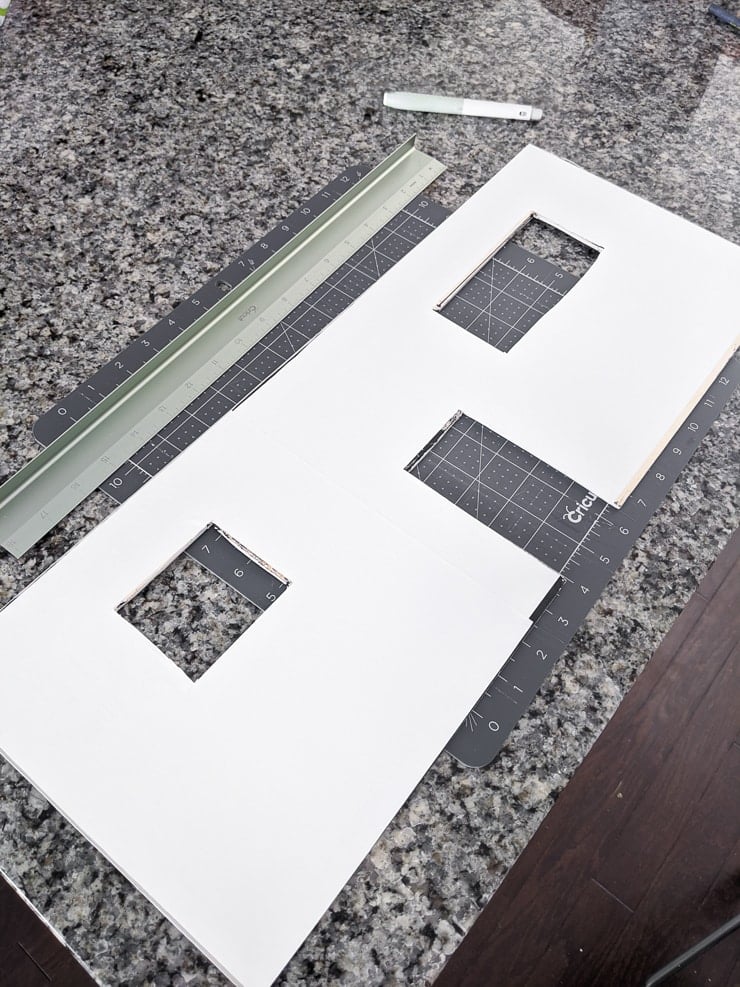
I added a felt rug in the bathroom and framed out the master bedroom window using painted basswood I cut on my Cricut. I framed out all of the windows like this because it really helped clean up the rough-cut edges. And I used a few pieces of vinyl cut into hearts and other shapes to help customize the furniture.
I did purple hearts on the baby’s crib, a turquoise heart on the bathroom’s sink/vanity, and a faux bedspread on the bed. And of course the faux plant in the bathroom by the tub.


And the downstairs rooms of the modern DIY dollhouse!
The downstairs floor is the kitchen and the living room. It also has some extra floor space because I made the base of the dollhouse deeper than the dollhouse walls. This was mostly to provide stability so the dollhouse wouldn’t tip over but also to provide a little “outdoor dining” space.
All of the wallpaper down on the bottom floor is a base of white adhesive vinyl with pink, turquoise, black, and holographic vinyl decals. I added a black vinyl cat I cut out using my Cricut to the TV, too. The furniture looks great down here, and I love how the baby set and pet set both fit in great with the main furniture set.
And of course there is an assortment of felt throw rugs and felt houseplants. I even got some battery-operated fairy lights and a tiny $1 Christmas tree for Ramona to decorate for Christmas. I’ll add pics 🙂 And that’s that!


I hope you guys have enjoyed this project—it’s been really fun and challenging to make, and I’m so proud of how it turned out. Let me know if you have any questions!


Ramona is one lucky little girl; this is amazing!
Thank you!! <3
Exceptional talent shown in every single detail! I love your posts.
Thank you so much Darlene!! That means so much to me!
It truly is amazing! You did a fabulous job. This will be a great heirloom for Ramona’s children someday.
Thanks JoAnne!! I wonder how out of style it will be by then LOL.
FANTASTIC! I’m SO impressed! I loved playing with my dollhouse! Awesome!
Thank you so much Robin! I can’t wait to give it to her tomorrow!!!