7 DIY Dollhouse Miniatures
7 adorable DIY dollhouse miniatures made with the Cricut Maker
This is the second-to-last post in my dollhouse series…the last one before I share the whole thing! If you missed the first few, I have a post on the modern DIY dollhouse build plans, as well as how I used balsa wood to create DIY dollhouse siding. I’m making this dollhouse for my daughter 🙂
I’m really excited to be at this stage, because it means I’m mostly doing the fun stuff—customizing the interior and cleaning up some last minute things. I leaned heavily on my Cricut Maker for this stage of the process.
I do not have a steady hand for intricate cuts and small things, and I love how easy the Cricut makes it to cut out almost any design exactly how I envision it in my head. So let’s go over the 7 DIY dollhouse miniatures I made with my Cricut Maker!

(Affiliate links below; read more here)
1. Vinyl wallpaper
This was such an in-depth process that I made a separate post about DIY dollhouse wallpaper, mostly so I could compare my experience using scrapbook paper and adhesive vinyl for dollhouse wallpaper. Ultimately, adhesive vinyl wins out for me because you don’t need to worry about glue and it has a much more durable finish than scrapbook paper.
Here’s what I used:
- Cricut Maker for decals, though other machines could be used as well
- Transfer tape for decals
- Adhesive vinyl
- Self-healing mat
- Ruler
- TrueControl knife
- Measuring tape and pencil
For the base of the wallpaper—the solid color—I used my TrueControl knife, ruler, and self-healing mat to get precise cuts. I do recommend tracing the outline of the room, making the vinyl slightly larger than the outline, and adhering it to the wooden back before attaching the back. This makes it much easier to get a blemish-free transfer.
To add decals, I used my Cricut Maker to cut out rainbows for the kitchen and hearts in the living room. I used a combination of opal holographic vinyl, mint vinyl, pink lavender vinyl, and black vinyl. I didn’t need transfer tape for the hearts, but I did use it for the rainbows.
For the baby’s loft, I decided to do a half wall using the mint green vinyl. See the black divider? That isn’t vinyl, and I’m going to share what they are next in this post—and how I made them for different areas in the house! For the colors, I tried to tie in green, pink, holographic, and black throughout the whole house.


2. Trim and finishing pieces
I used a couple of different methods for the DIY dollhouse trim and finishing pieces. For interior frames for the windows and front door, I used basswood. For the half wall separators and the interior of the balcony door, I used black kraft board. I’ll talk a bit about why I chose each.
Here’s what I used:
- Cricut Maker
- Cricut brand basswood
- Black kraft board
- Knife blade for the basswood
- Regular fine-tip blade for the kraft board
- Purple StrongGrip mat for basswood
- Blue LightGrip mat for black kraft board
- Black acrylic craft paint for basswood
- Glue
Framing out the interior windows was by far the most time-consuming part of this project. But it was also the step that made the biggest difference in how the dollhouse looked! I chose basswood for the interior frames because I needed something a bit more substantial than kraft board to hide some of my wonky jigsaw cuts. It wasn’t a totally flat surface, so kraft board would have shown more imperfections.
I simply measured the size I wanted to cut the pieces and then created those using the rectangle shape in Design Space. By doing this, I could customize each piece and make the bottom piece of the window frame a bit wider. I did these in a series of three rounds of cuts.
By doing it this way, I was able to cut the top and bottom for each window, then dry-fit them in place and take near-precise measurements for how tall the side pieces should be for each window. After cutting everything with my knife blade, I painted it all black using acrylic craft paint.


To match the black window and front door frames, I cut the half-wall separators, the interior balcony door trim, and the miscellaneous trim pieces out of black kraft board. I was able to use the regular Cricut cutting blade for this, but I needed to switch to the light-grip mat.
I was able to use kraft board instead of basswood because I was mostly covering super flat surfaces. The interior of the balcony door was much less jagged of a cut since it was cut out of 3/4″ poplar. The thin plywood backing always splinters when I cut with a jig saw.
I took the same steps to cut these: measuring, creating the rectangle pieces in Design Space, and cutting them out. I also noticed a slight separation between the roof line and the backing on the top two rooms. It was really irking me, so I cut two quick thin black kraft board pieces to glue over the gap and make it just blend in with the roof. It looks so good!


3. House numbers
Another nice touch I was able to add is the house number. I used two separate Cricut features and a bit of paint to make my modern house number. Here’s how.
Here’s what I used:
- Cricut Maker
- Basswood and knife blade
- Black acrylic craft paint
- Holographic vinyl
- Transfer tape
- Glue
You might have noticed some of the round pieces of wall art I’ve got up on the walls. Those are just pre-cut pieces of wood I got for cheap at the craft store and painted black. However, I really wanted a hexagon shape for the house number sign, so I decided to cut that out using my Cricut Maker, leftover basswood, and my knife blade.
Once I cut that out, I painted it black using acrylic craft paint. I then cut out a house number and added “MAIN,” mostly because I couldn’t think of something cute at this point, and “Main Street” is a pretty well-known street name. I’m not always creative. 🙂
I used holographic vinyl because I thought that would look great against the black background and would add a bit of interest to the otherwise pretty boring front of the house. I used transfer tape to apply the house number to the hexagon piece and then glued it on using regular old strong craft glue.


4. Faux orb light fixture
I wasn’t originally planning to do a hanging faux light fixture, but while I was experimenting for something else I wanted to make a miniature of (that ultimately was a failure), I ended up with a bunch of cut circles I didn’t want to waste. Here’s how I made my modern light fixture using basswood and kraft board.
Here’s what I used:
- Cricut Maker
- Basswood for outer layer
- Purple StrongGrip mat for basswood
- Black kraft board for inner two layers
- Blue LightGrip mat for kraft board
- Black acrylic craft paint
- Strong clear glue
- Black twine or similar
So I already had this basswood circle cut out from something else. I didn’t want to waste it because it was the last of my basswood, and basswood is expensive, so I didn’t want to waste it! I decided to turn it into a modern orb-like faux light fixture for the master bedroom.
First I painted the basswood circle black, then I used Design Space to create two progressively smaller circles to put inside the basswood circle. To glue everything together, I snipped the smallest circle and glued it on to the middle circle. Once that dried, I glued that on to the inside-bottom of the main basswood circle.
To cover the glue, I simply took some black twine from my craft closet and wrapped it multiple times around the top of the fixture. After securely tying this off with a knot, I hung it from a small hook I screwed in the ceiling.


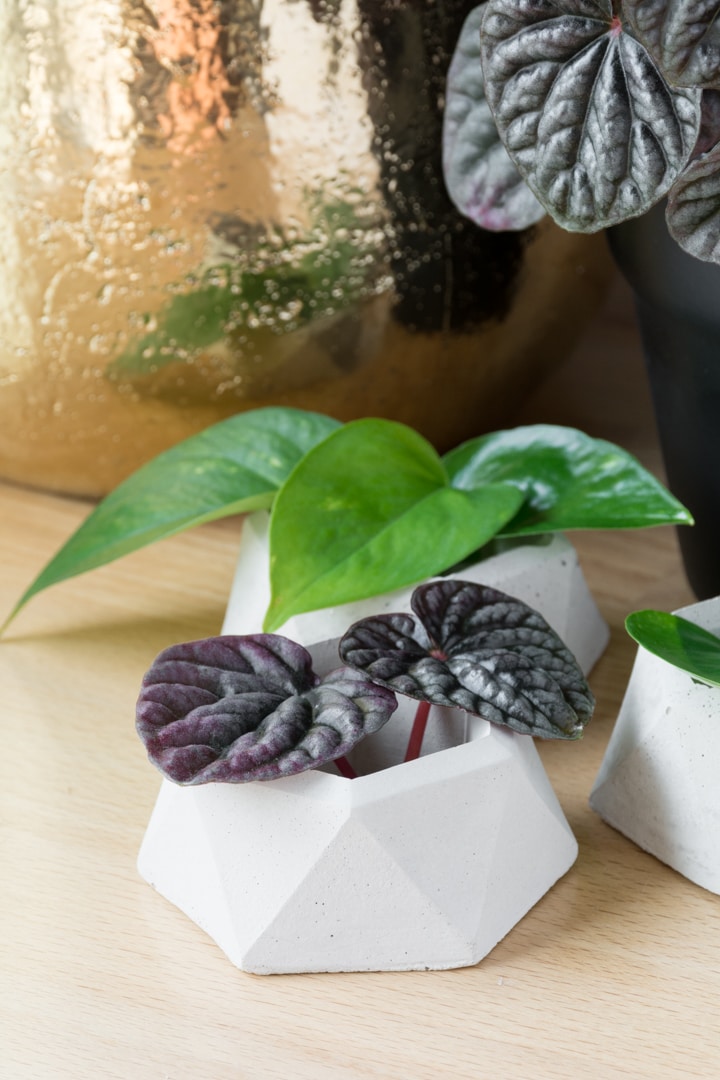
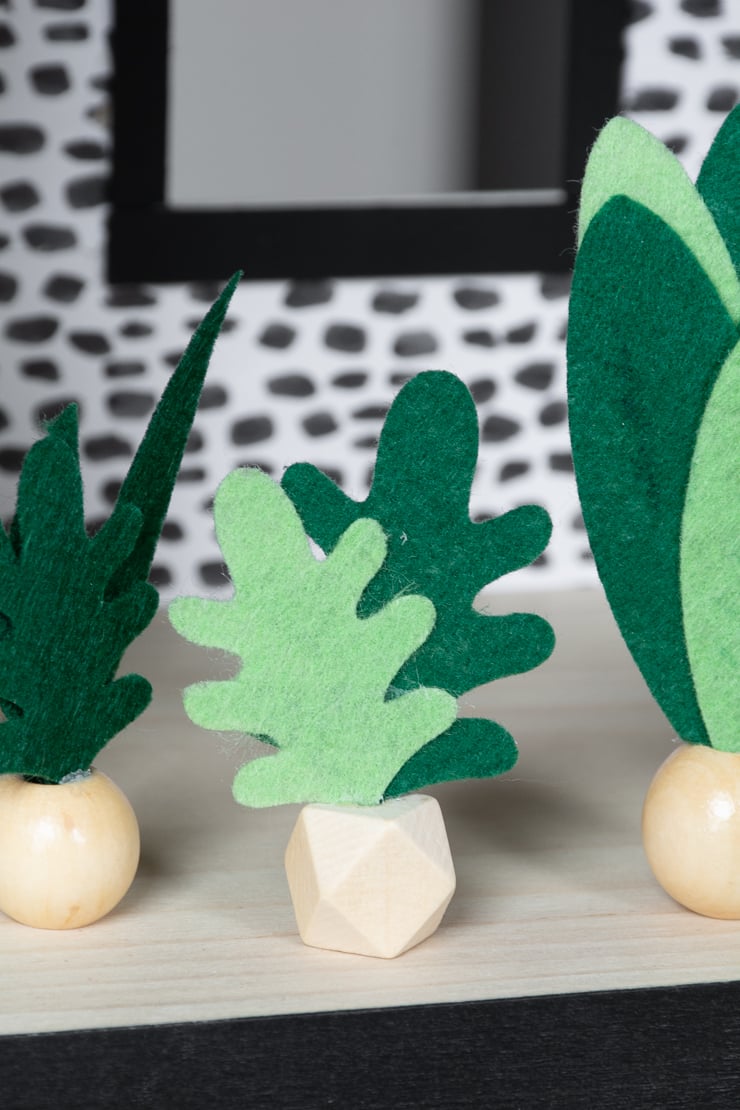
5. Miniature houseplants
The last DIY is the adorable miniature felt houseplants I made! Of course I had to make a few plants for this house…and they were a great way to fill up some of the empty spaces (like on top of the fridge or on the balcony table).
Here’s what I used:
- Cricut Maker
- Assorted pieces of green felt (I used Cricut brand felt)
- StandardGrip green mat
- Wooden beads
- Strong glue
I spent some time browsing Design Space for the perfect leaf patterns. This these were going to be small and cut out of felt, I didn’t pick anything too intricate. I also tried to find leaves that had stems so that I could stick those inside of the beads.
I cut a mixture of different leaves sized slightly larger and slightly smaller so that I could mix and match for several different plants. Using dark and light green felt was also a great way to create some dimension in these little cuties.
Once I made a few arrangements I was satisfied with, I used glue to glue the leaves together if necessary. Then I glued the arrangements into large wooden beads I had in my craft closet. These ended up being the absolute perfect size, and they look adorable!


6. Wall art
I also used my Cricut to create some wall art. This was very similar to the house number DIY, except I used vinyl to add a design to a pre-cut piece of wood.
Here’s what I used:
- Cricut Maker
- Round wooden circle
- Black acrylic craft paint
- Holographic vinyl
- Glue
This is also a special little piece because the little white wooden start is from the mobile I made for my daughter’s nursery. I took it apart hoping I could find a way to reuse some of the pieces and incorporate them into something that is more age appropriate, so this is a little nod to the very first DIY I ever made her.
To help tie it in with the rest of the house, I cut out a star from holographic vinyl to add on top of the white star and also cut out some hearts from the same material to add to the pieces. I then glued it up in the baby’s loft. Isn’t it adorable?

7. Felt throw rugs
And the last one—I definitely wanted to make some rugs to help create more interest in the rooms. Since I left all of the floors unfinished poplar, I felt each room needed a little something.
Here’s what I used:
- Cricut Maker
- Assorted pieces of dark gray and light pink felt
- StandardGrip green mat
I thought felt would be perfect for these, and it is! Design Space has a lot of great rug-like designs that were perfect. Just search for things like “circle with scalloped edges” or “rectangle with scalloped edges.” I was especially pleased with how well the Maker cut the heart details out of the living room rug.


Make sure to check back soon for the final dollhouse pics. I have a few other last-minute details to finish up, and I need to do some filling and touchups on some parts of the wood. It’s going to look great!!
Pin this!