How to Paint Terracotta Pots
Learn how to paint terracotta pots, including what you can use to seal them, the best paint for terracotta pots, and more!
Learn the best way to paint terracotta pots!
I often get asked about how to paint terracotta pots like it’s something that’s difficult to do…and it’s not! You don’t have to be exceptionally crafty to learn how to update or customize cheap pots. All you need to know is the best paint for terracotta pots, the best brushes to use, and a few simple techniques.
This tutorial has a video showing how I paint my terracotta pots to give them a more modern look. You can paint yours any way you’d like. Use a single color or multiple colors. Use painter’s tape to create a cool design. Whatever you want. 🙂
Supplies I use…
(Affiliate links below; read more about those here)
- Clean, dry terracotta pots
- DecoArt acrylic paints, I used Hauser Dark Green, Dove Grey, and a white color.
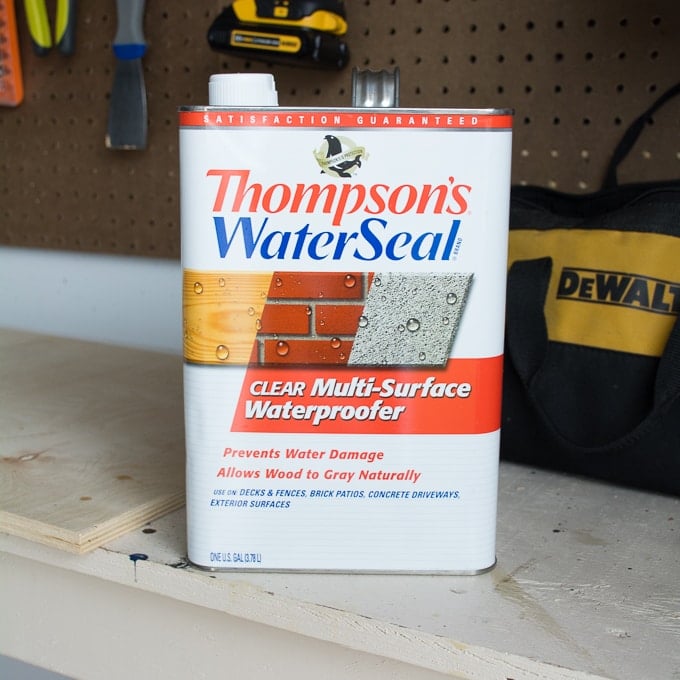
- Aerosol Thompson’s Waterseal
- Small paint brush
- Disposable gloves
- Workspace protection
- Optional: Painter’s tape
Step 1: Prep the pot
If you’re working with new terracotta pots, you probably don’t need to do much to clean the pot. Just make sure it’s free of dirt and debris. Make sure it’s totally dry, then give it a couple coats of Thompson’s Water Seal aerosol spray on the inside and out. This comes in a brush-on version too, but the aerosol is super convenient for small pots!
If you’re painting an old pot, remove any existing paint if you need to. Then wash the pot thoroughly in the sink with dish soap, scrubbing the inside and out. Let it dry completely, then apply the Thompson’s Water Seal.

Is Thompson’s Waterseal Really Necessary?
Well, that depends. Terracotta is a porous material, which means it will absorb moisture. If you want to paint your pots to give them a different look, you don’t want the moisture getting under the paint. This will cause bubbles.
Thompson’s Waterseal can seal any porous material against damage by water, including concrete, brick, stone, plaster, wood, canvas, asbestos, and yes—terracotta. That means using it gives you a nice clean surface to paint on. It serves as a barrier.
It’s very easy to work with. It’s clear and pretty watery. When spraying on clay, it’s easy to see where you’ve sprayed because it just makes the terracotta look wet. The odor isn’t fabulous, but it isn’t terrible. Definitely spray in a well-ventilated or outdoor area.
If you use a paint specifically designed for outdoor use, you can probably skip the sealer. Many paints have a built-in sealer. However, I like to use the Waterseal as an extra layer of protection. Especially if my pots are going to be outside. It’s cheap, easy, and quick—so I always do it on my painted pots.
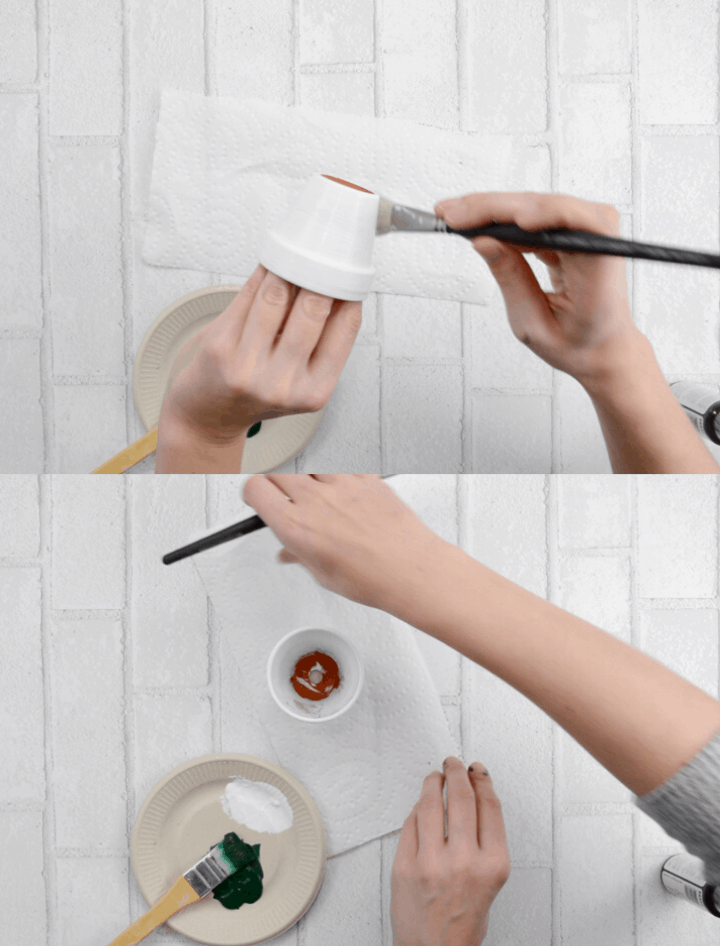
Step 2: Apply the first coat of paint
Use a small flat brush that is about 1/4” to 2” wide, depending on the size of your pot. Being painting the pot around the outside, circling the circumference of the pot. This gives it a nice even look as the paint dries.
I like to hold the pot at the lip and paint as much of the outside of the pot as I can. Then I like to set it down and carefully paint around the lip, including the top of the pot’s interior.
This can be tricky. If you aren’t up to this, just wait until the outside is dry to the touch so you can pick the pot up and maneuver it while painting. Paint the saucer to match or in whatever design you want.
Using disposable gloves will help protect your hands and save you time. That’s because you won’t be worried about getting wet paint on your hands while working. You can easily touch up any small amount of wet paint you accidentally smear off.

Step 3: Apply final coats of paint
Two of the colors I used provided enough coverage in two coats. The white paint required three coats. Simply repeat step 2 until you have complete coverage. Let the pot dry between coats so you don’t get any icky-looking clumpy paint buildup.
A finishing coat of sealer isn’t necessary if the pots will stay indoors. If the pots are headed outdoors, make sure you use a paint designed for outdoor use. More on choosing the best paint for terracotta pots below!
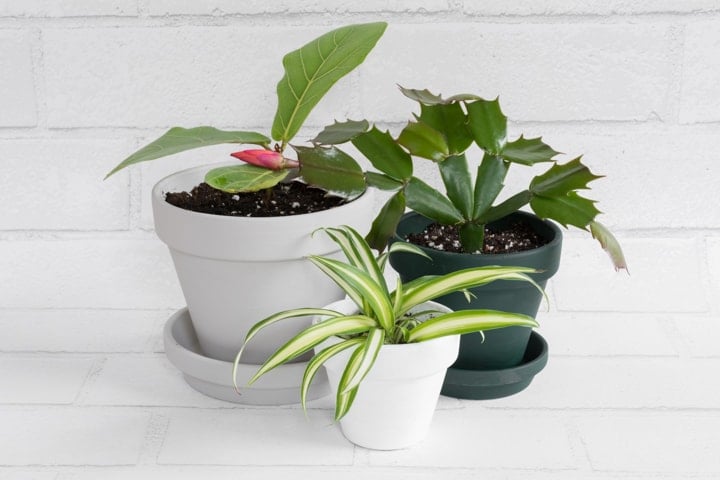
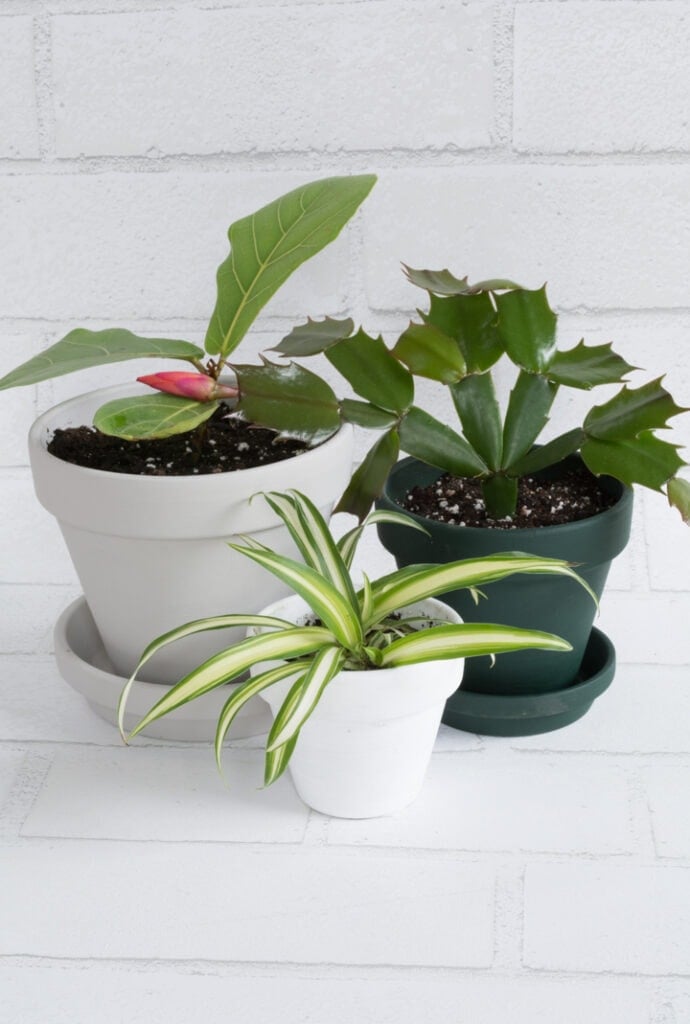
So what do you think of the finished pots? Don’t they look like a million bucks?! I’m very pleased with how these pots turned out! For just a few bucks, I was able to transform plain terracotta pots into something that looks much more upscale.


What is the best paint for terracotta pots?
There are so many different options for painting terracotta pots, so I’m just going to tell you what I’ve used with great success. I love DecoArt paints and work with them a lot. This isn’t an exhaustive list, so let me know if you have any questions!
1. Acrylic indoor paint with or without a varnish
I highly recommend DecoArt’s Americana Acrylics, which are beautiful matte finish colors that come in 257 shades (and can be mixed). I used these paints on all three of the pots for this tutorial. The flat, matte finish is gorgeous.
You can use these on indoor terracotta pots with or without a varnish. I don’t add a varnish to mind, but I do use the Thompson’s Waterseal as the base layer. You can add a varnish if you’d like, though. DecoArt has several great choices.
These are water-based, so they can be cleaned with soap and water while wet. This includes the brushes and any surface you might get the paint on accidentally.
2. Acrylic paint suitable for outdoor use
These paints can also be used for indoor pots, they just have extra durability for outdoor use and do not require a varnish like the indoor matte acrylics do. DecoArt’s Americana Multi-Surface Satin Acrylics and Patio Paint Outdoor Weather-Resistant Acrylics are excellent choices.
The Multi-Surface Satin acrylics are for both indoor and outdoor use and have a lovely satin finish (kind of an eggshell look on some surfaces, in my opinion). These are self-sealing and don’t require a primer or varnish. But I still like to use the Waterseal since terracotta is so porous. Patio Paint has very similar specs. You can’t go wrong with either.

3. Good old spray paint
Spray paint is a solid choice, too. I use spray paint when I want something done quickly and easily. I used it on all of the black pots I hung on pot klips in our little backyard—some on the deck posts and some on the fence.
Spray paint can chip outdoors, but it generally holds up extremely well through the elements. For example, I left my terracotta pots outdoors all winter. In the spring, I just had to do a few minor touch ups with black spray paint.
I don’t know that one brand of spray paint is far superior to another, but I generally buy Rust-Oleum Painter’s Touch or Krylon spray paint at whatever hardware store I’m at. Tip: It’s usually more expensive at craft stores, so don’t buy it there unless it’s the only place that carries the color and finish you need (and you have a coupon!).

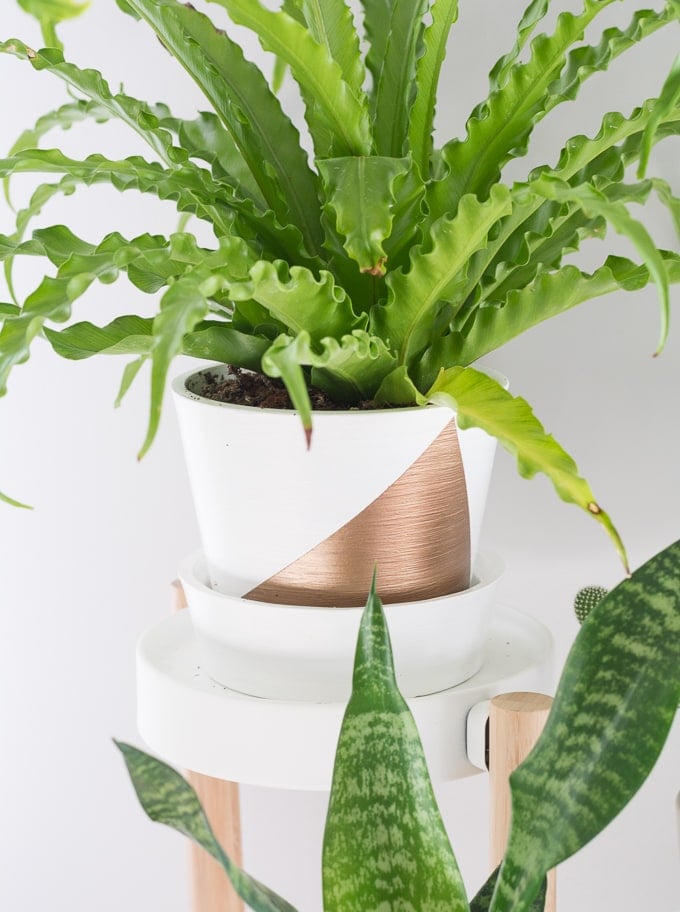
Ideas for custom-painted terracotta pots
You can customize these any way you want, including using painter’s tape to create designs. Here are a few different designs I’ve done using painters tape just remember to let the paint dry thoroughly between coats.
You can achieve a beautiful dipped effect by taping off the top of the pot or the bottom of the pot. Or you can tape a geometric design onto the pot using tape. I’ve done a ton of experimenting! And the best part is, if you don’t like it, you can paint right over it.


Pin my tutorial about how to paint terracotta pots!