What Does Flatten Mean in Design Space?
How to use the flatten tool in Design Space!
Are you wondering what flatten means in Cricut’s Design Space software? I will not lie. I have been a Cricut user for years, and I only learn how (and why) to use the flatten tool a couple years ago. Really, I just ignored it for a while because I didn’t do projects that required flattening.
But when I started to try to learn everything I could about my Cricut machine, I knew I needed to learn what all of the tools did. And I’m so glad I did—because flatten is an essential tool for working with print-then-cut projects!
In short, the flatten tool allows you to turn an image with multiple layers (each labeled “Basic Cut” in the images in this post) into one layer.
But why would you need that? And what does that really mean practically? First let’s chat about some of the other Design Space tools to help you put the flatten tool into perspective.

Flatten vs. the attach, weld, & slice tools
Each of the tools have pretty simple and specific uses. I used to think that some of the tools would do the trick for a certain task and didn’t totally understand the purpose of other tools.
So I want to quickly show you what some of the other tools are for to help you better understand the purpose of “flatten.”First, look at the screenshot below to see all of the different “Basic Cut” pieces below each “unicorn” header in the layers panel.
These are all separate pieces. If you were to cut the design without using any of the tools, Cricut would cut each of these pieces separately. And then you’d have to put them together yourself. While some might think this is annoying, it actually is good!
I say that because all of the separate pieces give you the flexibility to do lots of things with the images. You’ll see what I mean below.

What is the attach tool?
First let’s look at the attach tool. If you highlight all of the “Basic Cut” pieces under each “unicorn” heading and click attach, it will attach all of the pieces together as shown below. But what does that mean?
It means that it will hold all of the different cuts in place and will cut them as you have them placed. I can’t think of a time when I’d cut the image as I have it attached below, though.
Instead, I might use the attach function to attach the tutu, horn, and nose pieces so I can cut them all out in the same color. Then I might cut the rest of the image in another color and layer them with vinyl or iron-on after cutting.
Attach makes this process easier because it will cut the pieces exactly how you have them on the canvas. Then you can use transfer tape to transfer all of the pieces at once if you’re using vinyl. I’ll use the attach tool in this post’s tutorial, too.

What is the weld tool?
And below is an example of what happens when you highlight all of the “Basic Cut” layers and weld them together. The weld tool creates one image by removing all overlapping cut lines. You might wonder, when would I use the weld tool? That unicorn looks awful!
But it can be super helpful. I used it when I made some stickers and was using the offset tool. (See my post on how to make stickers with Cricut for more.) The image was detailed, so the offset tool created some holes in the image. I was able to use the weld tool to fix that. You can also use it to join the ends of cursive/script letters together, for exmaple.

What is the slice tool?
You can only use the slice tool when you have exactly two objects highlighted. This tool is a bit more complicated, and I have a whole post about how to use the slice tool in Design Space. It has lots of pictures and a practical tutorial to walk you through it.
Steps to use the flatten tool
Now that you have that background, let’s dive in to the flatten tool. The flatten tool is mostly used for print-then-cut images. So I’ll be showing you all how I made cute unicorn stickers using a file that started out with looooots of individual cut pieces!
Step 1: Highlight all cut pieces of an image to flatten
The first step is to highlight all cut pieces of an image. As you can see below in the Design Space layers panel, this image of a unicorn dancing has 8 individual basic cuts that make it up. Let’s simplify that!
You can highlight them all either on the canvas by simply clicking on the image or by highlighting all 8 layers in the layers panel. When you have them all highlighted, click “flatten” at the bottom of the layers panel.
Repeat for all images. You’ll notice that the coloring will change just slightly. This is because all of the lines are changing from cut lines to print lines.


Step 2: Add offset to the flattened image
Now that you have a bunch of flattened images, you could proceed with cutting them. But the new offset feature in Design Space adds a really polished look to print-then-cut sticker projects.
You have to add offsets individually to each image. But it’s easy. Just click the image you want to add an offset to and click “Offset,” which is in Design Space’s top tool bar. You can then change the corner shape to rounded or rectangle (if applicable for you image) and change the width.
I went with a .05 in offset for each image. The default offset color is black, but I revised them all to white because that is the best look for stickers. Again, you have to do this individually. (I added a pink background in the images below to help illustrate the white offset background.)


Step 3: Flatten the image & offset
Next you’ll need to highlight the image of the flattened unicorn and the new offset you created. Once you have each of those selected, you’ll click flatten again. This is your final sticker!
If you don’t click flatten again, your Cricut will cut two lines: one around the unicorn design, and a second around the white offset. And that’s not what we want. Flatten to the rescue again!
Tip: To decide on spacing, create a rectangle like the pink one I’ve created below. Size it to 9.25″ x 6.75″ because that is the maximum size you can do print-then-cut images. And arrange your unicorns to maximize space.
Then, before you head to print, delete the rectangle, highlight ALL of the images on your canvas, and click attach to use the attach tool. This will ensure that your stickers print and then cut exactly how you have them arranged here!


Step 4: Print & then cut
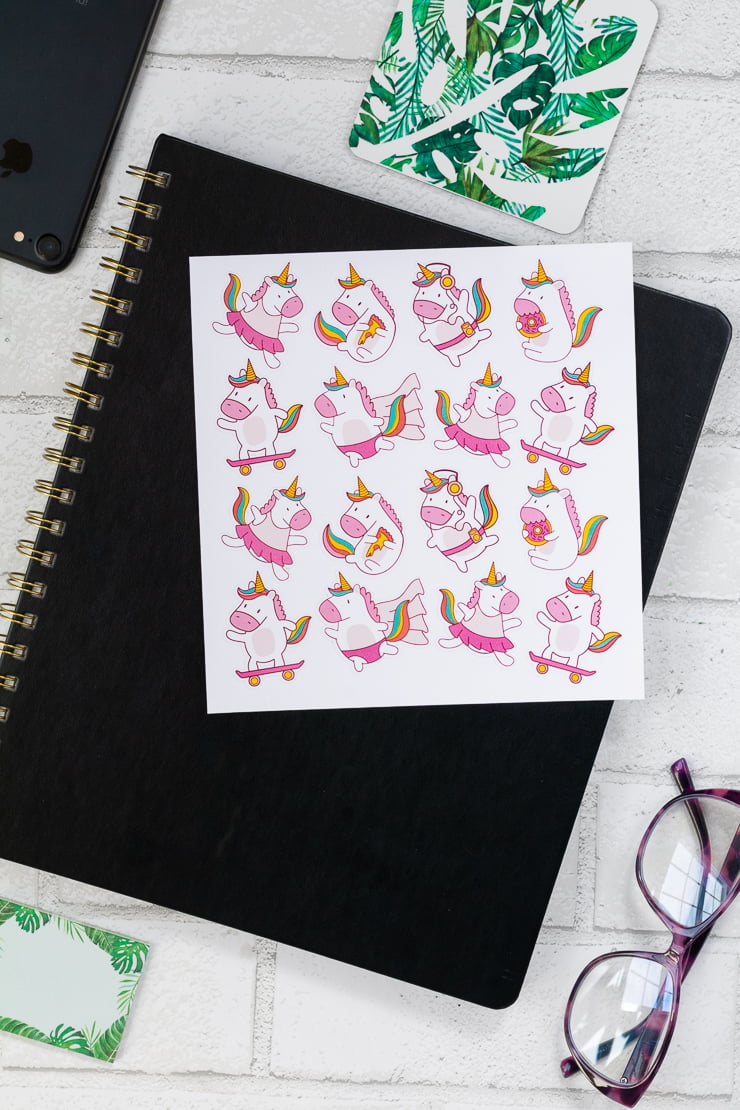
As the final step, follow the Design Space prompts to print your stickers. I used printable sticker paper for mine, but you can use printable vinyl as well. I’ve found that off-brand printable vinyl and sticker paper both work great with my printer and Cricut machine.
Run them through the machine after printing to cut them. After cutting, I used a straight edge and a single blade to cut a neat rectangle out to get rid of the black outline.
And that’s it! The flatten tool is a simple but very helpful tool to help you create gorgeous print-then-cut designs with your Cricut machine. Hope you found this post helpful!


Pin this!

