This post shares my DIY kids workbench. It’s an easy project that will keep your little assistant busy with interactive play!
DIY wooden kids workbench
I’ve been wanting to make Ramona a play workbench for a while now, and don’t you love how it turned out? I didn’t keep great tabs on my spending, but it was under $50. I did use some scrap pieces from the garage for the workbench top and lower shelf, which helped. And I have some leftover pegboard for the project that I can use for something else—any ideas?
This build as originally inspired by the Hape kids workbench our local toy store has sitting out in their free play area. Ramona really loved it, and I’ve been saying for a while now that I want to build her one at home. You can see it to the left of the kitchen below (that she was also obsessed with).


I also loved how chic the kids workbench from Crate and Barrel is—and surprisingly decently priced—but it’s too big for our space. Finally, this one on Etsy looked the easiest to replicate look-and-feel wise, but was a bit more “rustic” that the look I was going for.
The Etsy one also looked a lot like the one from Brad at Fix This Build That. I ended up using the same cleat mechanism that Brad used to mount his workbench’s pegboard and lower shelf and using his plans as a jump-off point for mine.
I combined the things I liked from all of these (coloring, finishes, size, modern look) to make one that is perfect for our space and needs. If you’re looking for a smaller play workbench that is also cute and functional, this is very easy to build. You can use Brad’s plans as a jump-off, too, or just follow them exactly if you’d like to build a bigger workbench.
Supplies
(Affiliate links below; read more about those here)
- Pine for the legs, aprons, and back frame; pegboard; and scrap plywood and MDF for the top workspace and bottom shelf (**see full plans at the bottom of this post for exact measurements)
- Tools: Miter saw, orbital sander, KregJig K4, drill and right-angle attachment
- Hammer and small nails (or nail gun)
- Pocket hole screws
- Wood glue
- Various bar clamps
- Wood veneer edge banding
- Finishes: Varathane Water-Based Polyurethane in Matte and Dark Gray Paint; black vinyl letters to spell a name—I cut mine out with my Cricut
Here are the steps to guide you through the DIY kids workbench process!
Always take the proper precautions and safety measures before working with any tools or materials. Wear safety equipment and work with a professional to complete projects when necessary. Read my full terms of use and disclosure for more. Happy making and stay safe!
And here’s a video of the build:
Step 1: Cut & Drill Pocket Holes
First I cut all pieces according to the cut list linked at the end of this post. Then drilled pocket holes according to the plans. The pocket holes will be drilled on the top and bottom aprons, as well as the top and bottom pieces for the pegboard frame.
I used a piece of sandpaper to gently break off any splintery pieces and smooth out the edges. I also rounded the front two corners on the plywood workbench top using my orbital sander. This is optional, but I think it gives a nice extra touch and an added layer of protection should a kid bite the dust into the bench.

Step 2: Assemble back frame.
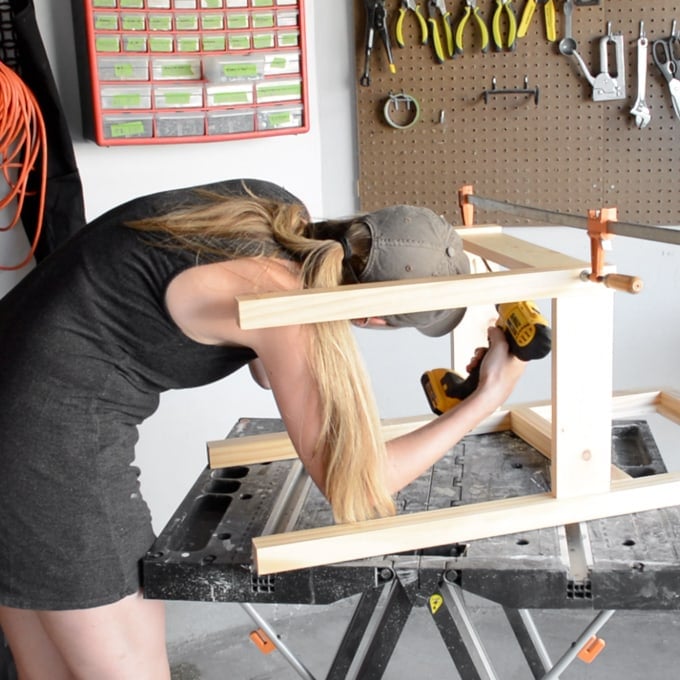
The back frame serves two purposes: to hold the pegboard, and to be the back legs of the workbench. To assemble the back frame, I attached the four pieces together like so, drilling pocket hole screws through the pocket holes I drilled in step 1, making sure to measure and mark where to attach the pegboard frame so that the pegboard will fit perfectly.
Once I’d built the frame, I nailed in my cleat pieces around the frame. This is what the pegboard will attach to. I found it was difficult to use my nail gun since it had a hard time fitting in the space. I did one side with a nail gun and then switched to good ol’ fashioned hammer and small nails.


Step 3: Attach aprons for workbench top & Front Legs
Next I used pocket hole screws to attach the side aprons for the workbench’s top workspace. Since those also connect to the legs, I attached those as well. The aprons are centered on the legs for a nice inset look. Then I added the front apron to the piece to finish off this area.


Step 4: Attach bottom aprons for shelf
I attached the four bottom aprons for the little shelf using my drill and pocket hole screws. I also used the same cleat system I used for the pegboard support to install the shelf. If you didn’t want to do this, you could just alter the plans and attach the shelf with pocket holes.
Note that I did need my right-angle drill attachment to reach some of these pocket holes. (Read more about how to drive pocket holes in tight spaces.)


Step 5: Attached pegboard and bottom shelf
I attached the pegboard and bottom shelf using a bit of wood glue along the cleats. Then I gently set each piece in place and applied some weight as the glue dried. I did the pegboard first, then flipped the piece upright once it was dried securely and did the bottom shelf. Note that I finished (painted and added a few coats of Varathane polyurethane) the bottom shelf before installing it.
For the pegboard, I just bought the smallest piece of regular pegboard I could find at the hardware store and then cut it down to size. I have a lot left over! For the bottom shelf, I used a piece of scrap MDF we had in the garage. You could also use plywood.


Step 6: Create the workbench top
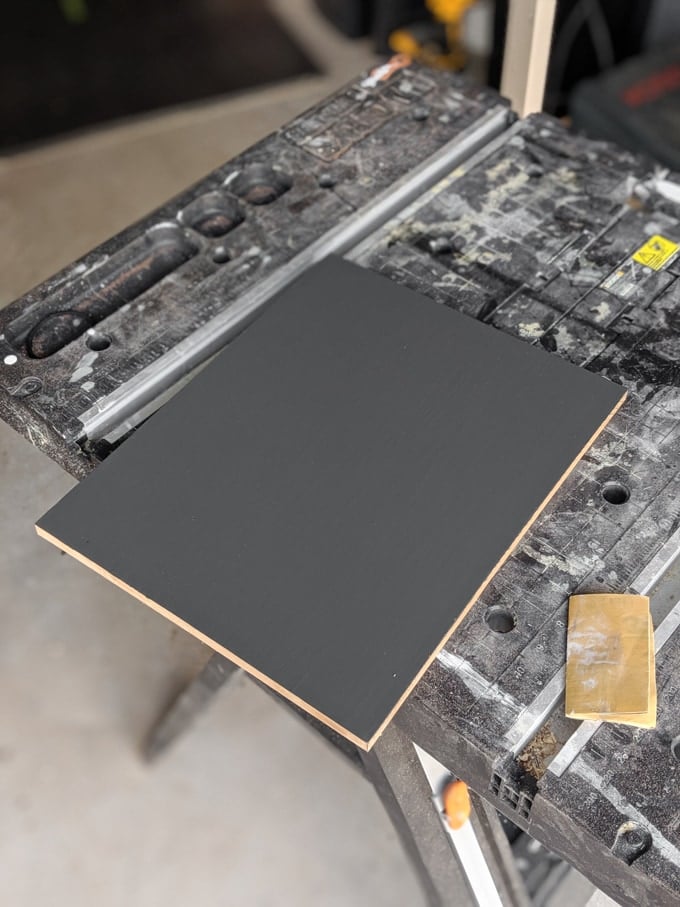
I spent a lot of time on the workbench top. It is made out of a rough piece of scrap plywood that I spent a lot of time sanding down and rounding the corners using my orbital sander. I also added a wood veneer edge banding to clean up the plywood raw edge look.
I painted it using one coat of primer since it had a few bad knotty areas, then a coat of paint from our storage closet (same paint we used on the wall behind the DIY photo ledge shelving downstairs).
After that, three coats of Varathane Water-Based Polyurethane in matte—my favorite finish at the moment. It’s been extremely durable on everything else we’ve used it for, and since Ramona will literally be whacking this with a hammer, I wanted it to be as strong as possible. I sanded between each coat of primer, paint, and finish.
To install the top, I just ran glue along the top of the frame, set the workbench top down on it, and applied some weight while it dried.


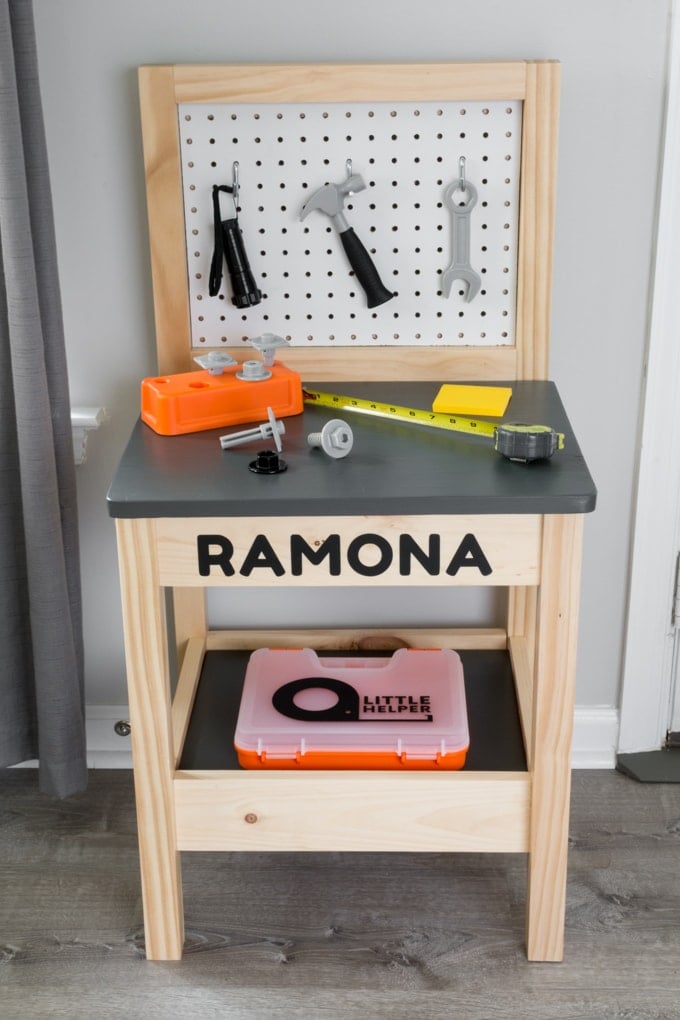
And here’s the finished workbench!
I added Ramona’s name in black vinyl letters that I cut out using my Cricut. If you don’t have a Cricut, you can probably just buy pre-made letters. Wood letters from the crafts store painted would look cute, too. Also, Ramona’s little toolbox I customized looks amazing here 🙂


Update—where are the plans?!
Hello all! I am popping in with an update for this post. Unfortunately after I published this, another creator reached out and asked me to take the plans down. The creator thought that the workbench was too similar to a workbench they had plans for on their site and was ripping them off. And because I’m not one for confrontation or drama, I took them down.
However, I am really proud of this project, so I didn’t want to take the post down. As a result, I continue to receive frequent DMs and emails asking for the plans to this workbench. While I’m not comfortable sharing them for the reason stated above, I am answering a few frequently asked questions below:
- The overall measurements for this workbench are 36 inches high, 15 inches deep, and 18 inches wide. If you’re looking to make a workbench with a similar height, that should be a good starting point for you when looking at other plans.
- I used mostly 2×2 pine for this project; I also used some 1×4 and some smaller pieces to set up the cleats for the back and bottom shelves.
- I painted parts of the table, but I finished the entire thing with Varathane water-based polyurethane in a matte finish. This is my finish of choice for anything that gets a lot of wear and tear since it is SUPER durable.
- I used a KregJig K4 to create the pocket holes for this, but you can use any type of pocket hole jig.
I’m very sorry for the inconvenience here and hope you understand why you can’t find the plans. If you have any other questions about this project, shoot me an email or send me a DM on Instagram and I’ll see if I can answer!
If you like this project, check out my modern dollhouse bookcase, DIY water play table for toddlers, modern outdoor kids table build plans with matching chairs, easy DIY unicorn bookends for a kids room, and Ramona’s pretty gender-neutral nursery.
Share this DIY kids workbench on Pinterest!


Brittany is a seasoned DIY home and garden expert, running a creative brand since 2014 that inspires others with approachable plant care guides, woodworking tutorials, and decor projects. She is a certified project manager and has completed extensive coursework in the art and science of growing your own plants. Her work has been recognized by major publications, and she routinely collaborates with fellow DIY industry leaders—but her favorite thing to do is inspire you! Learn more about her here.

Leave a comment