Peel and Stick Subway Tile Backsplash Review
Don’t overlook a peel and stick subway tile backsplash for a quick improvement to your home! I’m reviewing Smart Tiles and sharing installation tips. This post contains affiliate links.
Peel and stick subway tile backsplash: Smart Tiles review
It’s been a while since a good DIY…trust me, I’ve been doing them. But we have been so busy that I have just decided that I don’t have the patience to document everything. If I’m doing a project for myself, I always ask myself—would other people find this interesting or valuable?
If the answer is “meh” or “maybe,” I probably won’t do a post on it. I’ll just plow through the project like a normal person and get it done. But if I do think it might be useful, I grab my phone and take pictures along the way. And this is one of those projects.
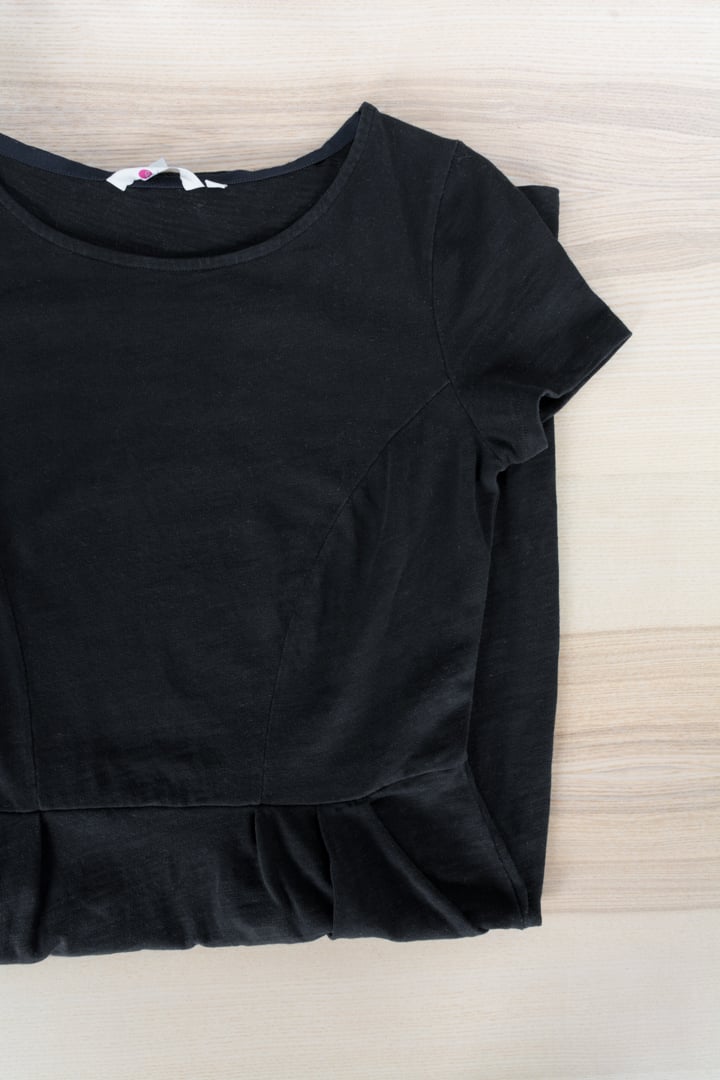
Because I am absolutely blown away by the peel and stick subway tile backsplash I just installed. It looks so lovely! Below is the before of what our new house looked like when we moved in. And let me tell you what, ripping out this backsplash was cathartic!

For another non-mortar backsplash option, check out my Aspect Peel and Stick Glass Tiles Review!
Choosing the right backsplash…
So since the backsplash we had was just thin panels glued up, I figured I could just rip them out and replace them with something similar. I had a feeling that the glue would rip off some of the drywall, though, so I had to be mindful of how un-level the surface might be in some areas.
Would peel and stick subway tile work? Would it look tacky? Or would it be hard to install? Would it fall off? These (and more) are all questions I had. So I kicked off the project by ordering a few samples to check them out.
I ordered four samples from the brand Smart Tiles. This brand has excellent reviews, so I felt comfortable going with them. The tiles consist of a trademarked gel component that give them a 3-dimensional look. I considered four types of Smart Tiles, all pictured below—
- Subway Norden (small white subway “tile” with gray “grout”)
- Subway White (small white subway “tile” with white “grout”)
- Metro Blanco (wider white subway “tile” with white “grout”)
- Penny Romy (white penny-style “tile” with white “grout”)


I should also say that there are a ton of amazing colors, styles, and patterns, but I wanted something super plain and simple. So I priced out how much I would need of each of the four options above.
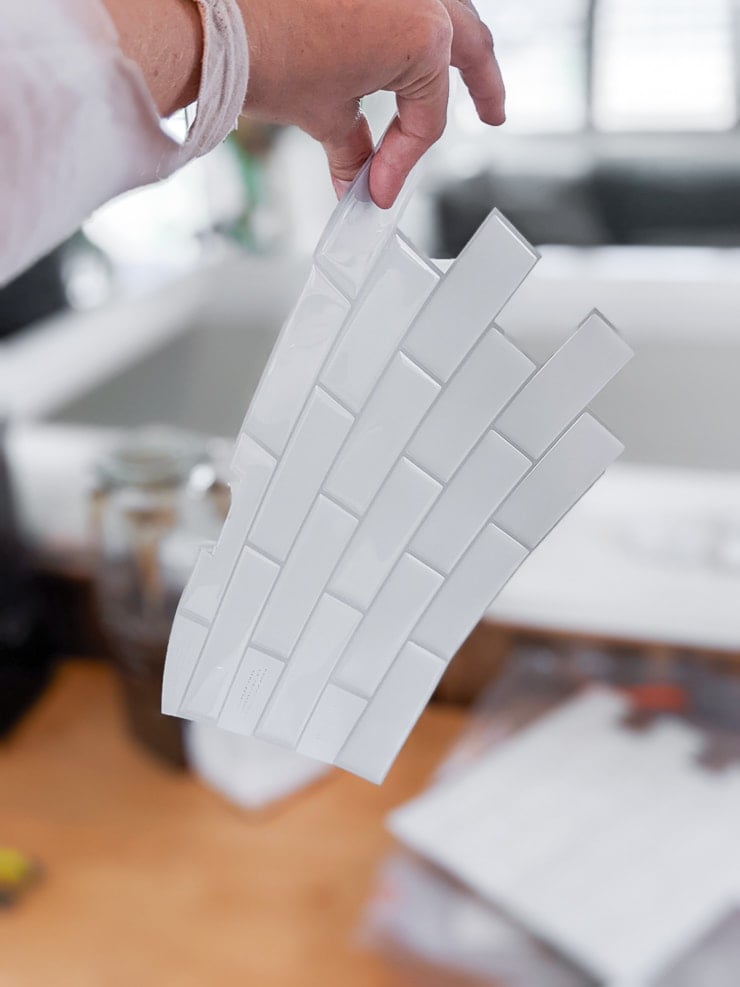
I took that price and how I thought the samples looked to make up my mind: I chose the subway norden, which is the smaller white tile with a very light gray “grout.” Here’s how it looks…I tried to capture how thin the panels are in these pictures.
But don’t be fooled! They went on beautifully, even on my somewhat patchy walls. I was not about to patch the areas of drywall that the glue pulled off just to immediately cover it up!

Supplies I used…
- Subway norden tiles
- Measuring tape
- Scissors or exacto knife
- Straight edge and marker
- Caulk (& maybe painter’s tape)
- End caps
Step 1: Measure and order
When you decide what type of tile you want to order, pull it up on the Smart Tiles website. Scroll down to the area where the details and reviews tabs are. There should also be a tab called “calculator.”
This makes it super easy to figure out exactly how much you need to buy. I also love how the site lets you break it up into different sections you can measure individually.
You can order directly from the Smart Tiles website. Or you can Google and search around to find the best price. I ordered mine from the Smart Tiles Amazon store and ended up paying only $118.68 for all 40 tiles! It was four 10-packs.
One of the main reasons I picked subway norden was because the price was great. You will definitely spend a bit more if you go with one of the fancier patterns or colors.

Step 2: Start from the right
My first instinct is to start from the left. But the way these tiles work, you overlap them from the right. So you want to begin laying them from the right, too. You can see what I mean here—on the left, you see areas that say “overlap here.”
That’s because these don’t fit together like a puzzle. Instead, each piece overlaps just slightly. So keep that in mind when you’re laying. The overlap should be as tight and close as possible so the “grout” lines are not different widths.

Step 3: Measure and cut as necessary
Ok, when I say this stuff is easy to cut and install, I mean it is e-a-s-y. I started off cutting with a Cricut True Control knife, which is kind of like an Exacto knife. But then I realized that I could just cut using regular scissors.
Below you can see where I started. I measured where I’d need to cut out the top of the tile sheet to accomodate the bottom of the double light switch panel. Again, I just marked this area with a marker and cut it out using scissors.


First panel on! I was already feeling great! It was definitely nerve-wracking to get that first panel on, but I found out a few things. First, the slightly uneven surface underneath the tiles was totally fine. You can’t tell at all.
Second, the panels stick very well, but they are also somehow very easy to reposition as you’re trying to line up that “grout” line overlap to get it just right. I wouldn’t pull the tile panels off multiple times to reposition, but one or two was fine for me. The stickiness still stuck.


Want more DIY home projects? Check out my vinyl plank DIY installation tips, my DIY window trim tutorial, and my ReadySeal fence stain review.
Step 4: Clean up corners and edges
For the inner corners, I simply cut the sheet about where the corner would hit and tried to line them up as best as I could. You can see that below. It isn’t perfect, but I knew I’d be covering it up, so I wasn’t too worried about it.
Smart Tiles does sell “Smart Edges” that you can buy and stick on. Originally I was planning to just use those, but then I realized that the edging that the previous backsplash had was just a painted piece of quarter-round. So I reused that and spray painted it white to save a few bucks! You’ll see in the finished pics.

Step 5: Caulk, caulk, caulk
Caulk heals all DIY wounds 🙂 Overall this job needed much less caulk than I thought it would. The tile just went on so easily that there weren’t many weird gaps.
But I definitely wanted to run a line of caulk along where the tile panels met the counter. I also wanted to run some caulk down along where the edge of the tile panels met the trim.
So I grabbed some painter’s tape—which I love for caulking—and got to work. (For more on working with painter’s tape while caulking, check out my post about recaulking cracked staircase stringer seams.)


And here’s the before and after!
I’d also painted the area above the cabinets in the after pictures. (I used Behr Silky White, which is a nice bright slightly off-white.) What a difference the paint and updated backsplash makes!
The other thing we want to do is swap out the electrical receptacles and plates to make them all white. The beige isn’t ideal, but it’s going to have to do for now. Too many other priorities 🙂 Two years later, and this backsplash is still holding up with zero issues.
I definitely recommend this product. Very low effort, no special tools required, no mess or mortar and grout, relatively affordable, and looks fab! From a reasonable distance, it’s very difficult to tell that they are peel and stick. When you look super closely, you can see the “grout” lines where they overlap.


Smart Tiles FAQs
There are a few different questions I want to address about the Smart Tiles peel and stick subway tile backsplash process, too. Here they are—
1. Can you clean peel and stick tiles?
Yes, for the Smart Tiles, you can wipe them down with a mild cleaner. They are antimold and antibacterial as well. I do recommend caulking the seams and any areas where the tile panels meet the counters so water can’t seep in there.
2. How long do these tiles last?
Smart Tiles says that they are guaranteed to stick for as long as you want them to. However, that assumes you’re installing them correctly and using them only in areas they should be used. (So, like, not in a shower.) Mine have held up perfectly for 2 years so far.
They are waterproof, but they aren’t designed for direct contact with water. They can be used around sinks and whatnot where they’ll be exposed to humidity but minimal water—like a kitchen sink.
3. Can I install Smart Tiles around a fireplace?
Yes, you can install them on a fireplace surround if it doesn’t exceed a temperature of 120 degrees Fahrenheit. No direct contact with heat or flame, so the exterior should be fine.


4. Can I install over ceramic tiles?
It depends. Some of the Smart Tiles need to be installed over a super smooth surface. But some go on fine if your tiles are only somewhat smooth. Read the full description of the tile you are considering before buying. I wanted one that had a warning about needing to be on a super smooth/sleek surface, so I ditched that one.
The ideal surfaces for these tiles are painted drywall, smooth ceramic tile, acrylic wall panels, wall linoleum, mirror, and unblemished wallpaper.
Smart tiles cannot be installed over porous wood, textured tiles, textured wallpaper, unpainted drywall, inside of any shower or on any floor, countertops, ceilings, brick, or stone. (My friend used stone in a different brand for her peel-and-stick stone backsplash.)
4. Do Smart Tiles damage the wall?
I can’t speak to this from firsthand experience, but Smart Tiles says they are easy to remove with little to no damage. They say to “use a blow dryer to warm up each tile to soften the adhesive and pull softly starting with the corners.” Then use a cleaning product to remove excess glue left by the tiles.
Pin my review!