Hey all! A few months ago I wrote about choosing a vinyl privacy fence over a standard wooden privacy fence. The fence is gorgeous, easy to keep clean, and doesn’t have any gaps between the slats. But one thing I do miss about having a wooden fence is being able to easily drill into the fence to hang things.

I hung a number of things on our old wooden fence, including planter pots using pot clips and a large modern trellis I made. You can drill into the main posts of a vinyl fence because the vinyl part is just a sleeve slipped over a wooden post. But then you have holes in your vinyl that would be really challenging to repair.
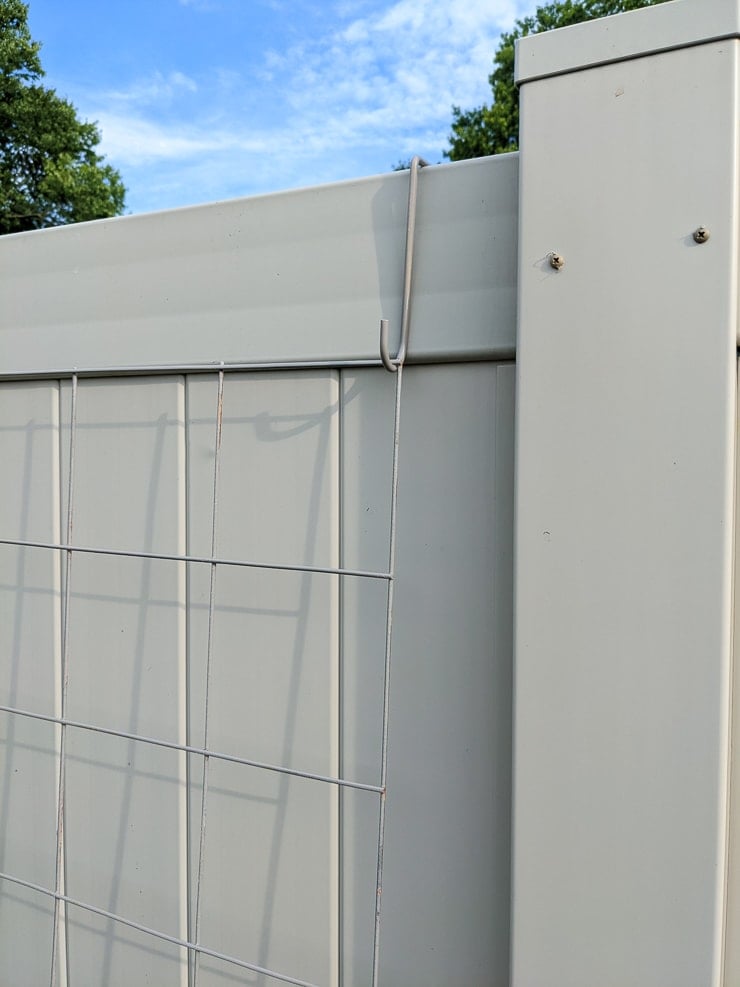
So off I went looking for solutions for hanging things on vinyl fences. I found some fence hooks that are designed to hang things on top of fences, and they are sized perfectly for the top of a standard vinyl fence. Although they are marketed as a solution for hanging patio lights, planters, bird feeders, and other garden decor…they were exactly what I needed! So here’s how I used them to make a DIY wire trellis.
Supplies used
Affiliate links below; read more here
Step 1: Paint the hooks
We chose the tan/almond color for our vinyl fence. (Side note: I’m really glad we did. It is much less “stark” than the white ones, especially in peak sun!) Since these hooks are made of steel with a white powder-coated surface, I grabbed some spray paint and got to work.
You could easily keep these white—especially if your fence is white! I just wanted my trellis to blend in as much as possible. I used Rust-Oleum Protective Enamel in satin finish to spray paint the hooks front and back.

Step 2: Pick up wire remesh
Now I had a bunch of hooks to hang something on. But I still didn’t know exactly what I wanted to make my trellis out of. So I picked up a 3.5-ft x 7-ft Steel Remesh Sheet, which is what my parents use for their tomato cages and other uses around the garden. They are big, and you can find them for between 20 and 30 bucks. Just be warned that they don’t come rolled up, so make sure your vehicle is big enough to get them home.
You might be wondering what exactly steel remesh is. Steel remesh gives additional strength to concrete in order to minimize cracking and separating. So when you’re pouring a concrete foundation, for example, there will be remesh inside of the dried concrete.
The sheet is made from steel wire welded together in a square grid pattern, so perfect for a trellis! The grid pattern is large, too, so bigger vining plants have a bit more room than they would with something like chicken wire.
The only real detractor to using steel remesh is that it is unfinished steel wire. Meaning it is RUSTY! It came rusty, so at first I was a little hesitant to grab them. But I decided to simply paint the remesh using the same spray paint I’d used for the hooks.
Using the Rust-Oleum Protective Enamel was a great way to not only cover up the rust spots, but to slow down further rusting in the future. It’s inevitable that it will happen when the trellis is out in the elements, but I’ll plan to touchup paint as needed and store it in the shed for the fall and winter.


Step 3: Paint & hang
It took me about one whole can of spray paint to paint the trellis, front and back. I painted the back because I didn’t want the rusted areas to stain the vinyl fence. But I did a better job of ensuring I painted evenly on the front!
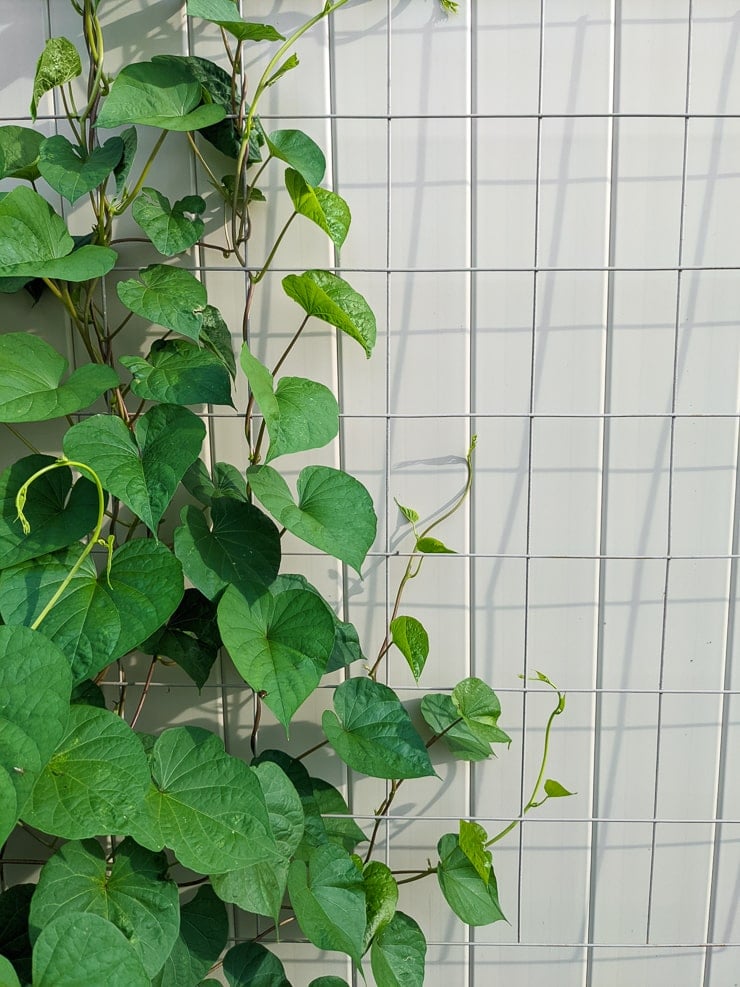
And painting the trellis was a REALLY good idea. I love how nicely it complements the fence. While I originally wanted to use this trellis for the honeysuckle vine I planted along the fence, my moonflower vine had a more pressing need. So that’s what you’ll see in these photos.
I also chose to hang mine horizontally because it fits nicely between two fence posts. Hanging the trellis vertically is also an option, and you couldn’t use fewer hooks for that, too.
Although the remesh sheet just hangs on the hooks, and it is totally secure. The sheet is heavy enough to hold it in place even though it isn’t fastened to the hooks, and the hooks aren’t fastened to the fence. The plant vining all over it also helps stabilize things. We have had some wicked storms with no issues.


And here’s the final trellis!
It’s exactly what I was looking for, and it looks great. The moonflower vine is loving it too, as you can see.I hope this tutorial was helpful if you’re looking to make your own large wire trellis or if you are wondering how you can hang something on a vinyl fence!


Pin my tutorial!


Brittany is a seasoned DIY home and garden expert, running a creative brand since 2014 that inspires others with approachable plant care guides, woodworking tutorials, and decor projects. She is a certified project manager and has completed extensive coursework in the art and science of growing your own plants. Her work has been recognized by major publications, and she routinely collaborates with fellow DIY industry leaders—but her favorite thing to do is inspire you! Learn more about her here.

Leave a comment