DIY Tree Branch Plant Hanger
One of my most popular posts is one about how to strip and finish tree branches to bring inside for decor. I did this post as a complement to my larger DIY cat tree made out of real branches project. Our cat tree is still going strong, so I’m pretty confident with my process of stripping and finishing tree branches 🙂
I’m using a similar tutorial to create a DIY tree branch plant hanger. So the beginning part of the tutorial will be a lot like my stripping and finishing tree branches post. But then I’ll go into hanging the branch and adding plants to it.

Why finish tree branches?
You might be wondering why you need to finish tree branches before bringing them inside. And the answer is that you don’t! It’s purely a cosmetic thing for me. You probably should remove the bark since bugs can live under loose bark and it will eventually fall off anyways.
However, one of the main reasons why I wanted to finish this branch was because the bark-less branch was way too light. It looks like driftwood and gave too much of a beachy vibe. So I decided to stain it darker and add a few coats of polyurethane to bring out the color a bit.

So here’s what I used:
(Affiliate links below; read more about those here)
- Tree branch that had already fallen off a tree
- Dry place to store it
- Paint scraper
- Fine-grit sandpaper
- Saw to chop off the uneven ends
- Wood stain and rag
- Disposable gloves
- Polyurethane in a satin finish
- Paint brush
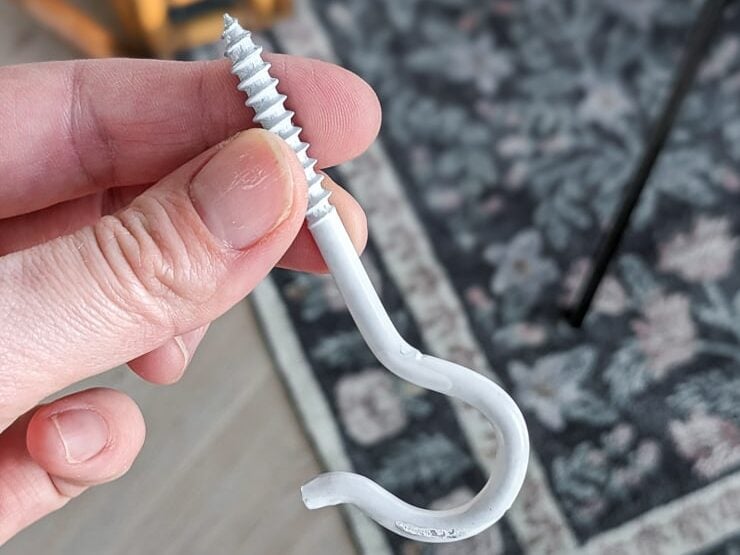
- Ceiling hooks and stud finder
- Strong rope and glue
Always take the proper precautions and safety measures before working with any tools or materials. Wear safety equipment and work with a professional to complete projects when necessary. Read my full terms of use and disclosure for more. Happy making and stay safe!
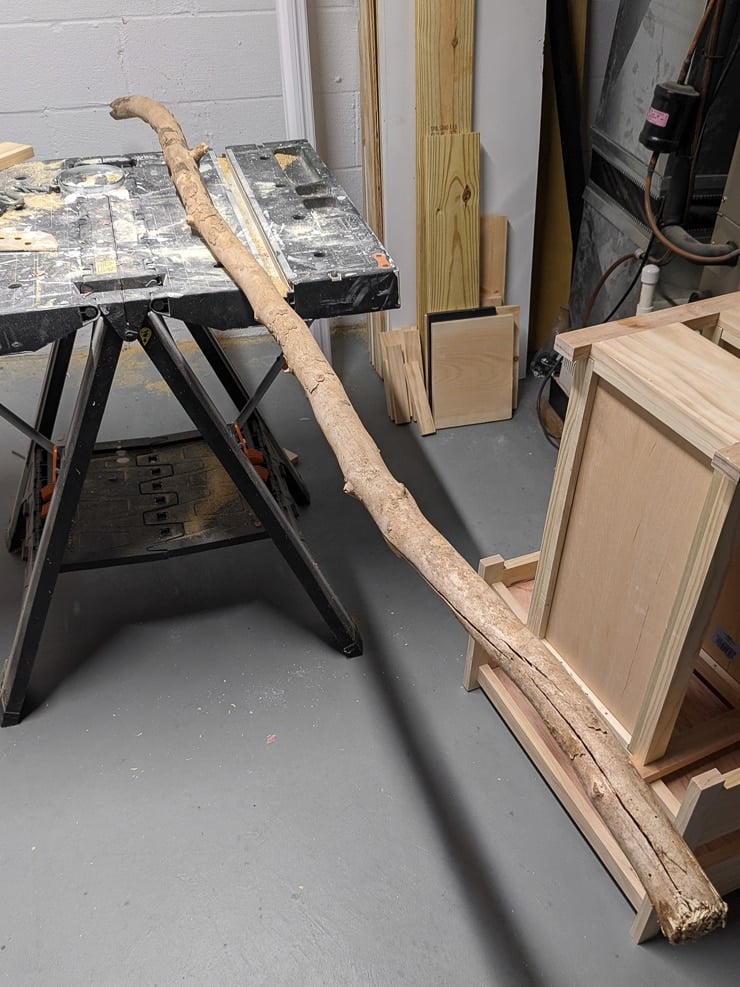
Step 1: Find a branch & let it dry
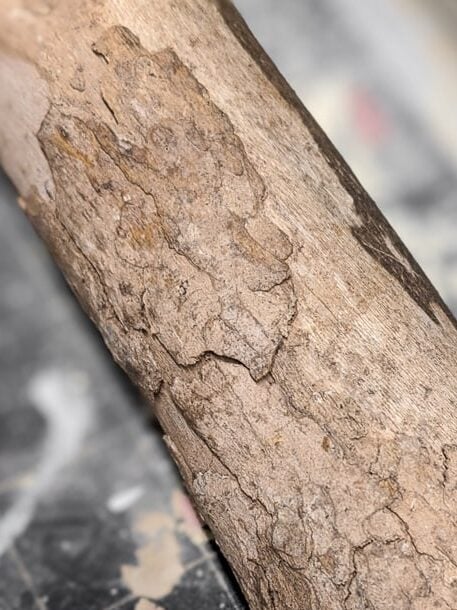
I found a nice branch that had already fallen off a tree. If you know someone who needs to prune a tree, you can also hit them up! The branch I found had probably been off the tree for a while because it had some cracks and the bark was a bit loose.
So I removed the bark that was already coming off of the branch and popped the branch in my shed. And there I left it to dry, which was perfect for my project procrastination! I quickly moved on to another project and didn’t grab the branch until months later.
If you’re wondering how long your branch will take to dry, it depends on a ton of factors. How long it has been off the tree, the weather, your climate, how you store it, etc. Look for cracks in the wood, which might help indicate drying. I also noticed that the weight of mine decreased a bit after a few months.

Step 2: Remove the remaining bark & sand
After my branch had dried, I brought it down to the shop and used a paint scraper to remove the remaining bark. I also used it to scrape off some darker areas, but this is purely aesthetic. This was a pretty easy process and was very unlike my first experience scraping bark off a branch.
This must be a different type of wood—I’m not sure what kind of wood my cat tree is made out of or what this one is. I’m just glad taking the bark off of this one was easy!
After all of the bark was gone, I used a piece of fine-grit sandpaper to sand the entire branch. This helped to smooth out the surface of the branch and prep it for staining. I also used my miter saw to chop off the uneven ends at this point—but you may choose to leave yours natural.


Step 3: Stain the branch
Next I grabbed a stain I already had on hand. It’s the same color I used for a little table I got and use for my How to Refinish Wood Furniture post. Lovely color. You don’t have to stain your branch, but I wanted a deeper color for mine. This was perfect!
I tried not to overthink this. I just popped on some disposable gloves, grabbed a rag, and applied two coats of stain to the entire branch. Since it was super dry, it soaked the stain right in and didn’t take long to dry at all.


Step 4: Finish with urethane
After the stain had dried, I applied two coats of satin polyurethane with a small brush. The first coat took a while to dry since my shop is so cold. But once it had dried, I sanded lightly to remove any bubbles. Then I slapped a second coat on.
I went with a satin finish because I wanted something with a sheen to help bring out the stain color, but I didn’t want it to be too glossy. Satin is a lovely finish for this.


Step 5: Hang the branch
The final step is to hang your DIY tree branch plant hanger. This can be done in a number of ways. First, there are two main ways that you can hang things from the ceiling. I outline both of them in my post about How to Hang a Planter From the Ceiling.
However, the only method I’d recommend for a hanger this big is using screw hooks directly into ceiling joists/studs. Toggle bolts in drywall are great, but my branch is really big and will have quite a few plants.
So I’ll be hanging it directly into the 2x4s behind the drywall in my ceiling. This is so much more secure than using drywall and toggle bolts (which is a perfectly fine method for smaller things like single hanging planters).
To find a ceiling joist, you’ll need a stud finder. If you can just use a magnet. The magnet will stick when you glide it over a screw (which is hidden in the drywall because it has been patched and painted). And then that will tell you where a stud is since drywall is screwed into studs/ceiling joists.
I had a rough idea of where the joists were in my room, so I knew about where to start. Once I’d found the right area, I drilled a pilot hole with a bit that was one size smaller than my ceiling hook’s treads. This turned out before too far away from the window, so I had to patch those holes and re-drill two. Oopsie.
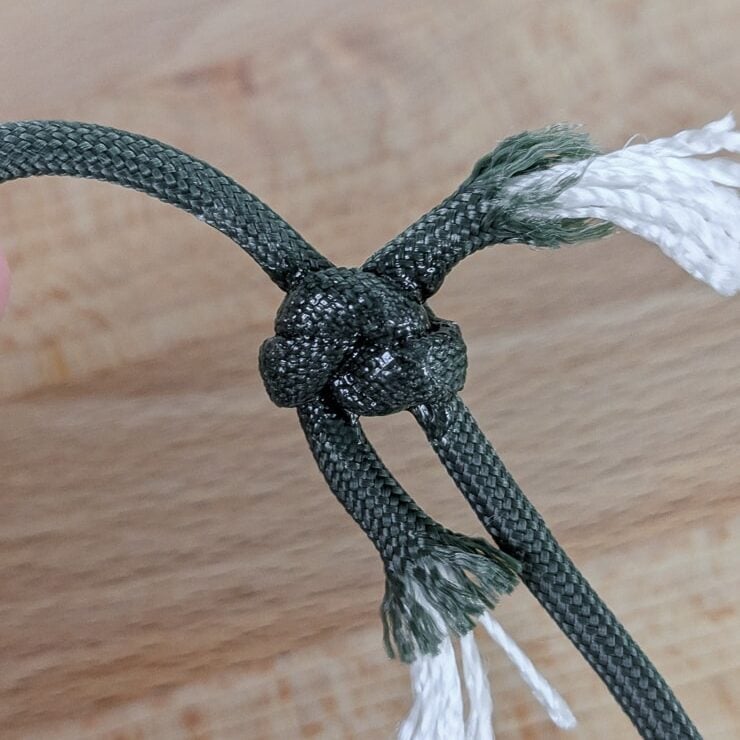
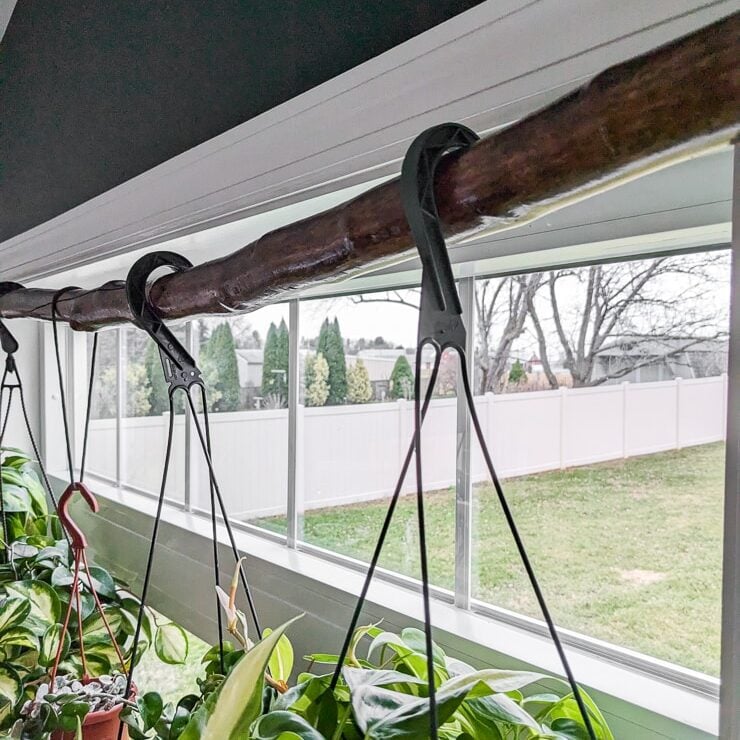
Then I screwed in my hooks and added some paracord I’d tied off (and glued for extra security) to hold up the branch. You can use chain as well, but rope had more of the look I was going for.

How much weight can it hold?
The amount of weight your tree branch plant hanger can hold totally depends on your branch, including how thick and long it is. It also depends on the method you use to hang your branch. It’s pretty impossible to give you an exact number.
But I’d just recommend you hang your tree branch from ceiling joists—not just drywall using anchors—and keep an eye out for any bowing on your branch if it’s particularly long. If there is bowing, you ma need to decrease the weight or add a third hook in the center.
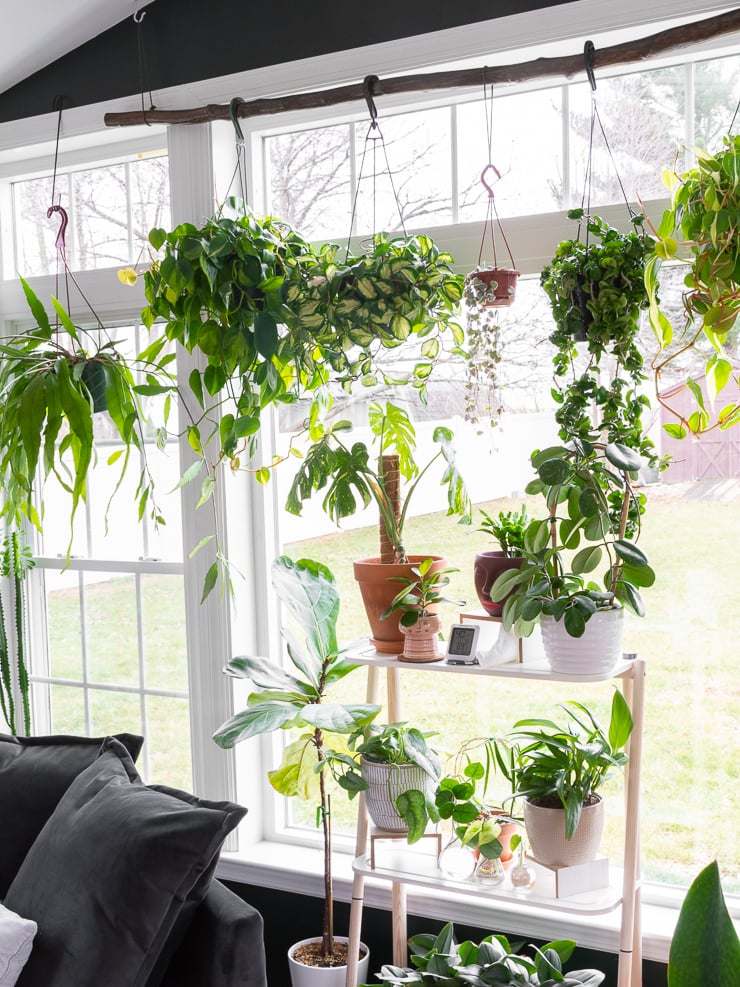
And here’s the finished branch!
And here is my finished branch, hung up with plants on it. Truthfully, I am not totally sold on it in this location. I really want it to work, but my husband and I are divided on what we think. I decided I am going to leave it up for a bit while I think it over and live with it.
What do you think? Team branch plant hanger or team no branch?


Amazing idea! Also, this decoration looks very pretty. Same decoration I want for my guest room as well. I am not a pro like you but, I will try to make my guest room decoration like it.