
Indoor Cat House Plans
This post shares my indoor cat house plans. This easy-to-build piece is both a stylish side table and a cat house—the perfect piece for any cat lover’s room.
How to Build a Cute Cat House Side Table
Hey guys, it’s been a while since I’ve shared build plans, I know. I was just telling Mike that I really wanted to get in the shop and build something with my hands. Life just gets so busy, but it’s such an amazing stress reliever.
Knowing we were going to be working on his office space, which also doubles as our guest space and a play room, I decided to make a side table to go next to the murphy bed. But with a twist! A cat twist, obviously. It also doubles as a cat house. Or cave, really.
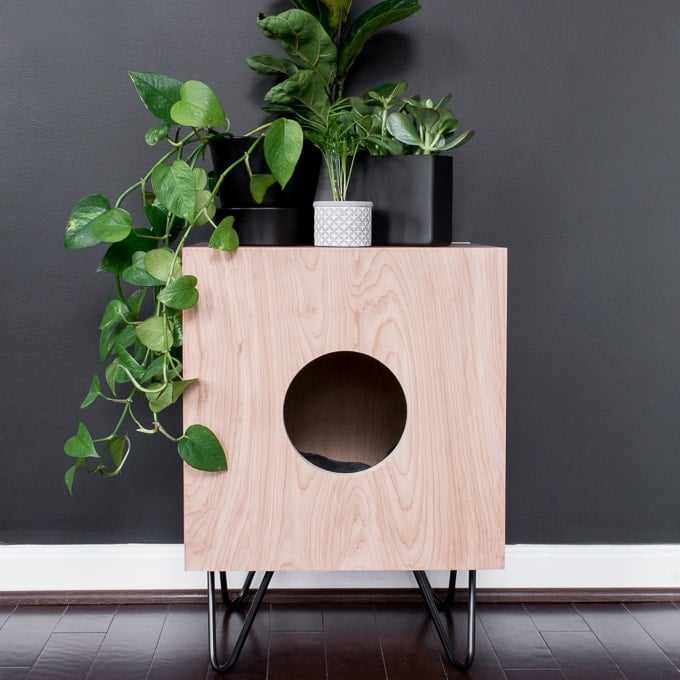
I was inspired by a piece I saw online with exposed plywood edging—I’ve never done a finished piece with exposed plywood edging, but I loved the look. And I also used PureBond plywood for the first time. It’s formaldehyde-free (did you even know that was something you had to worry about?), which is a huge selling point.
It’s a bit more expensive than a normal 4×8 sheet of plywood, but it pays off—the grain on it is beautiful and it’s a safer option than traditional plywood. I used birch and am looking forward to using the leftovers from the sheet for another project.
SUPPLIES:
(Affiliate links below; read more about those here)
- PureBond plywood, download the full printable build plants using the signup form below!
- Pocket hole bit and pocket hole screws
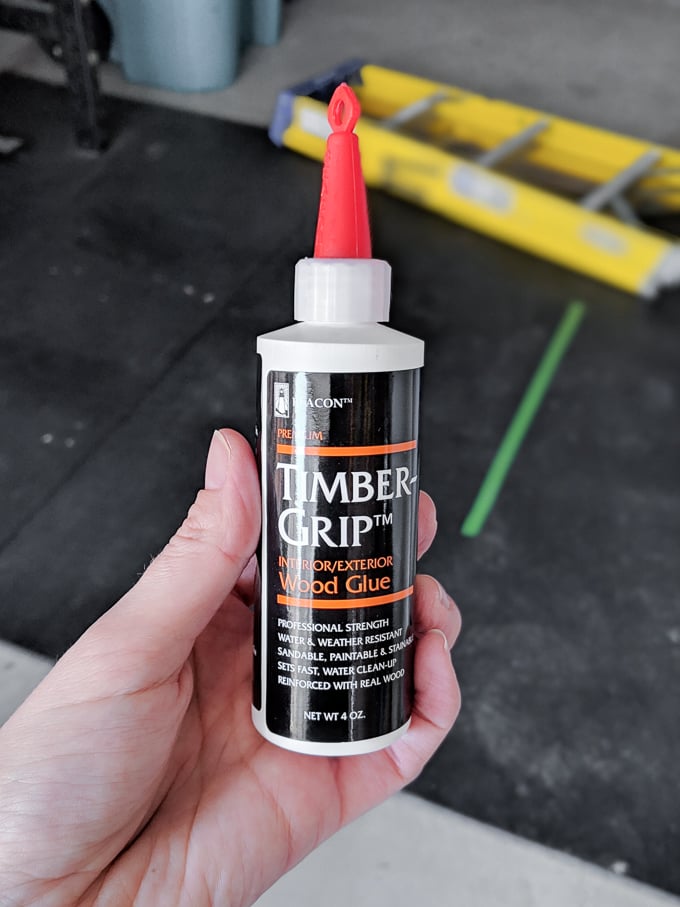
- Beacon Adhesives Timber-Grip glue
- 220-grit sandpaper
- Hole saw and appropriate bit (the same kind marketed for making corn hole boards!)
- Tack cloth (or regular cloth if you’re feeling lazy)
Tools used:
- Table saw
- Miter saw
- Orbital sander
- KregJig K4
- Drill
- Finish nailer
Finishing touches:
- Minwax stain in Pickled Oak and rag
- Varathane water-based polyurethane in matte and brush
- Hairpin legs and 3/4″ wood screws
And here are my indoor cat house plans!
(Remember to wear a mask and eye protection while sanding and working with wood, and wear an appropriate mask while working with stains and finishes. Follow the directions and warnings from your particular brand. Do not use any tools without proper training, precautions, and/or supervision. Read my full terms of use here.)
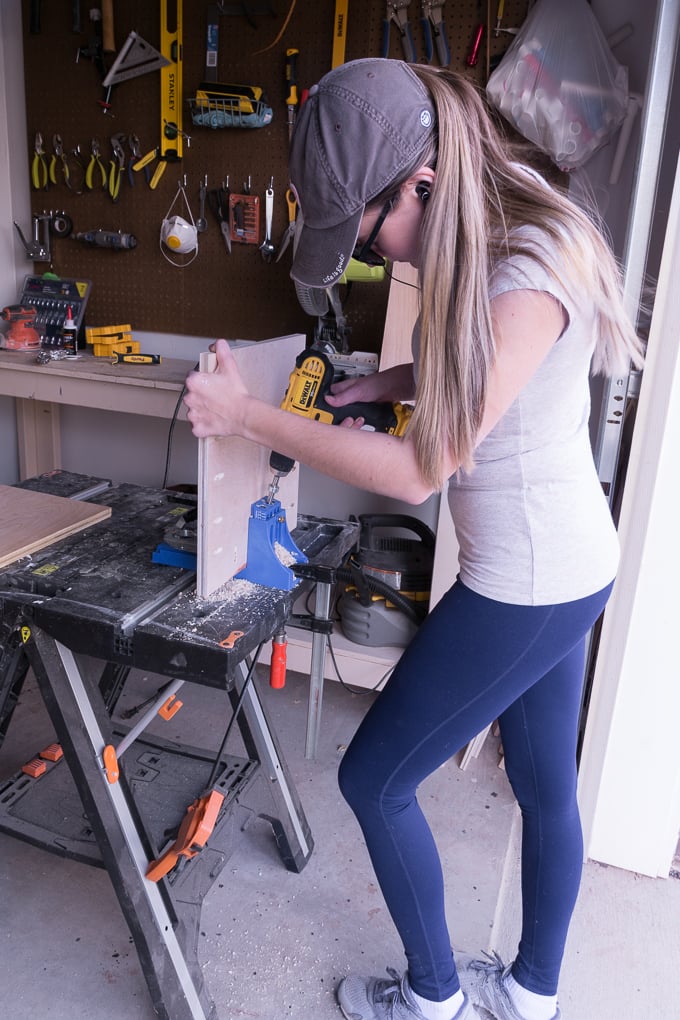
Step 1: Cut pieces and drill pocket holes.
First I cut my plywood pieces according to the cut list. Here is a link to the Dropbox folder with all of my free printable plans.
I used my orbital sander to clean up each piece. Then I used my KregJig to drill pocket holes as indicated in the plan.
Step 2: Attach sides to bottom.
Next I clamped the bottom piece to my workspace. Then I used pocket hole screws to attach one of the side pieces as outlined below. I also added a strip of Timer-Grip wood glue before I attached the piece.
I then repeated this step for the other side piece, except I attached it opposite the first piece.


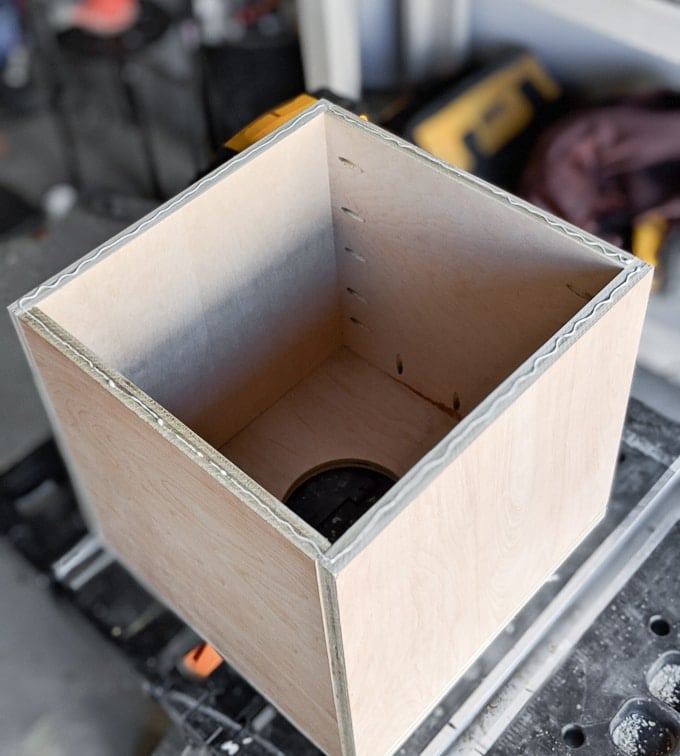
Step 3: Finish the cat house body.
Next I clamped the top piece to my workspace, flipped the u-shaped piece I’d created in step 2 around, and used pocket hole screws to attach that. (I also used a line of wood glue for this joint.)
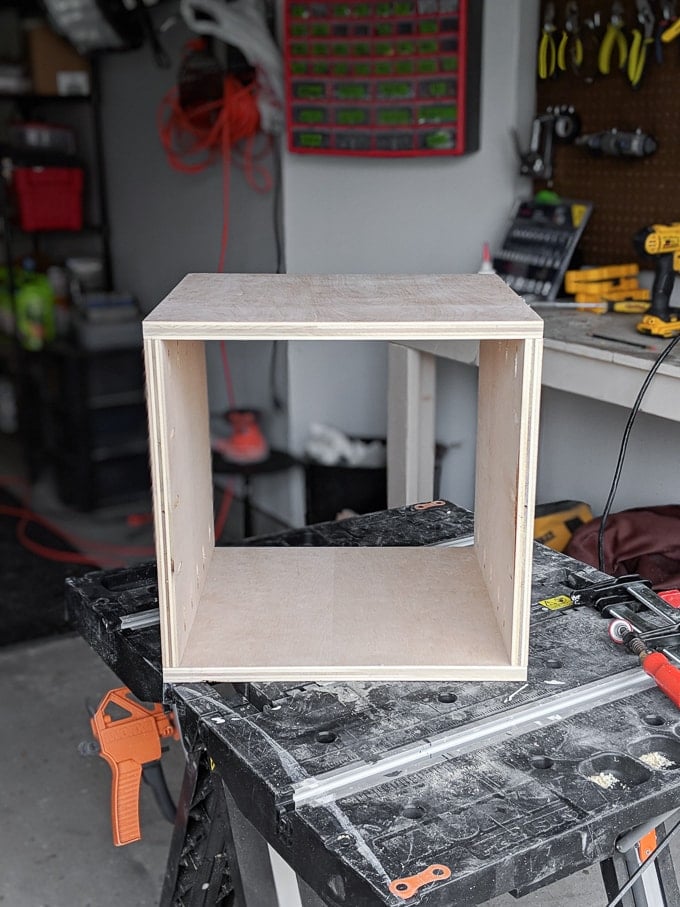
My piece now looked like this: a box without a front and back. Exciting for any cat since it’s a box…but it’s about to get even better! Note that you may need a right-angle drill attachment depending on your drill and pocket hole bit size—see a post about how to drive pocket hole screws in tight places.

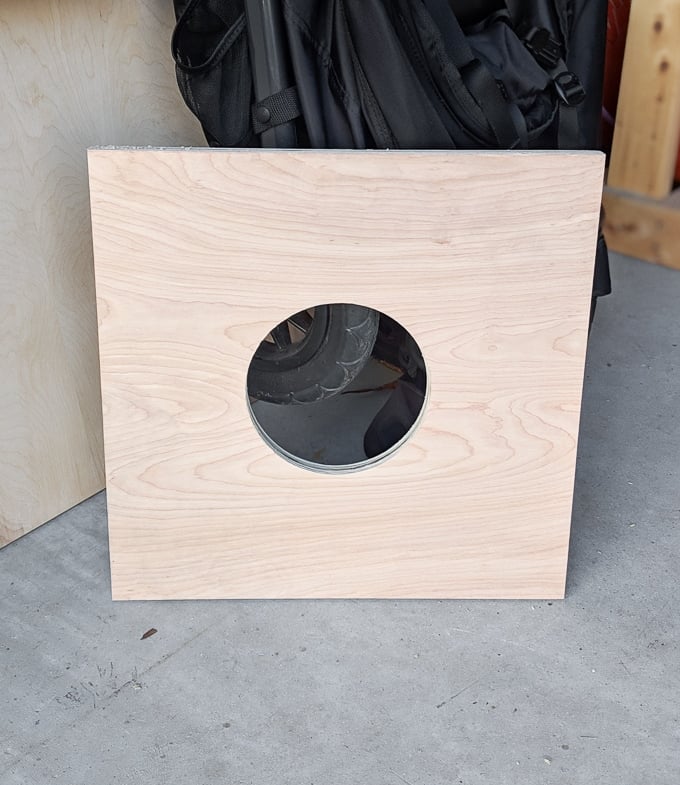
Step 4: Drill hole in the front piece.
We used a hole saw attachment to drill a perfect hole through the front piece. Full disclosure: this is a beast of a process. I didn’t feel comfortable muscling this, and our drill couldn’t handle it anyways, so I phoned in my dad for some help. I then used 220-grit sandpaper to polish up any rough spots.
You can see more in the video tutorial! You can see what it looks like below. If you can’t handle the power of a strong drill and a hole saw, you can use a jigsaw.
I then laid this piece face down on my workspace, ran a thin line of wood glue along the edges, and set the box down on top of it. The side with the three pocket holes should be facing down; that’s how I attached the front. I attached with pocket hole screws.
Step 5: Attach back piece.
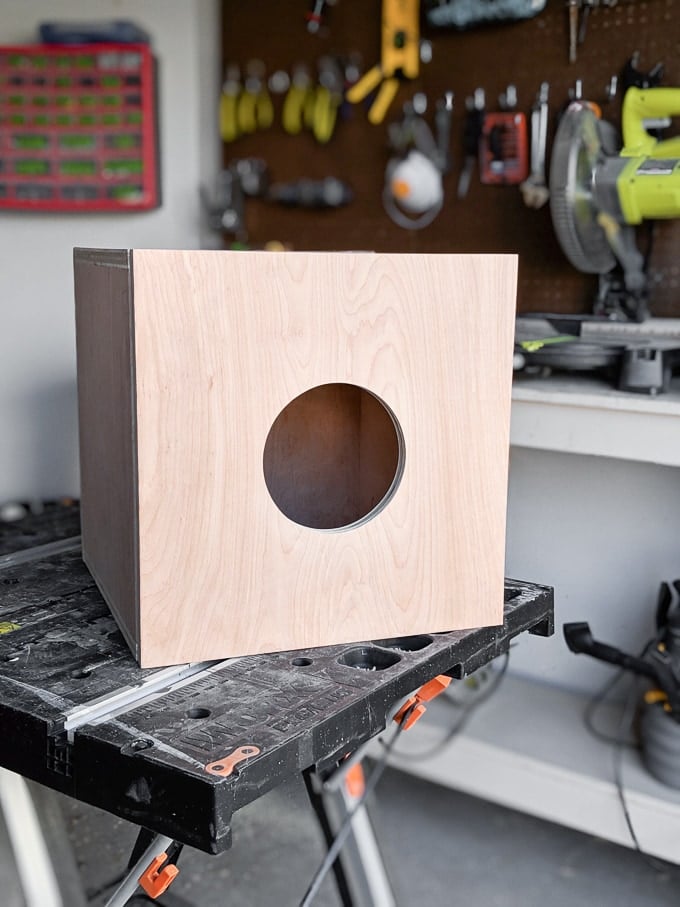
To attach the back, I ran wood glue along all four edges, set the back piece on top of it (that’s your last piece), and used my finish nailer to fix the piece in place.
The second pic below is what the box looks like fully constructed. Yay! It’s looking like a nice little cat cave now.

Step 6: Finish up the cat house part.
I attached my little hairpin legs to the bottom using 3/4″ wood screws, wiped the piece down with tack cloth, stained the pieces using Minwax wood stain in pickled oak, and finished it using two coats of Varathane water-based polyurethane in matte.
This finish has a great look—I used it on R’s DIY dollhouse book case and it became a fast favorite. I also used it on the coordinating hairpin leg planter I made for this space too.

And it looks amazinggggg! I really love the exposed plywood edge and the natural, matte finish. What do you think of my indoor cat house build?!


Update: I wanted to share an update from a reader who made this project! Check it out—thanks, Richard!
I wanted to share a little serendipity from the project—I expect others have found this too. The project requires just shy of 1/3 sheet of plywood, so we could make three cubes from one sheet (we have a bunch of cats). Purebond plywood is available at Home Depot. They’ll make 2 free cuts in full-size plywood sheets, so we had them cut 3, 32×48” pieces. Each is good for one cube, and all 3 pieces fit easily in the Subaru for the ride home. Getting 3 cubes out of the plywood—with virtually no waste—make this the kind of project where you can keep two for yourself, and give one to a friend. All in all a very satisfying project!
-Richard X.

If you like this project, check out my DIY cat tree made out of a real tree and my Ikea cat condo hack.
Pin my cat house build!


Wow, What a wonderful cat house side table. You did a great job. I also want to make one for my cat. Then I need a hole saw.