If you’ve been hanging around to witness my plant adventures over the years, you probably know that building a greenhouse is truly a dream come true for me. That’s right—we bought the 9×6 Willow model greenhouse from Backyard Discovery!
It’s perfect for us, our needs, and our space. And I did a ton of research before deciding on this greenhouse. In this post I’ll share more about that process, including some things to think about if you’re considering this greenhouse. So let’s dive in!

OVERVIEW
–Why We Chose It–
- Sturdy frame and 10mm 4-wall polycarbonate panels for insulation; withstands strong winds and snow loads.
- Straightforward to assemble with the 3D interactive step-by-step app.
- Built-in PowerPort, hose hookups, thermostat-controlled ventilation.
- Compact 6×9 design with over 13 feet of shelving; modern aesthetic.
- Competitively priced compared to similar greenhouses.
–Tips & Customizations–
- Keep pieces with their packing lists and stain pieces pre-assembly.
- Organize parts by steps to ensure a smooth build.
- Confirm greenhouse placement early; re-check for square during assembly.
- Adding extra shelving, hooks, solar lights, a walk-through screen, and a gutter and rain barrels for enhanced functionality.

This content contains affiliate links, which you can read about here.
Why we chose this greenhouse
There are a lot of greenhouses on the market, and searching around for them can be really overwhelming. I looked at some options locally, search retailers online, and considered building one from scratch, too. We ultimately decided that the Backyard Discovery line of greenhouses check the most boxes for us for the following reasons.
1. Quality
Backyard Discovery’s line of greenhouses is new, so I was a little worried about not having any data on the product’s longevity. However, Backyard Discovery itself is a very reputable brand that I was already familiar with having considered their gazebos in the past.
Having constructed the greenhouse ourselves, we can personally speak to its thoughtful design and physical strength. Once assembled and anchored in place, this thing is pretty rock solid. We generally don’t get super crazy winds and snow here in Maryland, but the structure is proven to withstand up to 2,850 pounds and 100 mph winds—a real piece of mind!
I don’t want to keep my greenhouse tropical over the winter, but I did want something with good insulation. The panels are made of 10mm commercial-grade 4-wall polycarbonate to improve heat retention by 30% (this is compared to standard double-wall polycarbonate).
The wooden frame is also made of cedar, but it isn’t the traditional North American cedar you might be familiar with. Some have discussed this as an issue online—it’s “Chinese cedar.” However someone in a Backyard Discovery Facebook group did some research and shared that the cedar used by Backyard Discovery is more dense than domestic cedar, potentially even being a better product for outdoor construction like a greenhouse.
Additionally, Chinese cedar seems to be frequently used in construction in Asia due to its durability. It smells 100% like cedar inside my greenhouse, and I’m planning to seal the outside yearly regardless of the material to help prolong its life. Time will tell if it holds up, but I have no concerns.

2. DIY approach
My husband and I definitely wanted something that we could build ourselves to save some money. If you aren’t up to building this yourself, you could probably hire this out as a quick 2-day project for a contractor. We built it ourselves in a few weeks working mostly part-time on it, but Mike did one or two days of solid 4 to 5 hour blocks of work.
The paper instructions were not super easy to follow, but we absolutely loved the interactive app that you can download and follow along with. It made the process relatively pain-free and straightforward. Just remember, it’s basically a giant Lego set 🙂

3. Features
One of the main reasons I decided against building our own greenhouse from scratch is that I loved the built-in features the Backyard Discovery greenhouse comes with. It comes with a PowerPort inside the greenhouse—you run power to that, and then everything else can plug into the PowerPort.
You can use that for seedling mats, misters, fans—whatever! I do have my fan plugged into the thermostat the greenhouse comes with so that it will automatically turn on to ventilate through the vents when the greenhouse reaches a certain temperature.
The greenhouse also has an interior and exterior hose hook-up if you want to run your hose out. We don’t do that, though—it’s close enough to our hose that we don’t need to, and I try to rely mostly on the rain barrels for water anyway.


4. Size & look
Given that this is a hobby greenhouse, I wanted something that was small but highly functional and also looked good. The Willow really hits all of those marks. At 6×9, it is small—but there is over 13 feet of shelving space included. We added more shelving, too.
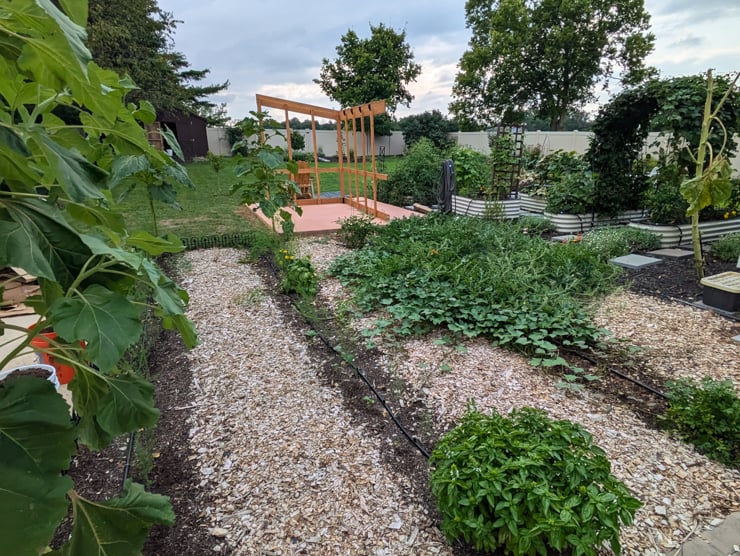
It’s large enough to provide the work area and storage we need without being overbearing in our backyard. It looks like it was made for the space we put it in! I also love the modern look of the slanted roof. Below is the concrete pad before we built the greenhouse—it’s the perfect size for the space!

5. Cost
And finally, cost. For all of the features this greenhouse brings, it truly is worth every penny! The base price of the Willow greenhouse is $1,999. I waited until it went on sale for $1,799 before buying, and I searched online for a coupon. Always search online for coupons, folks!
I found one that took 10% off the purchase price, bringing me down to 1,619.10. After adding in tax and shipping, my total was $1,716.25. When compared to similar greenhouses on the market, this really is a good deal.
Tips for construction
Backyard Discovery greenhouses come ready to assemble with pre-drilled holes and easy-to-follow instructions. It’s like a giant Lego set. But there are a few things I’d recommend keeping in mind for your build to help things go as smoothly as possible.
1. Keep pieces with their packing list
The greenhouse comes via freight shipping in a few large boxes. However, the pieces are NOT packaged according to their steps. They are packaged for maximum shipping efficiency.
I recommend unpacking all boxes before getting started, but keep the pieces grouped with their box’s packing list. Trust me on this, it will make my third tip below a lot easier!

2. Stain before assembly
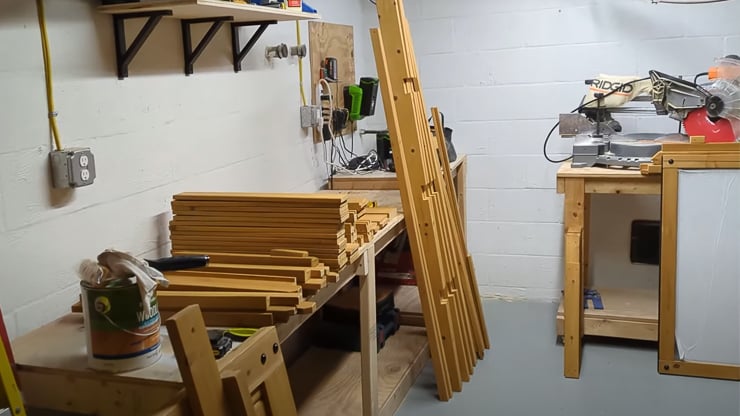
I stained every single piece before assembling it so that I could stain all six sides. I figured this would provide the most protection, but it would also save me from having to cut in around windows and other hardware in the greenhouse.
Staining before assembling meant that I could use a small roller and knock the job out pretty quickly with a few evenings of work. I loved the Benjamin Moore Luxe wood stain I used—it went on beautifully and really brought out the color in the wood.

3. Organize pieces based the steps
After you’ve stained everything, all pieces should still be grouped with their packing lists. At this point, I recommend going through the instructions and organizing the pieces from your different piles according to when you’ll need them in the build process.
This is why keeping the packing lists with their box contents is so important! You can more quickly and easily locate where pieces are by looking at the packing list. Start with step 1 and begin grouping the pieces you’ll need for each step. This saved us so much time when we got into a rhythm building!

4. Decide on placement early
We weren’t sure exactly where we wanted our greenhouse positioned on the concrete pad. I needed to see the frame built first. Once we built the frame, we were able to pick it up and position it where we wanted it.
If you want any longer to position or move your greenhouse, it will be much heavier and harder to move. You also don’t want to move it around too much after you square things off.

5. Check and re-check its square
And speaking of squaring things off…check and re-check that everything remains square as you build. We squared it off once we placed the frame, but somewhere between that step and inserting the window panels, something shifted about a half inch.
This was obvious when we slid the panel in and there was a small gap on one side of the bottom of the window. Oops! We had to backtrack, taking some of the pieces we’d assembled off to figure out where things got out of whack.
6. Try the app
And finally, we highly recommend using the 3D interactive BILT app. This was so much easier to follow along with than the paper instructions. You can rotate the steps to help you visualize, which was super helpful for us!
Customizations we’ve made
The cute little Willow is really read to go once you set it up. But of course I had to add some customizations to mine to help maximize space and storage! Here are some of the things we’ve done.
1. Add more shelving
I ordered (2) 2-packs of Hejne shelves from Ikea, the 30 3/8×11 ones. I then stained these to try to match the greenhouse. It isn’t perfect, but it’s close enough! I also got these cheap brackets and spray painted them black.


2. Add hooks & pot clips
And while I was making an order from Ikea, I also grabbed a few packages of these cheap hooks. They are so useful for hanging aprons, bags, tools, my broom—whatever. For the ladder storage in the greenhouse, these s-hooks from Amazon fit perfectly as well!
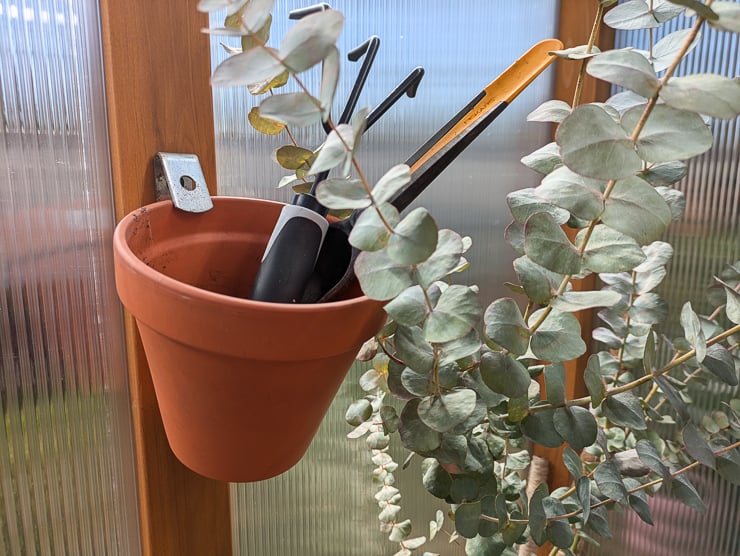
And I mounted a few of my absolute favorite pot clips (see my whole post about loving them for more!) that I hang plain terracotta pots on. You can of course use these for growing, but I love them for storing shovels and other little tools.


3. Get a shade cloth
We set our greenhouse up in August, where it can easily clear 100 degrees Fahrenheit during the day. And this little greenhouse holds heat in very well. So I got this shade cloth and mounted it inside using some little cup hooks.
Next year, when I know I’ll have it up for longer, I’m planning to put the hooks on the outside of the greenhouse and cover the roof with the shade cloth. I found 70% to be very helpful but might even add a second one next year for July and August!
4. Mount a walk-through screen
This one was a must have for the summer! On the super hot days, I’d open the door to help more with air flow. The screen helps prevent too many bugs from flying in. But since it’s a walk-through screen, I can just walk right in and out with my hands full. I got mine for $7 at Lidl, but I’m sure there are comparable ones on Amazon.

5. Add solar lights
Powering the whole greenhouse with solar would be a dream…but it’s not a possibility due to how much energy a heater would need. So I settled for getting solar-powered string lights. I already have these elsewhere in my garden and love them. I hung them inside the greenhouse—they are great for those early darker evenings when I’m still gardening!
6. Invest in a heater
Heating is a big one. I decided on this small heater from Bio Green, but I didn’t get the thermostat. My goal is to just keep the greenhouse barely above freezing for the winter so I can keep growing cold-weather greens and whatnot in there. This heater packs a punch!

7. Add a gutter & rain barrel
Absolute game changer! If there is a roof in our yard, we want to be capturing rain from it. Adding a gutter to the back of the greenhouse was one of the first things we did. We tucked it up under the metal frame on the roof and then screwed it into place.
The downspout goes directly down into rain barrels that are daisy-chained together. We chose two of these rain barrels because we already have the brand in brown and love them. (See our DIY Solar-Powered Rain Barrel Irrigation System for more.) Mike chained them together with PVC pipe and added a spigot for my watering can. Perfect!


Wrapping up…
And that’s about a wrap on our first summer with our Backyard Discovery Willow greenhouse! I’ll of course be updating this post as time passes to add details on additional customizations, our thoughts on functionality, and info on how it’s holding up. Until then, happy planting (finally in a greenhouse!!).

Pin this!


Brittany is a seasoned DIY home and garden expert, running a creative brand since 2014 that inspires others with approachable plant care guides, woodworking tutorials, and decor projects. She is a certified project manager and has completed extensive coursework in the art and science of growing your own plants. Her work has been recognized by major publications, and she routinely collaborates with fellow DIY industry leaders—but her favorite thing to do is inspire you! Learn more about her here.

Leave a comment