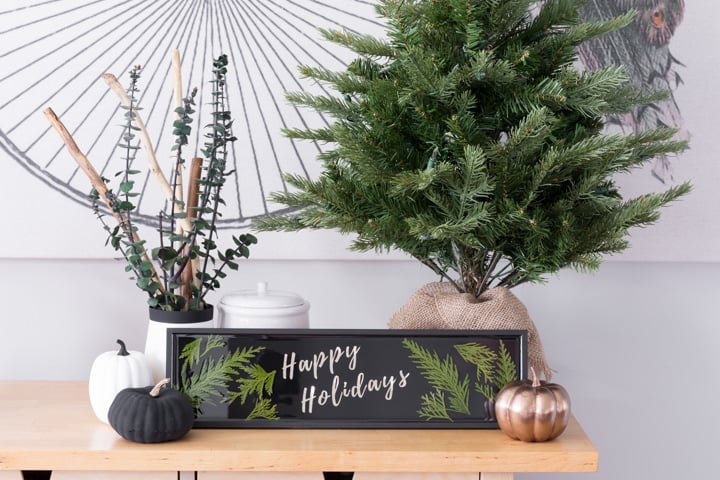
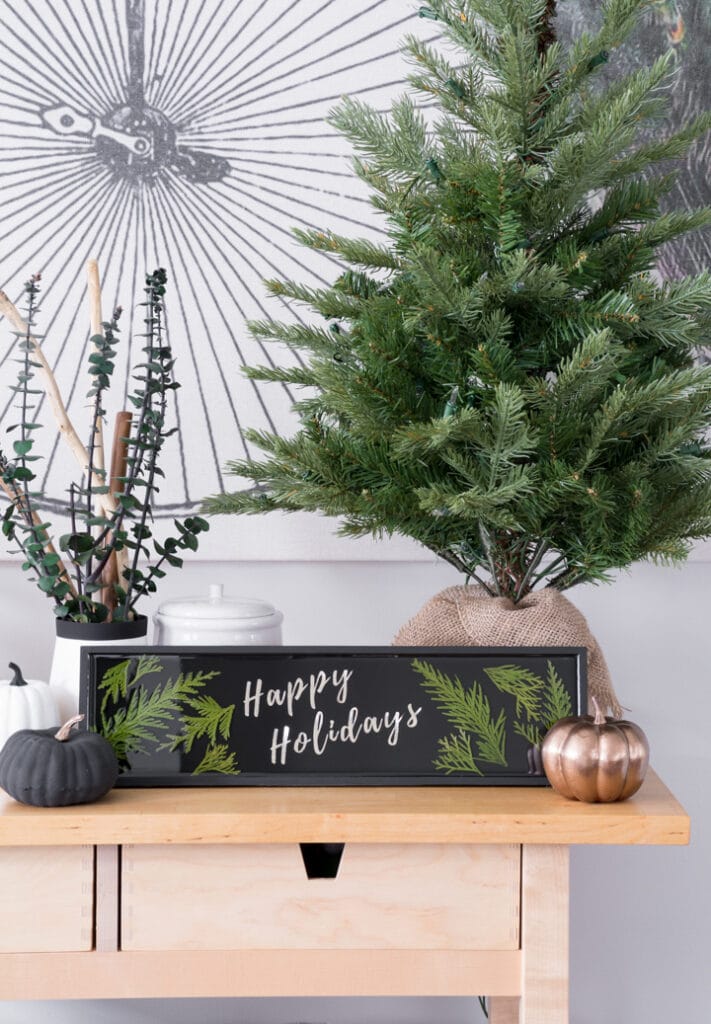
Wondering how to preserve leaves? This post shares all about preserving leaves in resin, which is a beautiful and fairly straightforward way to do it. See how I preserved evergreen leaves (from arborvitae trees, to be exact) in resin to make beautiful holiday decor. This post is sponsored by Wagner Spray Tech.
Preserving Leaves in Resin: How to Preserve Evergreen Leaves
Hey guys! Today I’m sharing a fun project that combines a few of my favorite crafting things: plants, painting, vinyl, AND resin! I’m chatting about preserving leaves in resin to make a beautiful and simple holiday decor piece.
I’m using my Wagner Spray Tech FURNO 500 heat gun on this project, too. I first used the heat gun on a tiny resin planter project, and I’ve since used it on a few other projects. My hexagon-shaped resin coasters, my beautiful faux marble tray project, and some melted upcycled crayons (project coming soon for that one).

It’s a really nifty tool that I’m enjoying using on my resin projects. I’m looking forward to trying it on a few other mediums, especially considering it has so many uses. But for now–another resin project. And it’s a really important piece of this project because it helped me achieve a beautiful, high-gloss, blemish- and bubble-free finish!
Supplies
(Affiliate links below; read more about those here)
- Shallow wooden tray; I got mine from Michaels for under 5 bucks using a coupon. Anything with a lip on it or slight raised edge will work. You just want the raised edge to hold the resin in.
- Castin’ Craft Casting Epoxy Resin
- FURNO 500 heat gun
- Evergreen leaves
- Dehydrator or a book and patience (to dehydrate)
- Black craft paint and paint brush
- Resin mixing supplies
- Vinyl “happy holidays” saying
And here’s how to preserve leaves in resin
Step 1: Prep The tray
Since I wanted to make this a holiday decor piece, I picked up a shallow wooden tray from Michaels. You can use anything with a slight lip on it. The lip holds the resin in while you’re pouring it. You could also easily make this, but I wanted a bit of a time saver. 🙂
Then I painted the tray black using a black craft paint. I chose black instead of white because resin can tend to yellow slightly over time, and that will show less with black. Plus I love the black and green combo.


Step 2: Add Happy Holidays saying
I used my Cricut to cut a simple “Happy Holidays” saying in metallic gold vinyl. I used a brush script for this to get it a more festive look. If you don’t have a Cricut, here are a few ideas to achieve a similar effect:
- Use a stencil and paint
- Freehand paint it with a small brush
- Use pre-cut vinyl or stickers in a holiday-themed saying
- Print and cut by hand with small craft scissors
- Use small wooden letters from the craft store
- Use another holiday-themed decorative piece as the focal point—resin will set just about anything
- Create a Christmas tree shape with evergreen clippings and glue it together, then use that as your focal point with single branches accenting it around the edges of the tray
- Ask a friend with a Cricut 😉


For more resin tips and projects, check out my galaxy-inspired resin paint pour art, my tiny resin planters, this resin and wood serving tray, how to make resin jewelry, and my resin coasters, and the difference between matte and shiny silicone molds!
Step 3: Dry the leaves you’ll be preserving
I chose a variety of evergreen leaves from arborvitae trees near my work. They are the super tall green giant trees. Their leaves are life a cross between pine needles and regular leaves—the perfect combination. And they have a wonderful color, even when dried.
I cut a variety of shapes and sizes to make sure I’d have enough options to choose from when laying my greens out on the tray.

How to dry leaves for preserving in resin
There are a few different ways you can dry leaves for preserving in resin (or anything else, for that matter). I’ll talk about a few of them here, as well as the pros and cons of each.
Dehydrator: I used our dehydrator, which we have had for years for dehydrating fruits and herbs, as well as making jerky. If you have a dehydrator, this is the fastest and most effective way to dehydrate the thick, juicy evergreen cuttings. However, it will likely “crinkle” or “curl” thinner leaves.
Air drying: Air drying is an obvious way to dry leaves, but it takes a while and can curl the edges of the leaves. If this isn’t the look you’re going for, I’d avoid air drying. Also, it can take a while. I definitely did not want to use air drying on my evergreen cuttings because they are so thick. Also note that direct sunlight can desaturate the color on your cuttings.
Pressing in a book: Place leaves between paper towels and stick in a large book. Check the paper towels every few days and change if they are damp. This method takes a while, but it has the massive benefit of drying the leaves and cuttings completely flat.
Create a DIY press: A DIY press will dry your leaves faster than the book-press method will. A DIY flower press is typically made using plywood and cardboard. You can check out a good tutorial for making an easy one here.
Note: Whichever method you choose, I don’t recommend sealing the leaves if you’re planning to coat them in resin. Some tutorials recommend using hairspray or a clear acrylic coating. I tried a clear acrylic coating on my evergreen cuttings, but the area around them turned yellow in the resin.

Step 4: Pour the first resin layer
For this specific piece, I mixed 8 ounces of two-part resin for the first layer. This filled the tray up about 75% and gave me a nice depth to work with while placing the leaves.
First I poured all 8 ounces of resin into the tray. Then I began adding the evergreen leaf cuttings roughly into the spots I wanted them in. They will move a bit, but that’s ok. You have a bit of working time.


Popping resin air bubbles using a heat gun
After a few minutes, the resin will begin to settle. Air bubbles will emerge at the surface—a heat gun can help you tackle these. A heat gun is an effective and safe way to get a spotlessly smooth resin finish, especially when you’re using clear, uncolored resin and every single blemish will show.
The FURNO 500 heat gun has two fan settings. I started off with the lower of the two settings, increasing to the stronger fan setting for more stubborn spots. And I set the heat to 350 degrees Fahrenheit (the second-lowest heat setting). Position the heat gun about a foot away from your project to pop the air bubbles.
After I’d popped the air bubbles, I let my project sit for about 30 minutes. This gave the resin some time to begin setting up. Then I took a toothpick and gently pushed the evergreen leaves down toward the bottom of the tray to ensure more coverage. When you first pour the resin in, they float to the top. You don’t have to do this step, but I wanted to ensure I had full coverage. And my tray is so shallow that I needed more clearance.
Note that you might need to grab your heat gun and pop a few more air bubbles after poking the leaves down toward the bottom. You might introduce more air into the resin.


Step 5: Pour the final resin layer over the leaves
I let this pour cure for about 6 hours. I mixed up about 4 more ounces of resin to finish this project off. There were still some spots that weren’t totally covered and sealed by the resin. I essentially repeated step 4, except it’s much easier this time. Everything is stuck in place. You’re just adding a finishing layer.
About 5 minutes after pouring the finishing layer, I used my heat gun with the same settings to pop all of the air bubbles. Then I sat over the piece obsessively looking for more air rogue bubbles for the next 20 minutes. They are no match for my FURNO 500. 🙂

Finished evergreen leaves and resin holiday decor
After I’d let the project cure for 24 hours, it was done! At first I was a little peeved that the gold metallic vinyl separated from where I’d stuck it to the tray. But seeing the finished piece, I think it gives it a nice three-dimensional effect. The fact that the evergreen leaves aren’t totally flat helps, too. I really love how it turned out!


Pin my tips about Preserving Leaves in Resin for Decor!


Brittany is a seasoned DIY home and garden expert, running a creative brand since 2014 that inspires others with approachable plant care guides, woodworking tutorials, and decor projects. She is a certified project manager and has completed extensive coursework in the art and science of growing your own plants. Her work has been recognized by major publications, and she routinely collaborates with fellow DIY industry leaders—but her favorite thing to do is inspire you! Learn more about her here.

Leave a comment