How to Make a Tree Stump Table
This post shares how to make a tree stump table and originally appeared on Simply Designing. Thanks for hosting me, Ashley!
How to Make a Tree Stump Table
Today I’m sharing an easy project that anyone who can lift a tree stump can make! I had had this tree stump side table project on my project list for a long time…almost a year, in fact! Because although it is an easy project, it takes a long time to complete.
That’s because you have to ensure your stump dries completely before you start working on it, and it can take anywhere from weeks to months for your stump to dry! The dry time depends on lots of different factors, including when the tree was cut down and what conditions the stump has been drying in.

I also had to add some extra time to my project timeline because my dad accidentally turned my first stump into firewood…it had been sitting drying out at their house for so long that he thought I’d forgotten about it!
So when my parents recently took down another tree at their house, I immediately jumped into the wood pile to see if I could find a good candidate to start my tree stump side table project over again.
My inspiration had a $249 price tag. Take a look at my version, which I made for $10. What do you think? I love how mine has a bit deeper of a color and a little bit more shine to it than the one I saw online. So let’s chat about what I used and how I did it!
Supplies
(Affiliate links below; read more about those here)
- Tree stump or pry bar
- Flat tip screwdriver
- Bleach and water
- 220-grit sandpaper (assorted pack here)
- Minwax Stain in Special Walnut
- Minwax Polyurethane in Semigloss
And here’s How to Make a Tree Stump Table
(Remember to wear a mask and eye protection while sanding and working with wood, and wear an appropriate mask while working with paints, stains, and finishes. Follow the directions and warnings from your particular brand. Do not use any tools without proper training, precautions, and supervision. Read my full terms of use here.)
Step 1: Remove Bark
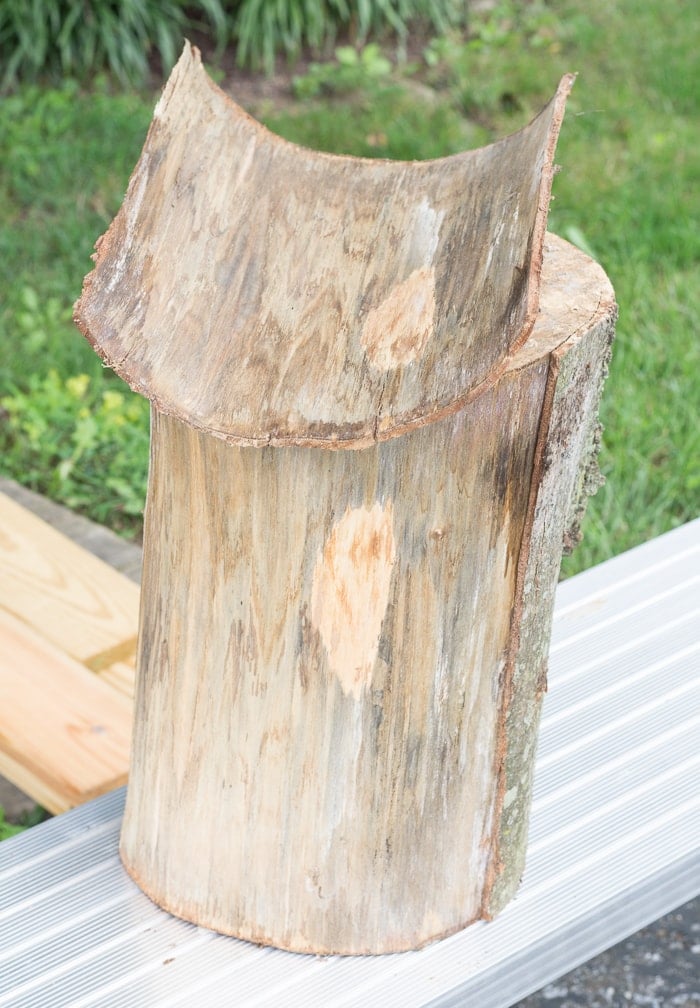
First I had to find a stump and peel off the bark. My parents had just taken down a tree in their backyard a few weeks before and kept it for firewood. We looked through the pile and picked the most even stump we could find.

Then I used a flat tip screwdriver to peel off the bark. This bark removal process was MUCH easier than what I had to go through when I made my DIY cat tree using real branches. I could not believe how easy this stump was!
(P.S., you can check out a detailed post I did on how to strip and finished tree branches for decor here!)


Step 2: Clean the stump
Next I had to clean up the stump. There was some mold growing on the stump due to some of the moisture it still had in it, so I wiped it down with a bleach and water mix at a 1:3 ratio to kill everything that was living on this bad boy. Here is pre-bleach:


Step 3: Let it dry
Once it’s clean, it needs to dry! My stump still had quite a bit of drying to do, so we set it in my parents’ basement right next to a dehumidifier to dry out for a few months. We didn’t need to use a dehumidifier, but it just helped to speed up the process.
You can still see some of the stains from where the mold was growing, but the mold itself is long gone. Once the stump dried out completely, it lost a few pounds, too. Here’s my dry stump. You can see some of the staining on the side that I ended up making the bottom:


Step 4: Sand and stain
I polished rough spots using a 220-grit sandpaper. Then I stained it just as I would any other piece of wood. (See my full post on how to stain and finish wood here!)


Step 5: Finish it off
To finish my stump, I gave it two generous coats of Minwax Polyurethane in Semigloss. Sanding lightly between coats.


And here it is, done! What do you think? I think it looks pretty damn sharp.
This was an easy DIY…like I said, it just took a lot of patience waiting for it to dry out! There was some heated discussion in our house about which end it should stand on…I love it this way, but my husband and friend both wanted it flipped. What do you think?


Pin my post about how to make a tree stump table!


turned out great! Definitely not for the instant gratification folks…which is definitely not me..not at all. haha
love it!
Thanks Colette! The good news is that once the stump dries out, it’s a fast project. Just set it somewhere and forget about it for a few months!
That is so awesome!!!
Thanks Shannon! Start your stump drying now and you can have one by April, ha!
I NEED TO FIND A TREE STUMP STAT!!!
YES you do!!
Love your stump side table. Thank you for sharing your tutorial too. I am featuring you tomorrow at the Snickerdoodle party.