How to Stain and Seal Wood
This guide shares tips about how to stain and seal wood and is designer for beginners.
An easy guide for how to stain and seal wood
I love staining wood. It is such an easy way to give a piece more depth or to add a classic touch to a piece and make it look more expensive. For example, the piece I’m working with for this guide will be the new top to an Ikea dresser. Major upgrade!
And the process isn’t as difficult as you probably think it is, either. I was intimidated when I first started learning how to stain wood, but I actually think staining is an easier process than painting. Applying stain is so forgiving–you don’t have to worry about brush strokes because unfinished wood is going to soak in your stain however it wants to soak it in.
Applying polyurethane after staining is a little trickier, but the ability to sand out issues and apply multiple coats makes it pretty forgiving as well. So if you want to learn how to stain and finish wood, sit down and start taking some notes!

Supplies I recommend
(Affiliate links below; read more about those here)
- A piece of unfinished wood
- Minwax wood stain in Ebony. You can see other colors here. I like to Google the color to find finished pieces photographed in different lights. Remember that different woods will each take on stains a little differently, so just be flexible!
- Minwax polyurethane semi-gloss finish
- A piece of #220 grit sandpaper
- Tack cloth, a rag, and a disposable brush. You want a cheap brush for oil-based paints so you can throw them out when you’re done. You don’t want that stuff going down the drain.
- Miscellaneous: Drop cloth for work area, screw driver to open cans and stir, disposable gloves
A note on sanding wood before staining
The piece of wood I’m working with for this tutorial is unfinished. That means that it has no primer, paint, or finish of any kind on it. It’s okay if you want to stain a finished piece of wood…you just have to sand everything off first! Wood must be unfinished to be stained. If it isn’t unfinished, the stain won’t be able to soak into the wood.
You can use an electric sander, a handle hand sander, or even just a piece of sand paper. Sandpaper comes in grades (or grits). The higher the number, the finer the grade. Medium grits are typically best for removing finishes (#120 and #150), and very fine grits (like#220) are used to buff a piece of wood before sanding or between finish coats.
As you’re sanding the finish off, use a dry paint brush to brush the dust off every few minutes to monitor your progress. When you’ve removed the finish completely, brush off the bulk of the dust and wipe down the entire piece using tack cloth.
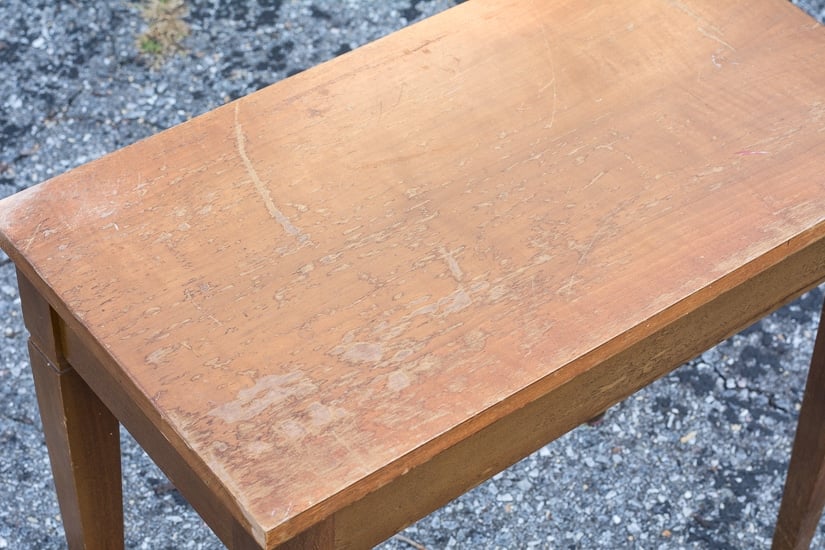
Below are before and after photos of a bench I used an electric sander to sand the finish off of. In the second photo, I had completely finished sanding down the top, but I only gave a light sand to the body since I wasn’t staining that part–just painting it.

Steps to stain and seal wood
(Remember to wear a mask and eye protection while sanding and working with wood, and wear an appropriate mask while working with paints, stains, and finishes. Follow the directions and warnings from your particular brand. Do not use any tools without proper training, precautions, and supervision.)
1. Prep the wood
If you didn’t have to strip a finish off of your piece, go ahead and use a fine grit (like#220) sandpaper to polish your piece. Break down the edges for a more finished look. Then, using tack cloth, wipe down the piece to remove any small pieces of dust.
2. Apply wood stain
Open and stir your stain. Then, beginning on one side of the piece, start painting the stain on in the direction of the wood grain. You don’t need to use too much; a little bit goes a long way. If you put a little bit too much on, just gently brush it out over the unstained areas. (Note: I do not use pre-stain wood conditioner, but if you’d like to, here is one that has good reviews.)
Watch for side drips. Make sure you apply your stain in a well-ventilated area. You don’t want to be trapped in a room with this stuff, especially if you’re using an oil-based stain. I usually stain in the garage with a fan on or outdoors if it’s nice enough.
When you’ve finished painting the stain on, let it sit for 5–10 minutes to soak in, then grab your rag and gently wipe the piece down. This removes any excess stain. Add a second coat if you’d like the color to deepen a bit more. After this, let the stain dry according to the instructions on the can.


Tip: If you’re working with a smaller piece, you don’t need to use a brush. Just dip the rag in the stain and wipe it on the piece.
After staining wood do you have to seal it?
Yes! Wood stain is beautiful, but it’s only half the job. I mean, unless you’re using a two-in-one stain and sealer, which I don’t trust. Call me old fashioned. It’s like two-in-one shampoo and conditioner. Sounds like it will save time, but I question the efficacy. I may be totally wrong, but I am not a fan of two-in-ones 🙂
After staining wood, you have to seal if because the wood remains a porous surface. If you’re just using a regular stain, it can provide some degree of protection compared to totally unfinished wood. But it isn’t good enough. If you set a drink on a piece of wood that you’ve stained by not sealed, for example, it’s going to leave water rings that you can’t wipe out.
This is why I always recommend using some sort of sealing or finishing method on your stained DIY pieces. A good finish allows you to easily wipe down a piece to keep it looking brand new. Oh—and sealers and finishes often give your piece a nice polished look, too. Oil-based sealers and finished can bring out some beautiful colors and wood grain patterns, too.

3. Seal or “finish” the stained wood
After the stain has dried, it’s time for the first finishing coat. There are a few ways to seal or finish wood after staining it.
- I have an article about the differences between polycrylic and polyurethane, as well as how I decided which one to use on my big wooden desk top.
- I don’t ever use wax, but it’s a common method—check out Rockler’s post for more.
- I also don’t use wood conditioners, but if you want to check out more on that topic, you can mosey over to Minwax’s website.
I am using polyurethane for this tutorial. To get started, open and stir your polyurethane, then brush a coat on. It will bubble as you brush it on. That’s okay, just slowly brush over the bubbles to smooth them out. Many of the bubbles will also pop as the finish dries. Watch for side drips!
Oil-based polyurethanes tend to be much trickier as far as dripping does. Monitor the sides of your project and the undersides for about 15 or so minutes for drips. Even if you catch the first round of drips, more might sneak in as the urethane settles. And remember—oil-based stuff STINKS! Work in a well-ventilated area and wear a mask.
Water-based polyurethanes and polycrylics have much less of a stench. They also don’t drip as badly in my experience, and they are forgiving to apply. And they dry much, much faster, decreasing the required time between coats. However, water-based urethanes seem to require more coats for durability, and if you’re looking for a deep, high-gloss finish, oil-based is the best bet.

4. Sand and add more coats as necessary
When the first coat of polyurethane dries, grab the #220 grit or higher sandpaper and very lightly do a quick sand over the entire piece. This will smooth out the surface and get rid of the bubbles that didn’t pop when the first coat was drying. Use your fingers to feel the surface before and after sanding to see the difference.
When you’re done sanding, wipe down the piece with your tack cloth and apply a second coat of polyurethane. I often do three coats of oil-based urethane, 4+ of water-based urethane, especially on pieces for my daughter. She’s a wrecking ball. You can do more coats if you’d like. Just remember to sand lightly between coats.


And that’s it!
Isn’t it pretty? It’s such a nice way to upgrade a low-end piece of furniture. I put this on my Ikea Rast dresser to upgrade it. Make sure to let the finish cure completely based on your finish’s instructions before you use it.

Pin my beginner tutorial for staining wood!


Great stain color! Those bubbles drive me insane 😉 Hope to see it on your Ikea dresser
Thank you, Angie!! Me too. But the result in the end is worth it!
Couple of suggestions.
Some hardwoods will “close up” and hardly except your stain if you sand all the way to 220 grit. With those you would be better off to stop at 120 or 150. The polyurethane with smooth it out further as you apply additional coats.
Some soft woods, such as the less expensive pine you buy at the box stores can become blotchy after you stain them. To avoid or lessen this effect you can use a wood conditioner.
And yes, staining is a fantastic way to add character and warmth to your project!
Can I use same process from going from a darker stain to a white stain. Have a piece I want to to change to a white washed look..your piece is beautiful!!
Yes! Just make sure the existing finish is totally sanded down to the bare wood!