How to Propagate Prickly Pear Cactus
Wondering how to propagate prickly pear cactus pads? My detailed article outlines everything you need to know!
How to propagate prickly pear cactus
Prickly pear cactus, or Opuntia, is a gorgeous, classic cactus that can grow in a variety of climates and conditions. (See an article about prickly pear cactus care!) I live right on the border of USDA grow zones 6a and 7a where we get all four seasons—and there are prickly pears that are perennials here!
They are a hardy and easy-to-grow cactus, so I’m excited to share my experience propagating them. Years ago, I ordered my first prickly pear cactus pads from the Etsy shop Texas Prickly Pears (affiliate link) for a reasonable price.
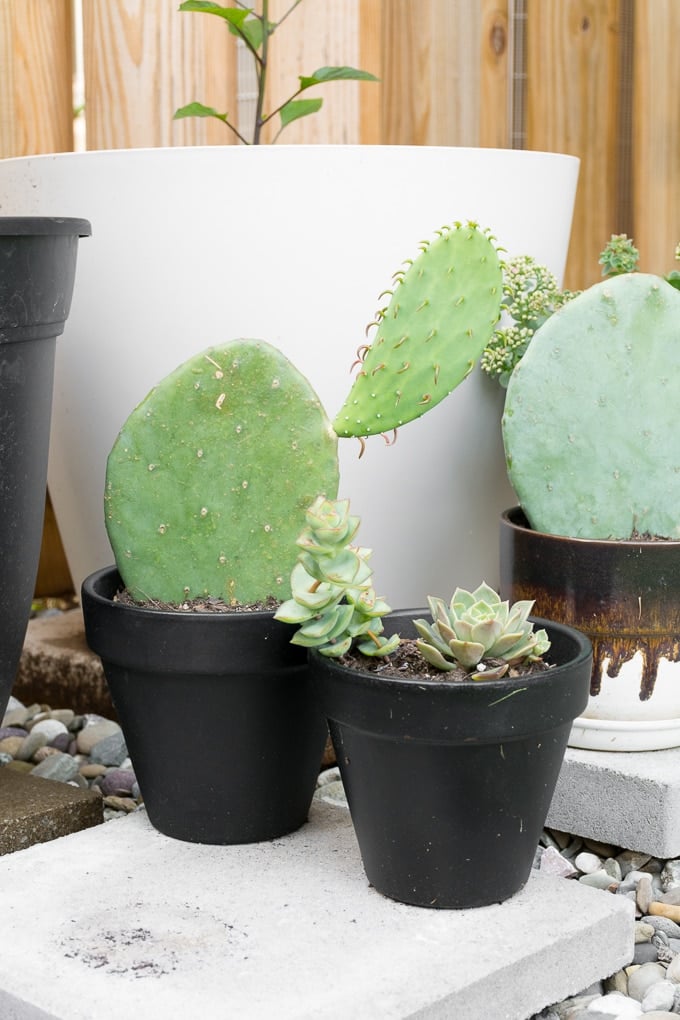
I settled on three large pads and one jumbo pad, giving one to my dad. But if you can find a source locally, that would be cheaper. My neighbors now basically have a field of them on the side of their house!

In a hurry? Here’s an overview of the steps…
- To propagate a prickly pear cactus from a cutting, break a pad off a plant; wear thick gardening gloves to avoid the sharp barbs.
- Allow the pad’s cut end to callus over for a few days; this can help prevent the cutting from taking in too much water, which can lead to rot.
- Plant the pad upright in well-draining succulent or cactus soil; pack in just enough soil to ensure the pad can stand up on its own and water deeply.
- Avoid watering again until until the soil has dried out; these plants are very drought-tolerant.
- After a few weeks, gently tug on the pad; if you are met with resistance—or if you notice new growth from the pad—your propagation is a success!
Propagation steps
Here are the steps you take to propagate a prickly pear cactus pad. I have propagated many pads over the years and have had a 100% success rate.
1. Take a cutting
To propagate a prickly pear cactus from a cutting, first gently break a pad off of the main plant. Try to get as clean of a separation as you can.
Be careful when taking the cutting. Some varieties of prickly pear have nasty barbs (spikes) on them, while some aren’t so bar. Use thick gardening or work gloves.

2. Let the cutting callus over
After taking a cutting allow your pad’s cut end to dry and harden over. It might turn a bit brown while this happens, but don’t worry. Based on my experience, letting the pads dry for a few days is sufficient.
For the pads I ordered online, I planted them soon after I got them because they had been in transit for several days and had already hardened off.
Why do the cut ends need to callus over?
Cacti in general do not need a lot of water because they are drought tolerant and store their own water supply. Too much water will kill them. When you take a fresh cutting, the area you break off is like a main line into the plant.
The callus provides a protective layer and prevents the cutting from taking in too much water. This is the same process for propagating other similar plants like succulents and snake plants. (See my articles on how to propagate succulents from leaves and cuttings and my guide on propagating snake plants.)
It you take a cactus cutting and immediately plant it in soil, it might be fine if you withhold water for a few days. However, your best chance for a successful prickly pear propagation is to let the pads callus over for at least a few days.
Here’s about what it will look like as the ends callus over.

3. Plant the cutting in soil
After the cuttings have callused over, it’s time to plant. You can dip the cut ends of the pads into rooting hormone before you plant them if you have it handy, but it certainly isn’t a requirement.
Simply plant the cuttings upright in well-draining succulent/cactus soil. I like to plant them just deep enough so I can pack the soil in lightly and get the pad to stand up on its own.
You can use any store-bought succulent or cactus soil. Or you can make your own—see my easy DIY succulent soil recipe for tips on that.
A soil designed for succulents or cacti will have additives in it like sand, rocks, or perlite to facilitate drainage and prevent too much water retention.
I water my cuttings as soon as I plant them—deeply, so that I soak the soil and the excess water drains from the pot’s drainage holes. Then I do not water again until at least the top half of soil has dried out.
After a few weeks, you should be able to very gently tug on the cuttings. If you are met with resistance, congratulations! Your cutting is beginning to root.
Once the roots are established, make sure you back off watering and wait until the soil dries out before watering again. Overwatering is sure to kill a cactus!

Monitoring for new growth
As you care for new plant, make sure to monitor for the best sign of a successful propagation—new growth. About 3-4 months after planting these cuttings, I noticed a baby sprouting! Yay!
This particular plant went through the rooting and propagation process in the winter. When I have propagated prickly pear cactus pads in the spring and summer, they grow faster.
If your plant begins getting too big for whatever planter you put your initial pads in, you can transplant to a larger pot. Transplanting prickly pears is easy; just don’t disturb the roots too much, and add some fresh cactus soil. And watch out for barbs!

Moving my prickly pears outdoors
After a few months of rooting and growing indoors, it was spring at my house. So I decided to set them outside, and they are drinking it up! Out of these three pads, two have major growth on them.
Here are some pictures of the growth. I’m letting the rain water these and avoiding watering them while I am watering my other plants.
That seems to be all they need for now. Love plants that thrive on neglect!

Other questions about prickly pear proapgation
Although prickly pear propagation is pretty easy and straightforward, there are a few other things to keep in mind. Have a look through for more.
1. Can I propagate a broken piece of cactus?
Yes, you can! As long as the piece that broke off is not too damaged. There’s no harm in trying for sure. It’s pretty much the exact same process.
I do this often with succulent propagation. Leaf breaks off? I’ll save it and propagate it! In fact, if you aren’t too wedded to the pads you’re trying to root, you can probably just pop it right in the same pot with the plant it fell off of. See if nature does its thing.
2. How fast do prickly pear cactus grow?
Speaking from experience with my prickly pears in pots both indoors and outdoors, they grow based on their conditions. During the winter, they grow much slower than they do when they are soaking up the sun and warm temperatures in the summer.

3. Will a cactus root in water?
Yes, you can root cactus in water or soil. However, water encourages the creation of a different kind of roots, and water does not have nutrients.
Since prickly pear roots so easily in soil, I recommend skipping water rooting completely and going straight to soil. It also roots faster in soil and you won’t have to deal with transferring it.
In conclusion…
Propagating prickly pear cactus pads is a rewarding experience that can help you bring the resilience and beauty of the desert right into your living room. I hope you found this tutorial helpful and enjoy the process of growing your own prickly pear!
Pin this!


this is so cool! and also a tongue twister… peter piper picked a peck of prickly pear pads to propagate.
I found all your info very interesting and helpful. My question is I brought one from Florida and above the pad closest to the soil has turned grey, why? my keeps growing taller and gets new pads that do not have the grey. what am I doing wrong? I live in southwest Minnesota.
Hi Marcella! Without seeing a photo, it’s possible that the bottom pad is just developing a strong “woody” base to stabilize the plants. I find this happens with many types of cacti. If it’s growing well and the darker spots aren’t mushy, I wouldn’t worry!