Monstera Deliciosa Cutting Propagation
How to propagate monstera deliciosa from a cutting
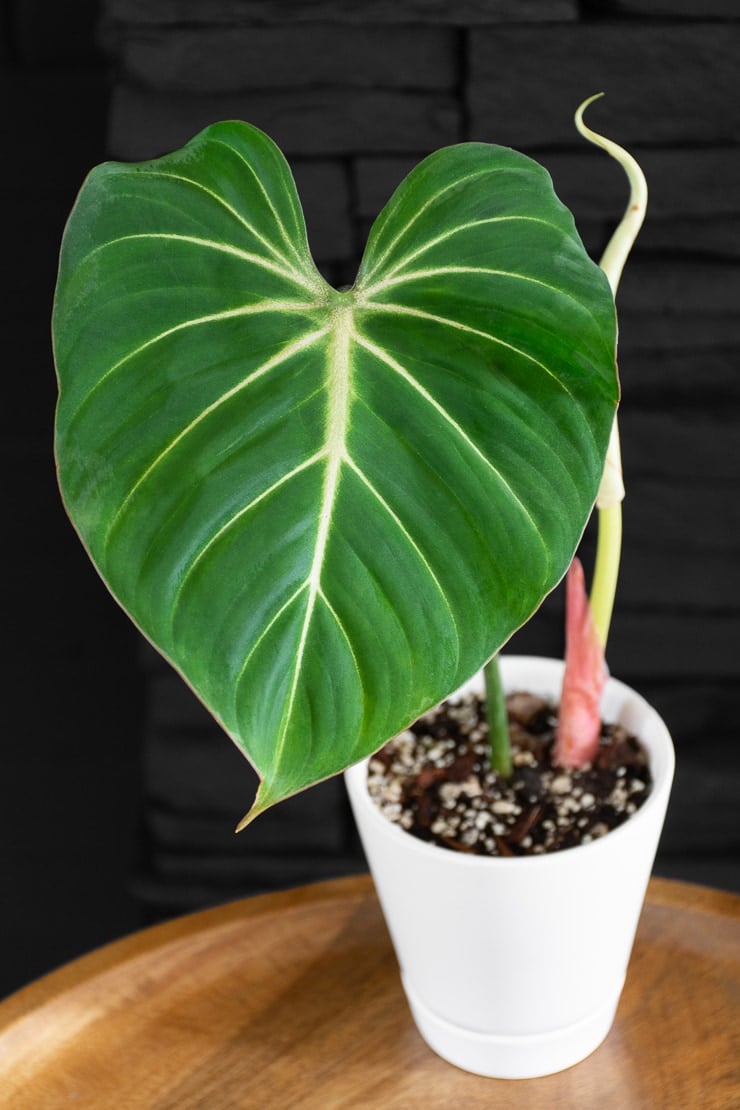
Monstera deliciosa plants are beautiful and easy. They can bring a lush tropical vibe to even the most suburban of living rooms (I would know). And while the monstera deliciosa—also called a Swiss cheese plant—is very much a trendy plant these days, it’s also a timeless plant!
It was around before it became famous on Instagram, and it will be around when the masses move on. Why? Because it is just stunning, especially when its leaves reach maturity. And in addition to being easy to care for, it’s also pretty easy to propagate. So let’s chat about that.

-OVERVIEW-
- Take a cutting with 2-3 small leaves that includes a growth point; aerial roots are beneficial but not essential.
- Water: Put the cutting in water and refresh weekly; when roots develop, transfer to soil and keep moist.
- Moss: Mix lightly damp sphagnum moss and perlite; nestle the cutting in the mixture and keep humidity high with a plastic bag.
- LECA: Add a cutting to a jar with LECA balls; add water to the bottom, coming up to just below the cutting; refresh as necessary.
- Soil: Plant cutting in well-draining soil and keep moist.
- Air layering: Wrap moist sphagnum moss around a node and secure with plastic wrap; keep moist.
- Division: Can be done only if there are multiple plants in a pot; take the plant out and separate at the root level, planting separately.

Want more? Check out guide about why Your Monstera Leaves Might be Turning Yellow, my tips for Monstera Peru Care, and my guide for Monstera Adansonii Propagation!
Taking a good cutting
The first step to a good propagation is taking a good cutting. The best time to propagate monstera deliciosa cuttings is during its active growing season—spring and summer. When taking your cutting, you can’t simply snip off a stem from the plant and give it a go, either.
It won’t develop any roots if it doesn’t have any growth points. Growth points are nodes on a plant stem where leaves, buds, or branches grow. They are typically located at regular intervals along the stem. If you look at a stem on your plant, you’ll see what I mean. Each new leaf is a growth point.
You can take a cutting with a few small leaves—generally 2-3 is good. Make sure to cut just below a growth point/node. You can also take a cutting with more leaves and remove the bottom 1-2 leaves to expose growth points.
I recommend using smaller plants for propagation. If the leaves on your plant are large and mature, it will take it much longer to root or won’t root at all. Below is an example of one smaller cutting. And the second pic shows two areas you could cut on a monstera.


Aerial roots
You don’t need an aerial root to propagate a monstera deliciosa. Aerial roots are the chunky brown things that grow from your monstera deliciosa and stay above the soil surface. They help the plant climb things when it is mature.
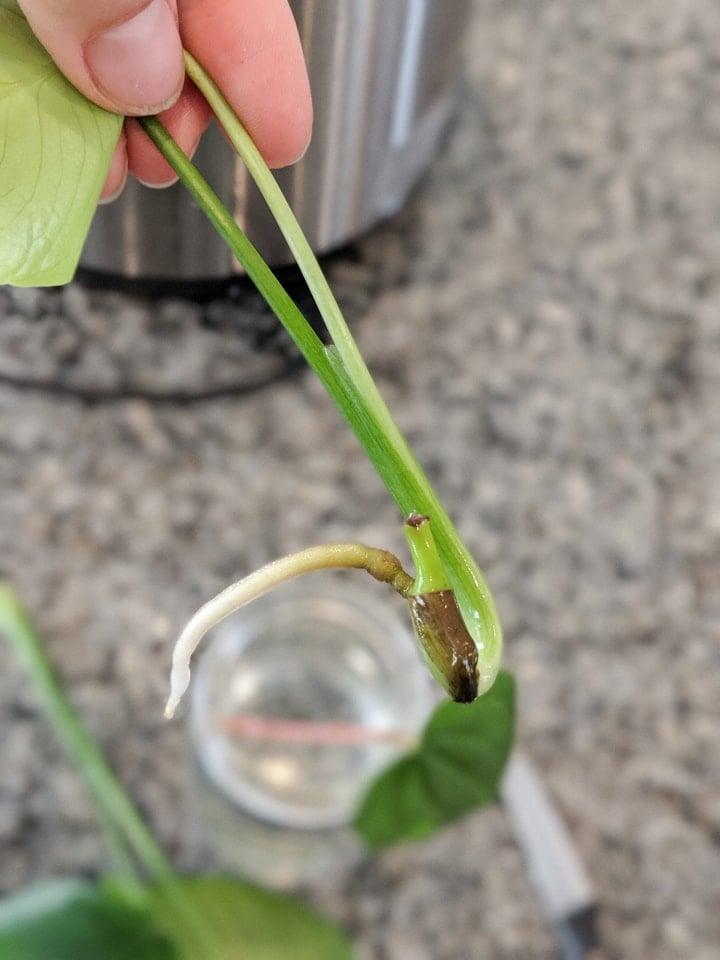
However, you can take a cutting with an aerial root, and it will help with the rooting process. If your plant already has little aerial root nubs sprouting from the cutting, this is a perfectly fine place to snip! Below is an example of a great cutting with the start of an aerial root included.

Method #1: Rooting in water
Let’s chat about water propagation first as our first method. Water propagation is when you root a plant in water. Then, when the roots are several inches long, you can move the plant to soil. It’s also a good method for beginners because you don’t have to buy anything else.
I have propagated many monstera deliciosa cuttings in water, and it works great! I don’t typically favor water propping for plants, but I break that rule for easy plants like this one. I pop cuttings into one of my cool little thrifted glass containers and set them in a windowsill or on a table. It looks really nice—like fresh cut flowers.
Step 1: Add cutting to water
When you’re ready to give it a go, pop a cutting in a container with water. Refresh the water every week or so or whenever you notice it’s becoming cloudy. Also make sure your little experiment is getting a good amount of indirect sunlight.

Step 2: Monitor root development
Monitor the growth points for root development. It will generally take 2 to 4 weeks to see roots sprouting depending on the growing conditions. I like to wait until the water roots are several inches long before transplanting the cutting into soil.

Step 3: Convert to soil
When it’s time, I simply plant the cutting in a small container with drainage holes and fresh, well-draining soil. Then keep the soil lightly moist for a few weeks while the plant is getting used to its new home.
Don’t be alarmed if your plant exhibits a bit of transplant shock by wilting. When you propagate a plant in water, it grows a different type of root. Have you ever wondered why overwatering a plant will lead to root rot, but that same plant can live and grow just fine in water?
Water roots are typically white or translucent, and they are thin and fibrous. These roots are adapted to absorb oxygen from the air that dissolved in the water. They are less efficient at absorbing water and nutrients than soil roots are.
Soil roots are typically thicker and more fibrous than water roots. They are adapted to absorb water and nutrients from the soil, and they also anchor the plant in the ground. Soil roots are typically more efficient at absorbing water and nutrients.
Method #2: Rooting in moss
Propagating monstera cuttings in moss is another option. Using sphagnum moss as your main medium helps your plant develop stronger roots than it would in water.
That’s because you just keep the moss moist—the cuttings aren’t completely submerged in water. There is much more room for oxygen flow to the roots, so they suffer less shock when transplanting to soil.
Step 1: Add cutting to moss mixture
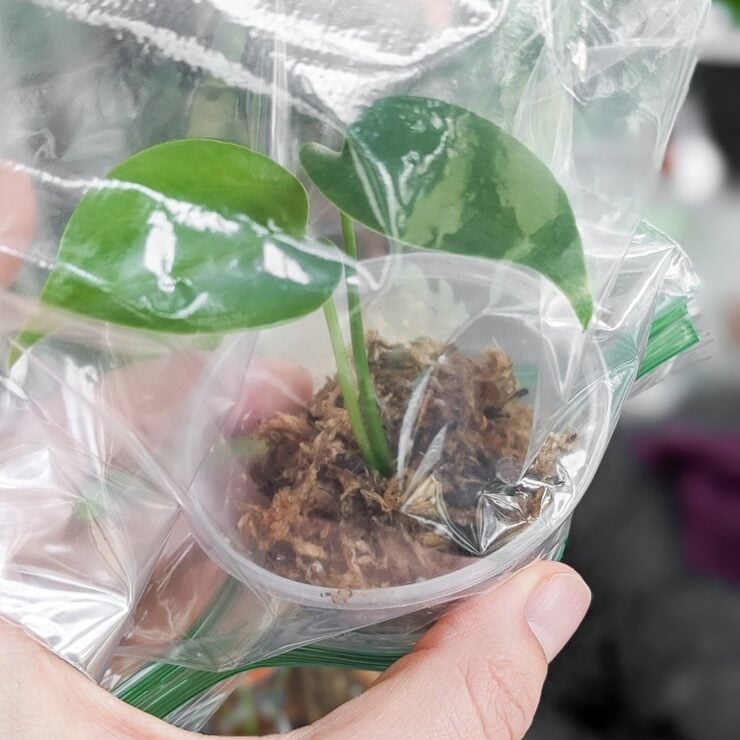
You’ll need a small container, some moss, some chunky perlite, and something like a plastic baggie or clear propagation box. That’s because the moss dries out quickly, and keeping it in an enclosed environment helps to keep humidity high.
Dampen the moss and squeeze out all of the excess water. Mix in some chunky perlite, then nest the cutting inside this mixture. Put a plastic baggie over top or add to your prop box.


Step 2: Keep moss moist
Keep the moss moist and air the plant out by removing the baggie every few days. But make sure you don’t keep the moss too wet—this will lead to stem rot, which will sabotage your propagation. I have definitely had this happen with my monstera props.
Step 3: Transition to soil
Once you have roots that are several inches long, transfer to fresh well-draining soil in a pot. Water the plant thoroughly and don’t water again until the top few inches of soil dry out.
With this method, you should notice that the roots look stronger and not as wispy as water roots. Because of this, the plant will probably suffer less transplant shock.
Method #3: Rooting in LECA
I love propagating in LECA because I find it provides all the benefits of water rooting—meaning I have an easy visual on the roots while they grow. But it also provides the benefits of moss rooting, meaning more oxygen flow and stronger root development. If you’re new to LECA, check out my tutorial about How to propagate cuttings in LECA.

Step 1: Add cutting to LECA
All you need for this method is a clear glass container—I like mason jars for LECA—and some LECA! LECA is much more widely available than it used to be, but my favorite source remains Ikea because you can get a big bag for cheap!
And LECA is reusable forever as long as you sanitize it by boiling it between uses. I haven’t had to buy anymore LECA since 2018. If you aren’t close to an IKEA, you can of course order a bag online.
First put about an inch or two of LECA into the bottom of a mason jar. Then put the cutting on top of that LECA and fill in around it to stabilize in place. Add water so that it fills up that bottom 1-2 inches of LECA. The water should come just up to the bottom of the cutting.

Step 2: Monitor & refresh water
Refresh the water every week or so as it evaporates. After several weeks, you’ll notice roots beginning to grow around the LECA. You might even see them through the glass if they are getting long enough. You can now plant in well-draining soil, give the plant a thorough watering, and call it a day!

Step 3: Transition to soil
Transfer the cutting to soil when the roots are several inches long. Carefully remove any LECA balls that might be stuck to the roots. Water the plant thoroughly and don’t water again until the top few inches of soil dry out.
Method #4: Rooting in soil
If you’d like to skip all of the water rooting, moss rooting, or LECA rooting steps, you can choose to propagate your monstera cuttings directly in soil. I personally loathe this method because I can’t see what is going on under the surface. I’m a control freak!
Step 1: Plant in soil
Grab a small pot and some well-draining soil. You can use a rooting hormone powder or something like Clone-X rooting gel, but this isn’t absolutely necessary.
Plant the cutting and water when the top few inches of soil dries out. Keep the plant in bright, indirect light. If you can keep it in a hot, humid area with bright, indirect light, you’ll be cookin!

Step 2: Monitor & have patience
Propagating in soil does take a lot more patience. That’s because you can’t see any of the root development as it’s happening—the suspense! Is it working? Well, you’ll know when new growth sprouts!
A few weeks after the first photo below was taken, I cut this plant down to about 1 inch above the soil line as an experiment. I continued to water and wait, giving it plenty of bright, indirect light.
After a few weeks or so, a new sprout emerged, and I was SO excited! Below is a documentation of its daily progress over the next week. It really did sprout quickly, and the day the new leaf unwound was so exciting.


Method #5: Rooting via air layering
This is a neat method that I wrote about in my guide on propagating rubber plants from cuttings. It’s a pretty simple approach. Here’s a basic overview of how to use the air layering technique:
- Find the spot you’d take a cutting from if you were using the previous propagation methods, but don’t cut it. Make a slice where you’d cut it, below a node.
- Wrap this whole area—including the cut, the node, and the stem around it—with moist sphagnum moss and plastic wrap. Unwrap and remoisten the moss when it dries.
- After a few months, roots will begin to grow. Cut the stem off at the original cut you made and plant in soil!

Method #6: Through divison
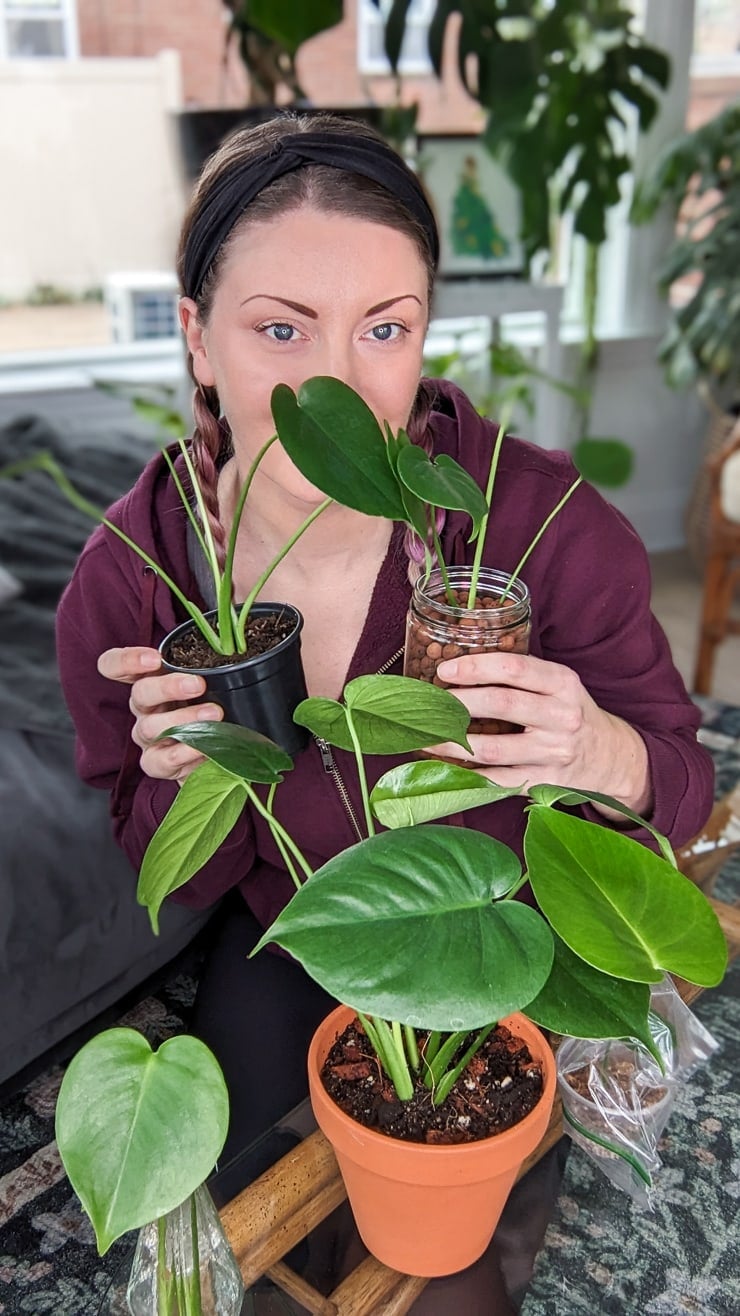
The last method I’ll outline is propagating by division. You can separate monstera deliciosa babies from a mother plant easily. This isn’t propagation so much as it is just splitting up a plant…but it’s a great way to make more plants quickly!
When you buy a monstera deliciosa plant at a big box store (and many times this is the case in nurseries as well), there are usually a TON of plants in there. Here’s a look. This was a clearance monstera I picked up at Lowe’s for $6! I’d already cut off all of the dead and ugly foliage when I snapped this pic.

Step 1: Remove plant from pot
The first thing I did was take the plant out of the pot. Then, with my gardening gloves on, I started gently pulling the soil off the root structure so I could untangle things.
Don’t worry if you rip some roots off. As long as some of the root structure remains for each plant, it will bounce back. I also find it’s easy to look for where plants separate at the surface of the soil.
Step 2: Separate and plant in pots
One I’d located a plant, I gently pulled the base of the stem away from the main root ball. Make sure to pull at the roots, too, to make sure you take some of them with you.
I think I harvested something like 13 plants from this one $6 monstera. Amazing isn’t it? I kept one for myself and re-homed the others. So rewarding to save them all from clearance shelf death!


Addressing rot
Before I wrap up, I want to address one issue that can affect all propagations. If you notice an area on your cutting turning black—usually either near the cut point or on the stem—it’s rotting. Below is an example of a Monstera Thai Constellation plant I had that suffered some rot.
Generally rot is a result of too much moisture and too little air circulation, so keep that in mind no matter what method you choose. Letting your cutting callus over for 1-2 days before adding it to your medium can definitely help prevent this.
Not all propagations are successful. All you can do is try your best and figure out which method works for you and the plant you’re working on. Good luck!