How to Propagate Spider Plants
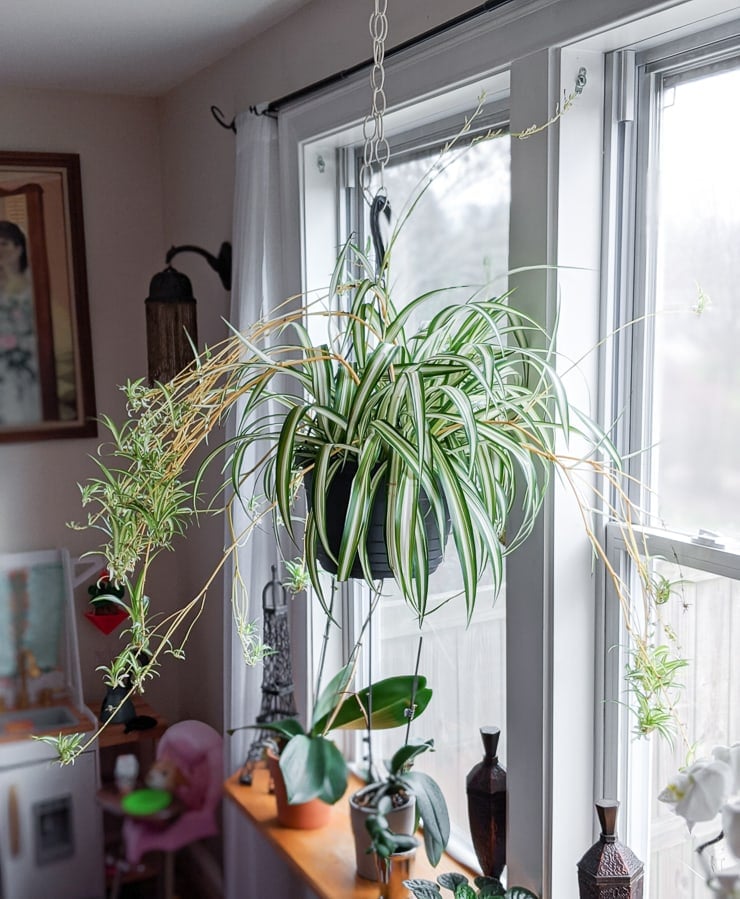
I have to admit that spider plants (Chlorophytum comosum) aren’t my favorite. I have had some bad luck with them many years ago despite being really easy to care for. But I wanted to give it another shot after seeing my mom’s stunning spider plant FULL of flowers and babies.
It’s throwing new shoots and tiny babies out every which way, giving a kind of crazy vibe. I can dig that. So instead of buying a new spider plant, I decided to propagate spider plant babies from my mom’s plant.
Overview of the steps
- Encourage your spider plant to grow babies by providing bright indirect sunlight, warmth, and adequate water.
- The three main propagation methods for spider plant babies are cutting a plantlet, or “baby,” and planting it directly in soil, planting in soil while still attached to the mother plant, and rooting in water.
- Water propagation is, in my opinion, the quickest and most rewarding technique for propagating spider plants; I like it for its simplicity.
- Snip a spider plantlet off of a stem, then fill a shallow container with water and set the spider plant cutting in the water with the roots submerged in the water.
- After several weeks, your cutting will sprout new roots; when they are several inches long, you can transplant the cutting to soil.
- Don’t want to chop all of the spider plant babies off to propagate? Leaving them on the parent plant is a totally viable option and will lead to a full, lush appearance.

Taking a cutting
The spider plant is a true propagation power house. I have extensive experience propagating plants, and I can say with 100% certainly that the spider plant is one of the easiest! It’s a lot like Pilea Peperomioides Propagation and Snake Plant Propagation in that way. I say that because it literally propagates itself without you doing anything, sprouting offshoot plantlets left and right.
The spider plant babies that mother plants produce are basically new plants that you can pop off and work with. Or you can just leave the babies on the mother plant. If your plant is happy and thriving, the babies will mature and also create babies. This will lead to a crazy trailing look. My mom’s plant is surely headed that way!
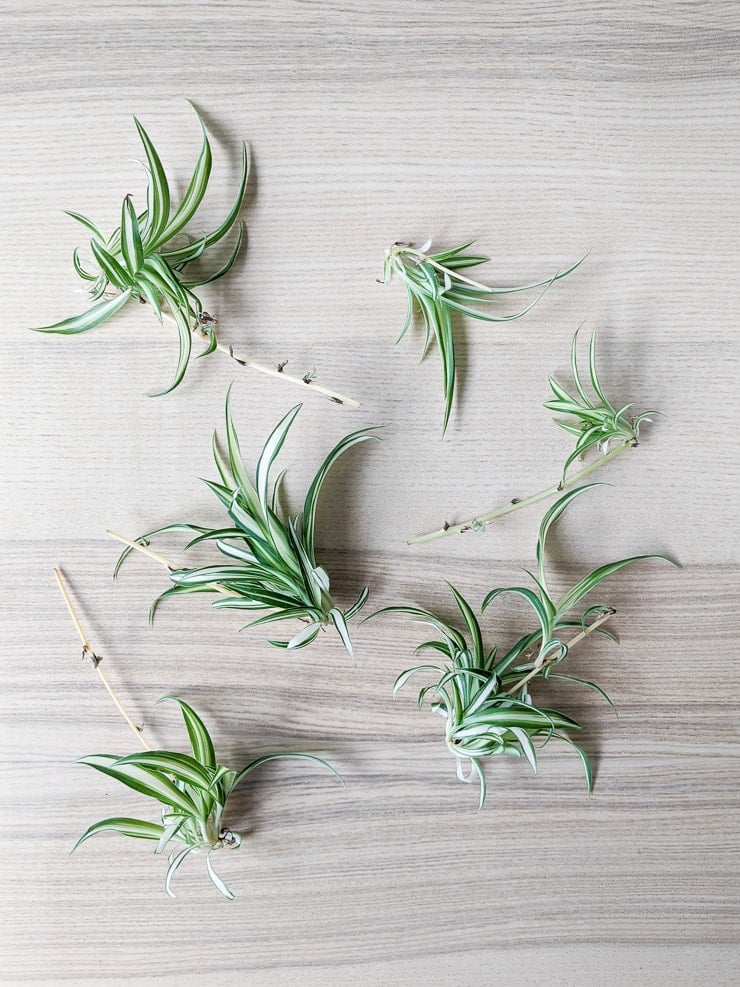
To take a baby off to propagate, first look for a plantlet that has little nubs on it. These are the beginnings of those beautiful new roots. They look like the picture below. Make sure you get at least one of these when removing your baby. You can also trim off the stem that the spider plantlet emerged from.


Water vs. soil
There are three main ways to propagate spider plant babies: by cutting them off and planting them alone in soil; by planting them in soil while they are still attached to the mother plant, severing them off of the mother plant later; and by rooting them in water.
I think water propagation is the most rewarding because the spider plant babies sprout new white roots so quickly in water. You can watch the roots develop quite a bit before planting the propagated babies and monitor the whole process. I am not necessarilly the biggest fan of water propagation for all plants, but plants like spider plants, pothos plants, and monstera deliciosa plants respond quite well to water rooting.
That said, if you want to skip the water step, you can plant your cutting immediately in soil. You’ll want to keep the soil moist to encourage root development, but you won’t be able to see what’s going on under the surface of the soil.

Propagating in water
Here are the steps to propagate spider plants in water. You’ll just need an existing spider plant, a clean knife or pair of scissors, and a container of water. Let’s get to it!
Step 1: Remove a spider plantlet
First remove a few spider plantlets and fill up a container with water. Since the tiny spider plants don’t have long stems like some other plant cuttings, I like to use a mason jar with water or a bowl of water.
Step 2: Grow roots
Next add your plants to a bit of water. You want the water to cover the root area only, not the entire plant. Set the plant and water in a spot with bright, indirect light. Check it every few days to monitor root growth, adding more water as necessary.
Make sure the roots remain covered in water throughout this process. I like my roots get nice and long over about 1 month in water. The length of time it takes for spider plant cuttings to root depends heavily on the conditions you’re growing the plant in. Warmer temperatures, plenty of bright, indirect light, and some extra humidity can help plants root.


Step 3: Plant the new spider plant
Once the roots are sufficiently established, you can plant the spider plant just as you would any other plant. I planted three rooted spider plant babies together in one pot so it wouldn’t look so piddly.
As for the soil, a good well-draining potting soil helps to ensure the roots don’t stay too wet. A soil mix labeled for indoor use is best. If you don’t have an indoor potting mix, lighten up your dirt by adding some coco coir or fine moss and perlite, sand, or both!
After you transfer the cutting to soil, it could take a few weeks for the water roots to transition to soil. Water roots are a bit different from soil roots, so keep the soil evenly moist as they adjust to their new home.
I recommend watering the plant slightly more than you would an established spider plant. You need a bit of extra moisture to help the roots develop. Once you can gently tug the plant and get some resistance, you know it has started to root. Back off watering.
Encouraging babies
But how can you get your spider plant to grow more spider plant babies? Giving it the right growing conditions is the first step. Spider plants enjoy bright indirect sunlight and warm temperatures.
Don’t give this plant too much direct light, though, as the leaves are prone to burning. While spider plants can tolerate low light levels, they won’t thrive and likely won’t flower or produce babies. Misting your plant with a spray bottle can also be helpful, especially if it gets a lot of light.
Aside from the right care conditions, keeping spider plants snug in their pots is a good way to encourage spider plant baby growth. Once you see the plant flower, you know you’re doing something right. It’s these small white flowers that turn into new spider plant babies (source, UW-Madison).
Wrapping up…
Propagating spider plants can be a rewarding foray into the plant propagation world, and water propagation is an easy way to get started. By following the steps in this guide, you’ll be on your way to building an army of spider plants!
Pin my tips!


Example of synchronicity, I looked at my very pregnant spider plant this a.m. and wondered if there was instruction in propogating a spider plant on your blog (which I recently discovered) and it showed up in my e mail this very day !!! thank you for your helpful log, you keep it interesting too.
I read your mind, Glenda!! Hopefully I can keep it up!