DIY Pine Cone Potpourri
How to make holiday potpourri with pine cones
My aunt recently sent me some amazing large pine cones from her yard. This shady package just showed up one day with a return address of “THE SHORE,” and since my aunt lives on the eastern shore of Maryland, I knew it had to be her. When I opened it and saw the pine cones, I definitely knew it was her!
I decided to use these giant pine cones for DIY scented pine cone potpourri. My plan was to make our main powder room smelled like Christmas exploded when all of our family was at our house using that one bathroom for my daughter’s first birthday party. 🙂


Supplies you’ll need
(Affiliate links below; read more about those here)
- Pine cones, large and small
- Dish soap and sink
- Baking pan, aluminum foil, oven, oven mits
- Gallon Ziploc bag
- Spray bottle and water
- Scents, I used a bit of some rosemary essential oil I had on hand, as well as some water I’d simmered a few cloves and cinnamon sticks in. (If you make stove top potpourri, it’s just like that!)
Step 1: Clean pine cones
First I soaked the pine cones in a hot dish soap solution. I just used my sink. Then I rinsed them off and shook off the excess water. Don’t freak out if they close up. It’s just because they’re wet, and it’s totally normal.
You could probably skip this step and kill any nasties in the oven. I chose to do both because my pine cones looked like they needed it.
Step 2: Dry out pine cones
Next I lined a baking sheet with aluminum foil and baked the pine cones at 200 degrees for about an hour, checking on them every 15 minutes. The baking time depends heavily on the size of the pine cone and if they’re wet. You’ll know they are drying out because they will pop back open as they dry.


Step 3: Pull pine cones apart
I noticed that some of the pine cone scales that had dried first, mostly near the tops of the pine cones, were getting a bit brittle and falling off on their own. I just picked off the rest of the dried scales.
After I’d finished this, I laid them out in a single layer on a towel for a day or so to continue drying. The last thing I wanted was any moisture trapped in there to create mold. The cats loved knocking them off the table and batting them around.—very fun.

Step 4: Spray with a scent
Once everything was dry, I grabbed some smaller pine cones that were already ready to go and laid them out as well. Then I filled a spray bottle with a clove and cinnamon solution I’d made by simmering whole cloves and cinnamon sticks on the stove in some water.
I also added a few drops of rosemary essential oil I had. I misted the pieces so they’d grab the scent…and also decided to sprinkle some cinnamon and clove powder on as well for good measure.
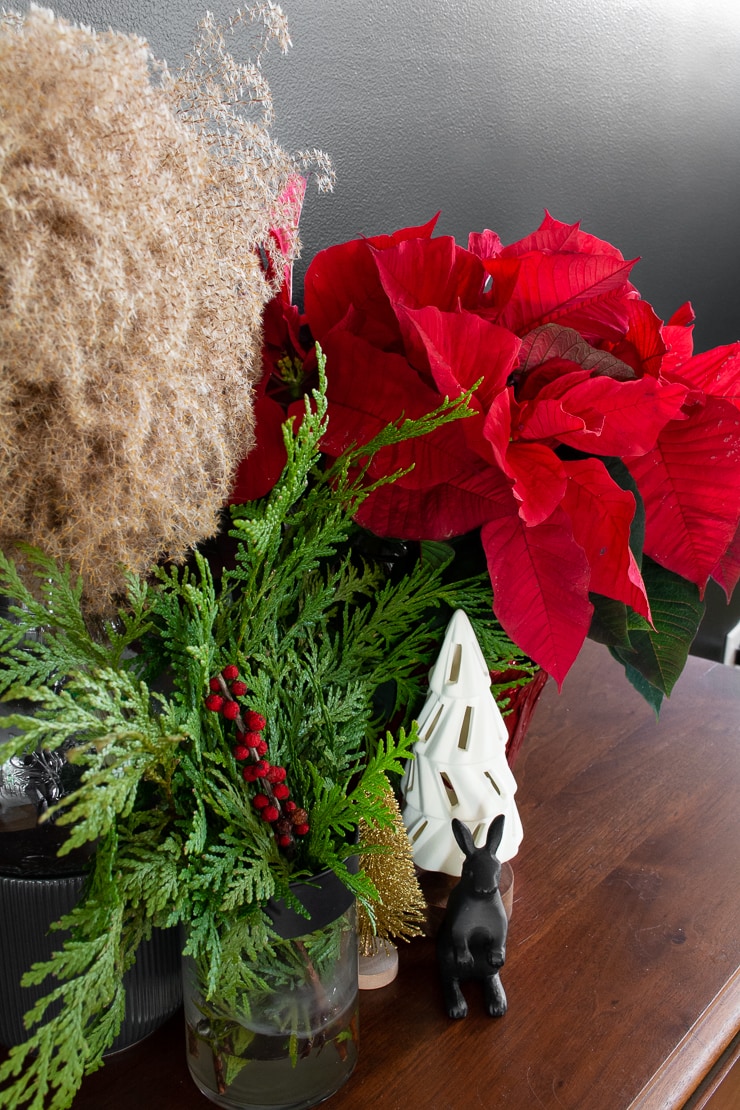
Then I put them in gallon bags and let them sit overnight. The next morning, I opened the bags and dumped the contents into a bowl, added some pine sprigs and some dehydrated orange slices I had from my DIY stovetop potpourri ornaments and called it a day.
The scented pine cone potpourri smells lovely, especially in the little powder room. I think the small space amplifies the scent—plus it looks like lovely seasonal decor. If the smell starts dying out, I’ll just spray them again.


Pin my tips!