3 Free Indoor Cat House Laser Files
Want to make a cozy corner for your kitties? Grab my 3 totally free indoor cat house laser files today! This post was sponsored by xTool.
Using xTool’s P2 CO2 laser machine to make indoor cat houses!
Today I’m working with xTool to share some free indoor cat house laser files! I have been dying to make some larger projects. The xTool P2 CO2 laser machine is fantastic for these houses because of its power and large working area.
For more on this machine, check out My xTool P2 CO2 Laser Cutter Review. I love the P2 and have been using it like crazy since getting it. I recently made some Test Tube Propagation stands and also have a post with 16 Free Houseplant Trellis SVG Files.
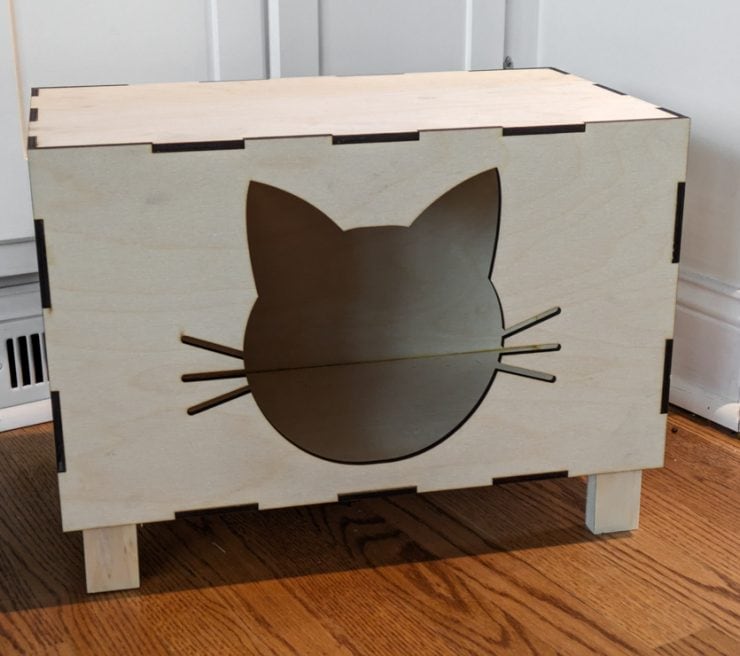
I’ll show you a peek at some of the houses below, then we’ll jump into supplies and how I made these houses. Enjoy!


Here are the supplies I used:
- xTool P2 CO2 laser machine
- 6mm (1/4″) baltic birch plywood
- SVG files for the house of your choice (download at the end of this post!)
- Wood glue and clamps
- Orbital sander and 220-grit sandpaper
- Finish of your choice
- Optional: 1×2 wood for the legs and a nail gun
And here’s a quick tutorial for my indoor cat house laser files!
Always take the proper precautions and safety measures before working with any tools or materials. Wear safety equipment and work with a professional to complete projects when necessary. Read my full terms of use and disclosure for more. Happy making and stay safe!
Step 1. Cut the pieces
After you download the .SVG files and add them to your canvas in xTool Creative Space, make sure you don’t re-size them. They are specifically designed to be cut out of 6mm (1/4″) material. If you make the pieces larger or smaller, it will mess up the finger joint size.
I have a number of xTool machines, but I chose the P2 for this project for a few reasons:
- The P2’s larger workspace of 600mm by 308mm (23.6 by 12.1 inches) allowed me to make larger houses for bigger cats or multiple cats.
- The P2 cuts 6mm (1/4″) thick wood quickly and beautifully, meaning I would get all of the pieces cut for these different houses in less time.
For these pieces, I used the settings 100 power, 7 speed, 1 pass. I always try to check to make sure the cuts have made it all the way through before moving anything. If I need another pass, I do another quick pass.


Step 2. Assemble the cat house
To assemble the walls, I used wood glue and clamps. Clamps aren’t entirely necessary, but they sure do make it a lot easier. It also helps to ensure a firm bond as the glue dried.
I put the wood glue along the inside of the finger joints. Then, when I pressed the pieces together, I ran my finger along the inside of the pieces to create a line of glue. Kind of like you’d do with caulk.
The P2 laser machine’s ability to cut extremely precise pieces means that all of my finger joints went together beautifully. I had no issues—but, remember, don’t resize the files in xTool’s Creative Space! It will throw off the finger joint sizing.
A note on the cat house with a slatted front design—you’ll need to use a very strong glue if you want to add the slatted front. I did a version with and without the slats. I ended up using a stronger construction adhesive for the slats because I was thinking my fat cat would bust right through them.


Step 3. Add legs (optional)
The cut files I am including do not include legs. They only include the cat house boxes. You may choose to add legs to your houses. I used several pieces of 1×2 pine lumber to cut out small legs.
Then, before I attached the top of each house, I glued the legs in place. After the glue set up (about 30 minutes or so), I went in with my finish nailer and nailed the legs into place for additional stability. Then I glued on the top of the house 🙂
Step 4: Sand and finish the house
This step will depend on the quality of the wood you’re using. I also wanted to sand off some of the wood glue that had oozed out from the joints. So I brought my houses outside and gave them a quick sanding with 220-grit sandpaper.
Then I wiped them down and stained and painted them. I did a natural stain on one house and a darker stain on others. On the one with a slatted front, I painted the slats and the legs. And I went ahead and painted the inside of the houses black, too. I chose a satin polyurethane to finish off the houses.
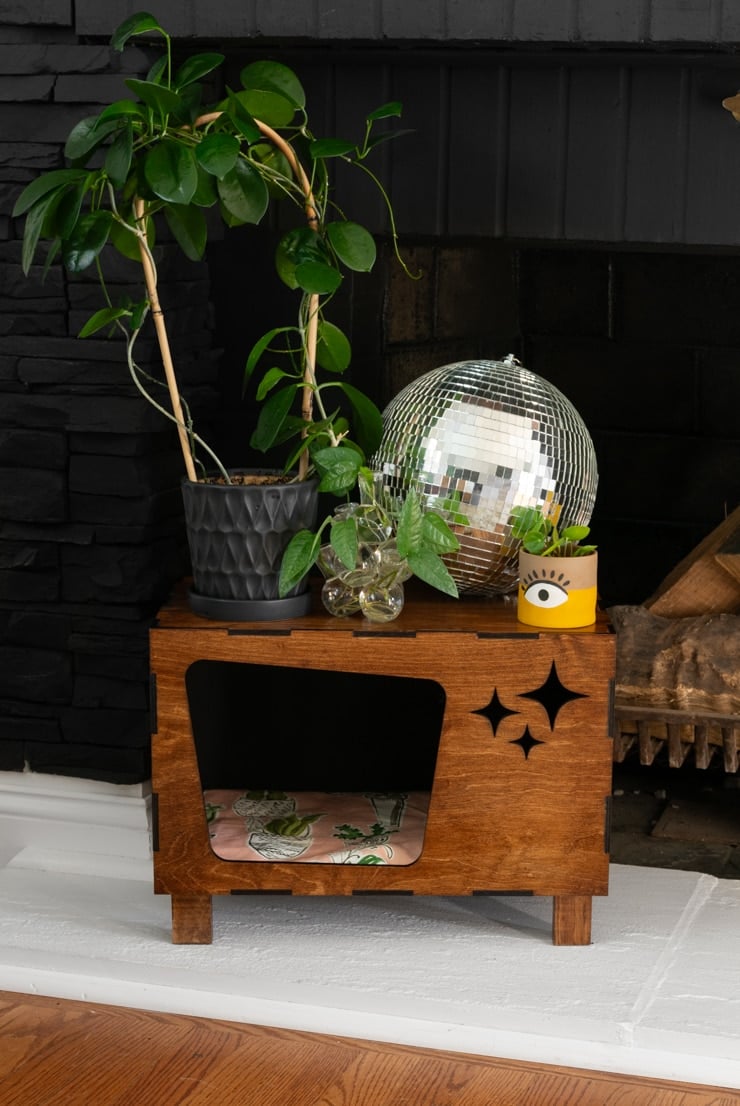
Here is a look at the final houses! I think the retro tv one is my favorite and the one I’ll keep 🙂


Download the cat house SVG files here!
Want to download the files? Drop your email in below to sign up. And I’d love to see your cat house after you make it!
Here is the link to the Dropbox folder with the files! Enjoy, and I’d love to see what you make.

Pin this post!