Test Tube Propagation Stations
Today I am sharing test tube propagation stations I made using my laser cutting machine. I designed these for a material thickness of 1/4-inch or 6-mm, and they are meant for hanging on the wall.
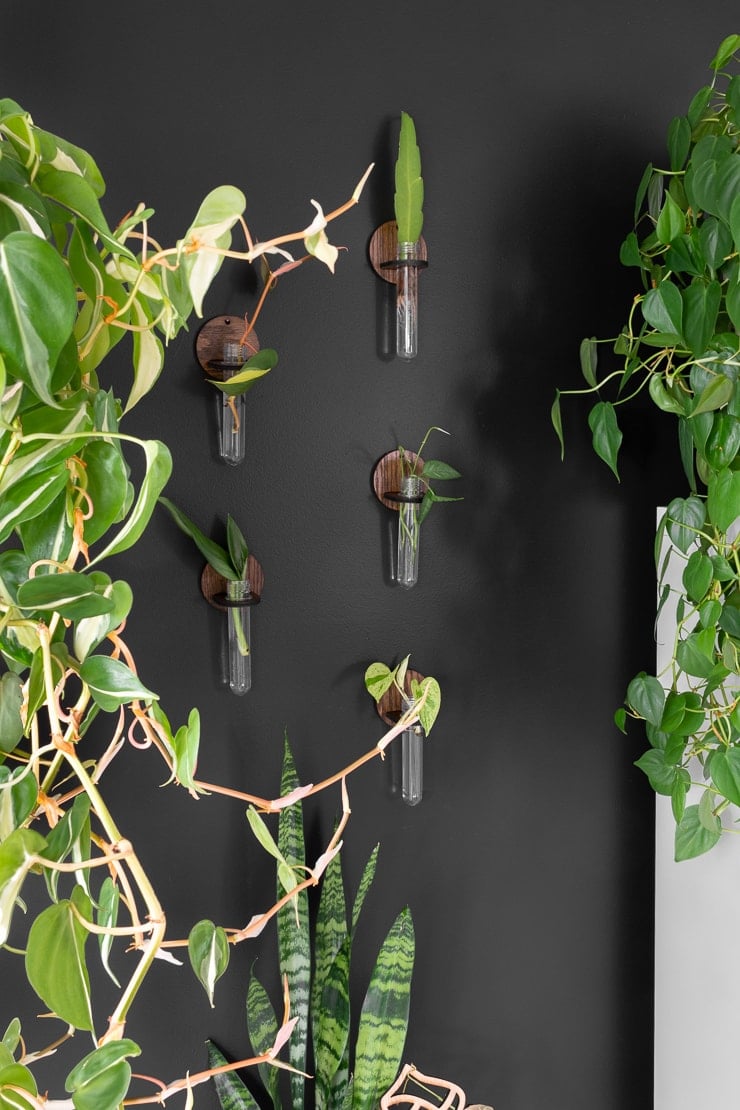
5 test tube propagation stations made with a laser cutting machine!
Hey all! Today I am sharing something pretty exciting. I was recently at a garden show and saw a vendor selling propagation stands. I thought…that would be a fun project to complete on my xTool M1 machine! So I got to work on some designs.
These are a perfect complement to the houseplant trellis SVG files I shared, too! And make sure to check out my xTool M1 Review post to learn about the machine and its capabilities.
As for these designs…they are pretty simple with only two pieces: a backing piece and a test tube holder piece. The backing pieces have circle, triangle, hexagon, cat, and rainbow. And the sizing for each holder piece is designed for a 1″ test tube. So let’s walk through the tutorial.

Here’s what I used:
(Affiliate links below; read more about those here)
- Propagation station SVG files
- xTool M1 machine
- 6-mm or 1/4-inch white oak plywood (that’s what my files were designed to work with)
- Fine-grit sandpaper
- Finish of your choice; I used wood stain and a clear aerosol sealant
- 1-inch diameter test tube—I used these specifically

And here’s how the test tube propagation stations look cut out!
Always take the proper precautions and safety measures before working with any tools or materials. Wear safety equipment and work with a professional to complete projects when necessary. Read my full terms of use and disclosure for more. Happy making and stay safe!
Step 1: Design the files
As a first step, you can design the files yourself or hire it out. I messaged someone on Fiverr and told them what I wanted—they then sent me the SVG files. This is often the easiest option for me since I am not terribly proficient in designing SVGs.
There are a few things to know about the process if you also want to design your own files or hire someone to do it for you:
- Each wall-mounted test tube propagation station includes two pieces: a backing and a test tube holder.
- Assembly is easy—you’ll need only a bit of glue…maybe a rubber mallet depending on how tight the fit is with your material.
- My files are designed for 1/4-inch or 6-mm material, and I can’t resize the files, either. If you make them bigger or smaller, the finger joints will no longer line up appropriately. Keep the size as is.
- The holes are designed for test tubes with a diameter of 1 inch.


Step 2: Cut the test tube propagation pieces
Next cut the pieces you want to use. Remember not to resize any of the pieces. My files were sized perfectly as they were for the finger joints to line up. Even if I made both pieces bigger, it would throw off the depth measurements on the finger joint. They are designed for 1/4-inch or 6-mm thick material.
I used 1/4-inch white oak plywood for mine. This took a lot of passes on my M1 machine. I used the settings 100% power, 10 speed. I needed about 15 passes. However, I found that 15 wasn’t enough on some of the areas of the wood. So I added a 16th pass.


Step 3: Sand lightly as necessary and stain
After I’d cut everything out, I used fine-grit sandpaper to sand any rough edges lightly by hand. The machine cuts perfectly, but there were some areas where I probably could have benefitted from another pass or two.
I popped those out and polished up any splintering with my sandpaper. Then I wiped the pieces down to get off any soot and stained the fronts and backs of all pieces.


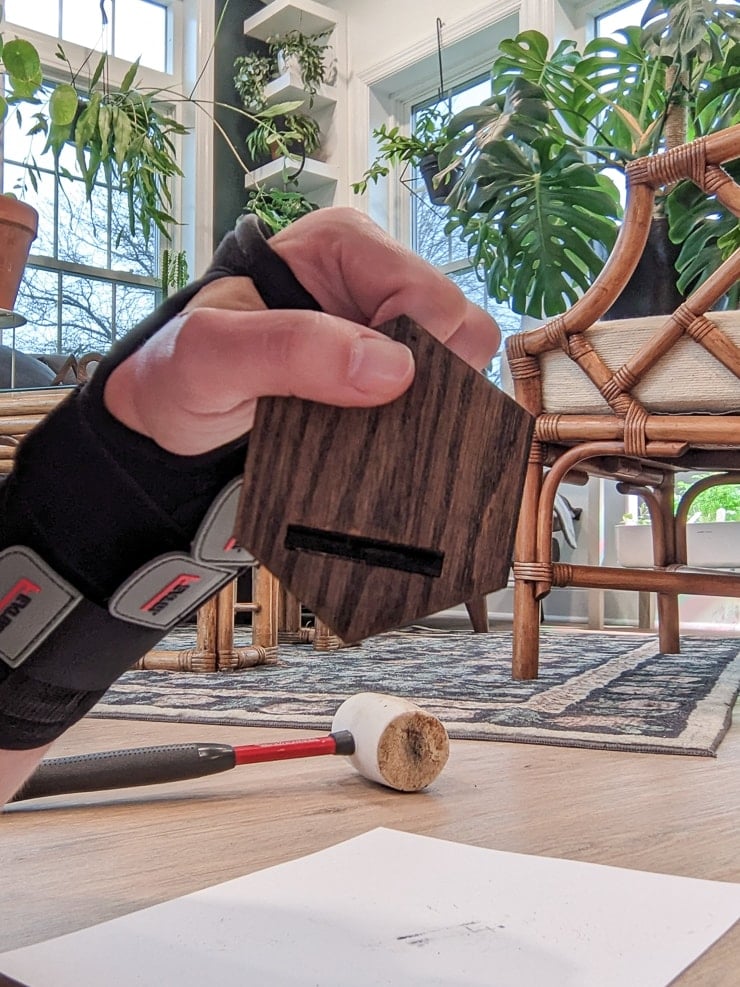
Step 4: Assemble the test tube propagation holders
You can assemble the pieces before finishing them, but I found it was easier to stain the individual pieces, assemble them, and then finishing them with an aerosol spray.
As for assembling them…there can always be a slight variation in cut sizes. Cut in white oak plywood, my finger joints were super tight. I didn’t need to use glue. Instead, I simply tapped the holder pieces in with a rubber mallet.


If you can fit the test tube holder piece into the joint without using a mallet, I would recommend adding a bit of strong glue to the joint to reinforce it. And when you’re done, add your test tube!
Here are my finished wall-mounted test tube propagation stations! The perfect laser cutting machine for the plant lovers in your life.


How do I keep my test tube from falling out?
Finally, let’s talk about the test tubes. How do you keep them from falling out? Well…it depends. The hole is sized for a 1-inch test tube. If you’re lucky, you can get one with a lip and the measurements will be such that you can slip it in and it will hold.
You could also use a slightly tapered test tube in hopes of the slight taper doing the job itself. I originally tried this, but the measurements didn’t end up working for a 1″ opening.
If you use a test tube that doesn’t have any sort of lip or taper, the easiest way to keep it in place in my opinion is to just add a rubber o-ring. If you wrap a rubber o-ring around the top of the area you want to keep above the hole, it will be just enough to prevent it from falling through the hole.
You may need to do some trial and error to figure out which size works best for a 1″ test tube. Sorry—that was the direction I was heading in when I found the perfect test tubes with a lip. So I didn’t look into o-ring sizing.
It might take some troubleshooting to find the perfect approach based on the material you’re using, how much you sand, and the test tubes you use.