Want to give your seeds a head start without building a greenhouse or investing in a ton of supplies? You can turn a simple storage tub into a mini greenhouse 🙂 I love helping people overcome obstacles to growing, and seed starting can be an expensive venture if you’re not careful.
This easy, budget-friendly setup helps trap heat and moisture, protects your seedlings from the elements, and boosts germination so you can grow strong, healthy plants right from the start. Whether you’re working with a windowsill, balcony, or backyard, you’ll be able to adapt this DIY approach to your needs. So let’s get started!

Things you’ll need
- Clear plastic storage bin (lid doesn’t have to be clear)
- Ability to carry it…that’s it!
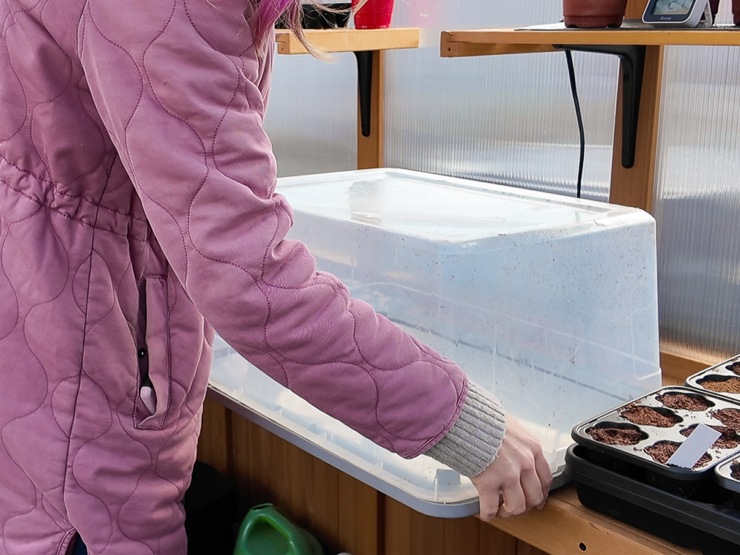
Choosing the right bin
To get started, you’ll need a clear or translucent plastic storage bin with a lid. The lid doesn’t need to be clear because you’ll be flipping the bin upside down to maximize space. The size of the bin you choose kind of depends on how many seeds you’re starting and the space you have for the bin.
You’ll also need something to start your seeds in like seedling trays or small cups. It doesn’t really matter what it is, it just matters that it has drainage holes!
For your seed starting medium, I like to buy bricks of coco coir online and expand them in water. I start a lot of seeds, so I find this approach to be the cheapest. But if you aren’t starting a ton, you can just buy a bag of seed-starting mix.
Setting up the mini greenhouse
All you’ll need to do to set up this greenhouse is flip it upside down so that the underside of the lid is now the base. I like to flip the bins upside down because most storage bins taper a bit toward the bottom, so this approach lets me fit a few more plants in.
Then just arrange your pots and seedling trays on the lid and snap the storage bin on. That’s it…that’s the greenhouse🙂 But there are a few things I want to highlight about using this method.

Light
First let’s talk about light. I like this method because I don’t have to buy grow lights. I did not use any grow lights for this method last year. Instead, I simply carried my bins out and set them in the sun. I then took them back inside at night.
If the bin is clear or translucent, it lets sunlight in while providing insulation, giving seedlings the light they need to grow while also protecting them from the elements. Sure, this won’t work on days when it’s snowing or raining, but you’d be surprised at how much light a sunny or even partly cloudy winter day produces.
As a bonus tip for boosting the light a bit, you could also line the lid with aluminum foil. This will reflect the light and more evenly disperse it.
And I know moving the bin outside every day requires a bit of effort on your part, but it’s really not that bad. I did three of these bins last year. And while I was certainly ready to stop doing it when April rolled around, it was totally worth it!


Temperature
Now you may be wondering why I take the bins in at night. If it was just about the light, I’d leave them out. But it’s not just about the light. It’s about the temperatures.
Here in Maryland zone 7A, it’s still quite cold in March. The greenhouse effect of the sun hitting the clear plastic bin will raise the temperature an impressive amount even when it’s frigid outside—but at night, there’s no sun to help, so it gets quite cold. I stop carrying the bin inside at night once temperatures are getting into the high 40s or low 50s at night.
That’s why I carry the bins back inside at night. If you don’t want to deal with this, you could consider putting a seedling heat mat under your seedlings. This would help boost the temperature a few degrees, and the bin would trap that heat. You could turn the mat off during the day when the sun gets to work.

Watering
Seedlings need plenty of light, but they also need plenty of water. Using the upside down storage bin method makes watering easy. I simply take off the bin portion, water the seedlings liberally, and pop the bin back on.
The excess moisture combined with the rising heat levels inside the enclosed bin creates a fantastically humid environment for your seedlings, and it also decreases water evaporation, meaning you don’t have to water as frequently.

Ventilation
Now let’s talk about ventilation. When it’s pretty cold out and you’re relaying on the sun and the greenhouse effect to warm things up, you don’t have to worry too much about ventilation. What I’ll sometimes do it keep the bin latched on all day, and then when I bring the bins inside for the night, I’ll take off the lid to let things air out in stable temperatures.
Once it gets warmer during the day, though, you’ll probably want to start propping the box up to let some of the hot air escape and circulate a bit.


Hardening off
And when the temperatures start getting up into the high 50s or 60s during the day, you can start taking the clear part of the bin off completely for increasing lengths of time to start naturally hardening off the seedlings. Then just add it back on for warmth before the sun goes down.
Throughout this process, you may need to pot your seedlings up to larger pots as they grow. That’s another reason why I like using the deep storage bins—they provide a lot of vertical growing space.


And that’s basically all you need to know to make a simple, cost-effective greenhouse to give your seeds a good start! And since you’ve already been gradually exposing the seedlings to the elements by removing the clear bin, they are probably ready to go straight into the garden once your last frost date has passed. Enjoy! 🙂
Like this? Pin it!


Brittany is a seasoned DIY home and garden expert, running a creative brand since 2014 that inspires others with approachable plant care guides, woodworking tutorials, and decor projects. She is a certified project manager and has completed extensive coursework in the art and science of growing your own plants. Her work has been recognized by major publications, and she routinely collaborates with fellow DIY industry leaders—but her favorite thing to do is inspire you! Learn more about her here.
Leave a comment