
My Tiny Backyard: Platform Deck & Some Cleaning Up
Hey all, I’m back for week 2 of the One Room Challenge and sharing the progress we’ve made on our tiny backyard. Here’s week 1 if you missed it. Let’s jump right in.
One of the main projects we wanted to do in the backyard was clean up the area around the house with a platform deck. We settled on the platform deck for a few reasons:
- A concrete patio was way too expensive
- Landscaping the area around the house with gravel and pavers would be nice, but it wouldn’t create as clean and long-lasting of a solution as we were hoping for
- We could match it with the deck that’s above it for a cohesive look
- We could get the look of a clean, modern, and practical space without the cost of a concrete patio
- My dad said he’d do it 🙂
As I’ve mentioned before, my dad is a licensed contractor, so he put in the deck. He whipped it out in a couple of days, working on it here and there between his real jobs for real customers who pay him real money. (Did I mention how much I love my dad? He’s the best.)
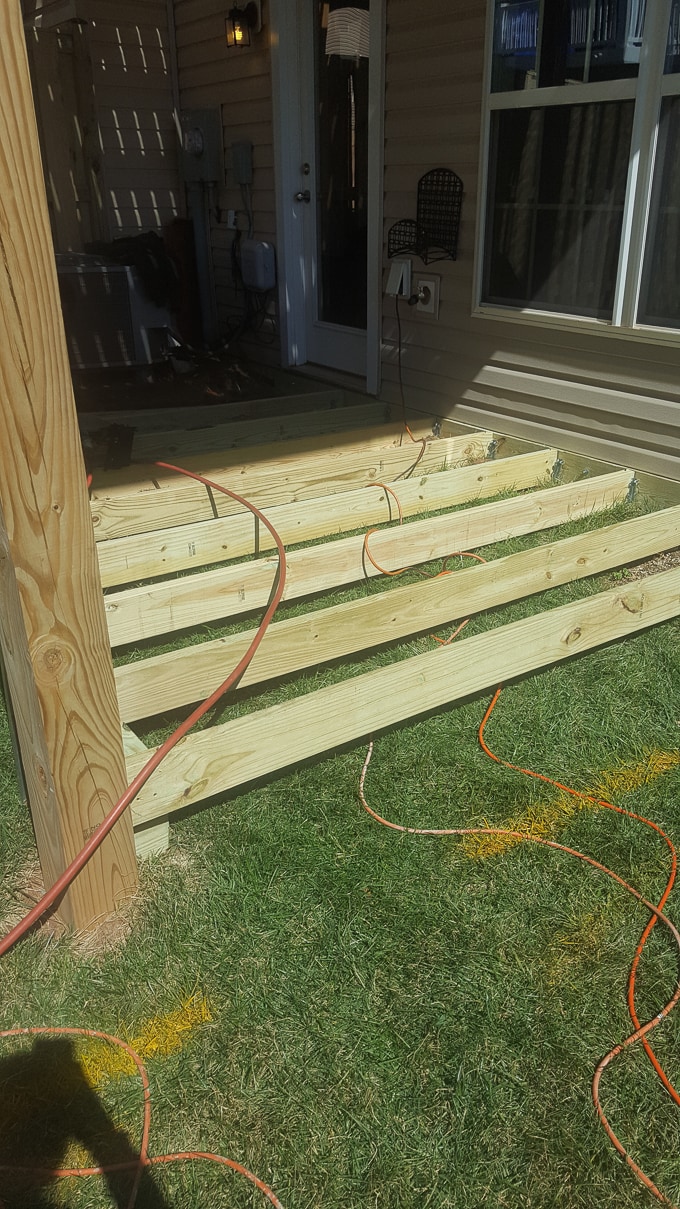
Here’s a reminder of how the spot looked before the deck:


Having a professional do the deck was important to us because it is way too big of a project for us to DIY, and since it’s structural, we wanted it to be 100% legit. So to keep costs down, we chose to do it all with wood.


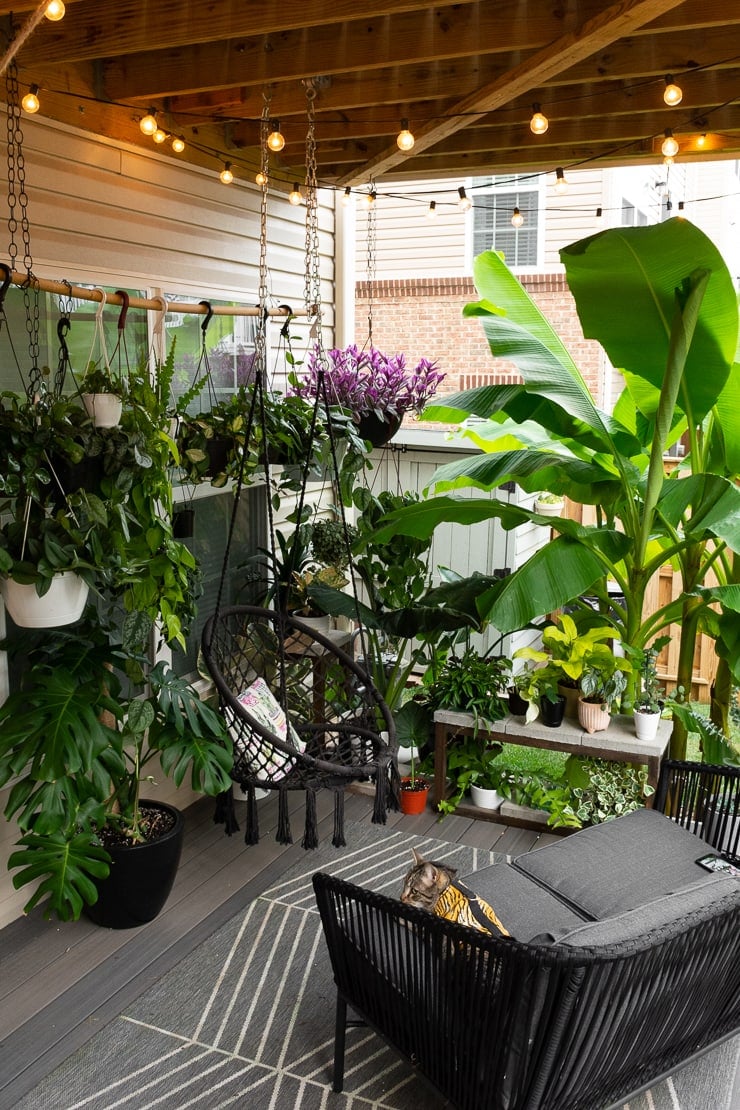
Just kidding. I was a bit of a brat about this one and wanted it to be finished with the same gray Trex we have on the second-story deck. Mike agreed. But hear me out, here…this stuff is beautiful, and while it’s more of an investment up front, it needs ZERO maintenance. No refinishing, staining, etc. And I absolutely love the clean, modern look of the gray Trex. I just swallowed the price tag on it, which was about 80% of the total materials cost.


(Note: Sharing the tutorial for the benches pictured here, but once I saw them with the gray Trex, I refinished them in a different color. More on that when I post the bench plans.)
Since our yard is on a bit of a slope, the deck has a small area where it is above the ground. Not enough to warrant steps, but enough to allow to cats to crawl under it. In fact, THE VERY FIRST TIME we had them out with the deck built but not finished, they crawled under. Looking forward to having dad wrap this project up—there are just a few things left he needs to do. Pics forthcoming.
The deck alone made a HUGE difference in cleaning up the yard, but to finish off this part of the yard, I wanted to do some landscaping around the air conditioning unit/general utilities area. We also didn’t want to leave any grass back in that weird corner to mow. This was a huge PITA because I had to pull up some of the sod and dig out the dirt. Way more work than I was expecting, but we think it turned out great.
Here’s a quick little tutorial on how we cleaned this area up.
Supplies
- Landscaping fabric. We got this kind.
- Landscaping pins
- All-purpose drainage rocks. We got bags of this kind.
- Decorative stones
- Gardening gloves
- Trowel
Step 1: First we cleaned up the area. As a reminder, here’s what it looked like before. We used a shovel to cut and dig out some parts. We also dug up a bit of extra dirt so the rocks wouldn’t sit too high.

Step 2: Next we evened out the area. I actually did this while the dirt was wet after it had rained. While it was really messy, it was easy to mold the dirt and pack it down like clay.

Step 3: After we had an even space, we laid landscaping fabric cut to size and pinned it in place using landscaping pins.
Here’s some of the fabric laid.


Step 4: I laid a “L” shape of pavers (you’ll see why in an upcoming post) and then filled in the rest with rocks. Luckily we didn’t really need to edge off most of the area since the fence, house, and deck did most of that for us.

Since these drainage rocks came really dirty in the bag, I just gave them a good hosing off after dumping them in the spot. It cleaned them up nicely.
Also, the end of the rocky area where the rocks just kind of stop—we’re going to have garden beds butting up against that area, so it will look cleaner when those are in. One step at a time.


And then I finished the L-shaped screen for our utilities area. (This makes it sound like it was a quick and easy project. It was not, lol. See the full post for that project here!)
Once the beds are in to cap off the other side of the rocky area, we’ll be dumping a layer of prettier decorative stones over the parts you can see. No need to waste money on prettier stones that will be hidden behind this beauty:


This space already looks so different. Here’s a before and after because I like to see them as I go along (keeps me motivated)…
And here’s a recap of the to-do list. I’m bolding what’s on my radar next…
Build a platform deck (not DIY—having a licensed contractor do it to make sure it’s done right)- Add additional lighting—hanging? string? No idea.
Clean up area around the AC unit and the gas meter/gutter using rocks- Build table and benches for deck (Done, actually. Just need to finish them off with some no-slip bottoms because the Trex is very slick.)
Build screen for AC unit and all of those wires and boxes back there- Hang plants
- Build veggie beds and lattice for climbing veggies
- Hang bucket swing for Ramona
- General landscaping around the fence perimeter (flowers, bushes, etc)
- Maybe: Privacy screening for the deck area (depending on the cost, and I don’t think I want to DIY this)
- Major maybe: Let myself do a little shopping for some fun items like a large outdoor vase planter—budget depending
I removed “add a rain barrel” because we decided against it based on space. I’d really like one, I just can’t find something that works well for the space.


I LOVE the screen that you built and put around your HVAC unit. It looks AWESOME!!
Thank you, and you got to see it in person too, so you can attest to it looking just as good in real life 🙂
Holy moly, now that is some progress!! I am so impressed!
Thanks! Hiring out the deck was a smart idea 🙂
I really appreciate these updates, as we own a townhouse w a similar backyard. We have two HVACs, and while they are awesome on the temp inside…are obnoxious to look out outside. Thanks for your options to hide!
Hey Kristina, yep, not nice to look at. Bonus for us: the screen now blocks the cats from jumping onto the AC unit and then over the fence. I’m posting more details about the screen on Monday!
This looks so much better ALREADY! This deck will host a lot of gatherings in the future. I can tell!
It has already hosted one, and even with just this amount of progress, it was so much better than before!
Wow!! That looks 100% different and I love the wood screen to hide the air conditioning unit! I can’t wait to see what you get done next!
Wow, Brittany! Love the changes already. The HVAC screen is amazing. Looking so forward to following along with you. ~~ Susie from The Chelsea Project
I love the trex floor planks and the screen to cover the HVAC! Looking forward to seeing how the bench looks with your new color for it.
The deck looks great! I love how you disguised the AC. Hubby is building a patio and I’ll need to disguise ours too.
It’s an AMAZING change. We moved it to hang some plants this past weekend and I already forgot how awful it looked without it!
This has me reminiscing my backyard project. It’s looking great and you guys are making serious progress.Keep it up! xox
Ahhhh the Trex looks soooo good. I need to do that this spring, our deck flooring is literally falling apart and I’m dreaming of the low maintenance of a composite decking material. Love the color you chose. Also your AC screen looks great!!!!
Yep, low maintenance is my jam these days…
Wow! You guys have accomplished so much! Keep it up!
OMG – this is quick progress! The gray deck looks fabulous and we agree with zero maintenance! Can’t wait to follow your progress!
Progress is quick when you hire out the biggest project, thanks dad! Ha.
This is looking amazing Brittany! I love the AC cover, I need to do that so badly! So glad you are back to blogging, I love your style :).
Thank youuuu 🙂
Absolutely love this project! I’m going to use that screen idea. It’s perfect for hiding our noisy AC. Thanks for creating and sharing!
I feel like I just read about my own life haha! Aren’t handy dads the best ever?! Good call on the no-maintenance flooring for the deck. That will definitely be worth it. I am already dreading resealing our pergola wood. But c’est la vie! Great call on everything you did with the AC unit. I never even thought to put landscaping fabric around ours. I will definitely be keeping that in mind. I can’t wait to see what comes next!
I honestly only put landscaping fabric down because the red clay dirt we have is soooooo gross. Not sure the fabric will do much of anything in terms of keeping things tidy as it rains and time passes, but we’ll see!
This is looking amazing! The screen turned out beautiful and you dad is the best! Can’t wait to see the rest 🙂
Brittany,
I LOVE seeing a fellow house lover using every inch of their home. This sweet area is going to be so beautiful and inviting! I can’t wait to see more!!! We are making over our mudroom for our first ever ORC. So fun!!!
Meghan
The deck looks great! I really like how you hid your air conditioner too! Looking good!
I love the screen you have added to hide the air conditioner and utility meters! The clean lines really compliment the clean lines of the Trex. All the hard work has made a huge difference!
You made some great progress! I LOVE the grey Trex! It’s so nice – I would definitely pay more up front for something that functional and pretty. Also, we still have inches of snow on the ground…. lol. Guess I’ll never do the backyard for a spring ORC…
You live in the north pole! But my in-laws here in Minnesota just got almost two feet of snow yesterday, sooo
I love the gray trex, and good job on your solution for hiding the a/c!
The gravel around the air conditioning unit was such a great idea and I love the privacy screen you made for it. The decking color is beautiful! What a difference already – can’t wait to see the next post!
Fantastic job!!!! I need you to come help me with my back yard!
Haha, thanks so much!!