One of the more interesting things in my kitchen’s tea cabinet is a big bag of deep red dried up hibiscus calyxes. I love using them for tea. It has a super tangy taste that is perfect for lovers of tart, sour things…like me 🙂
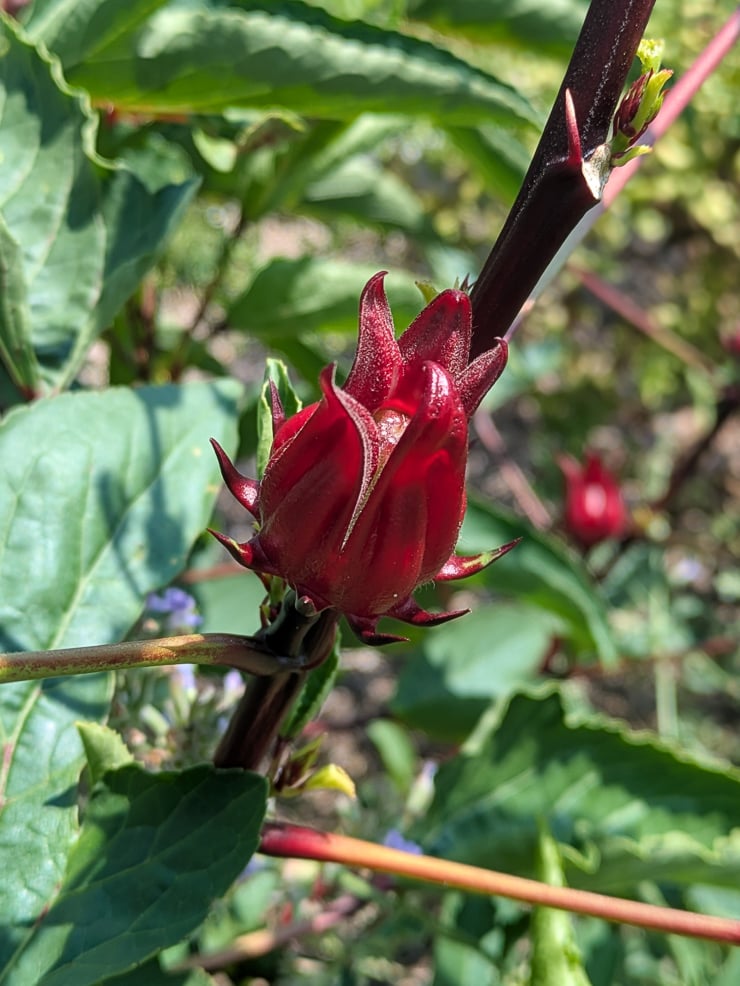
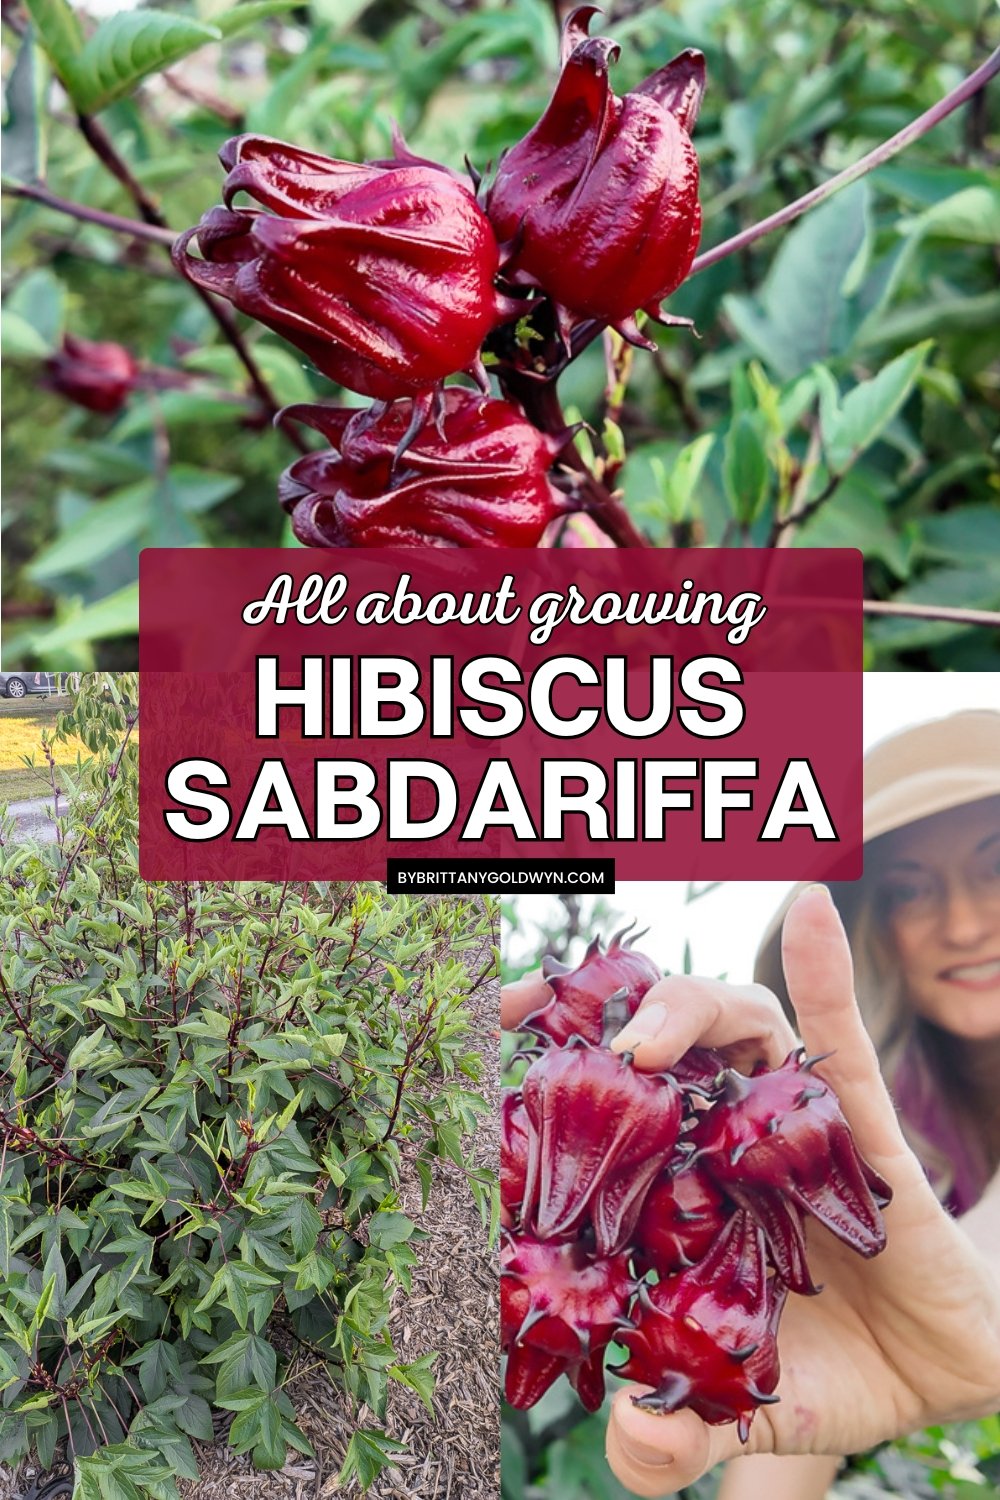
The calyxes are from a type of tropical hibiscus called Hibiscus sabdariffa, also commonly referred to as roselle hibiscus. Here in zone 7, we can grow winter-hardy hibiscus plants with huge, gorgeous flowers. But this type of hibiscus is a bit different. Its flowers are small and only last for one day, dropping quickly to reveal this plant’s real stunner: its calyxes!
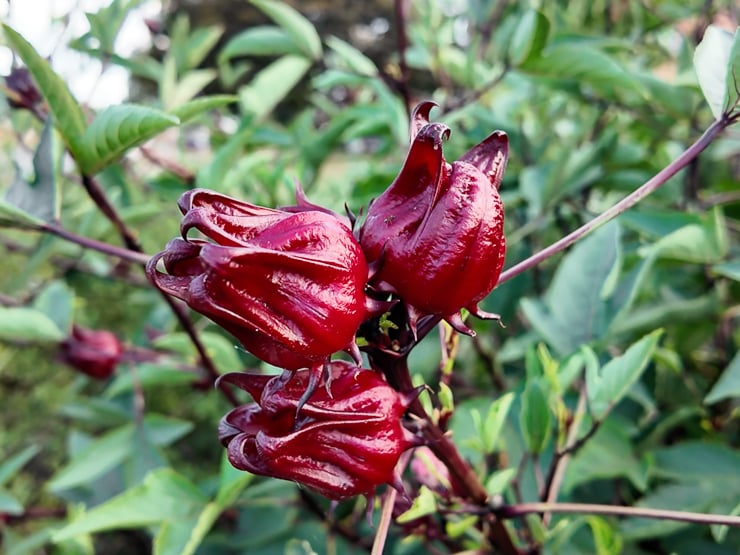
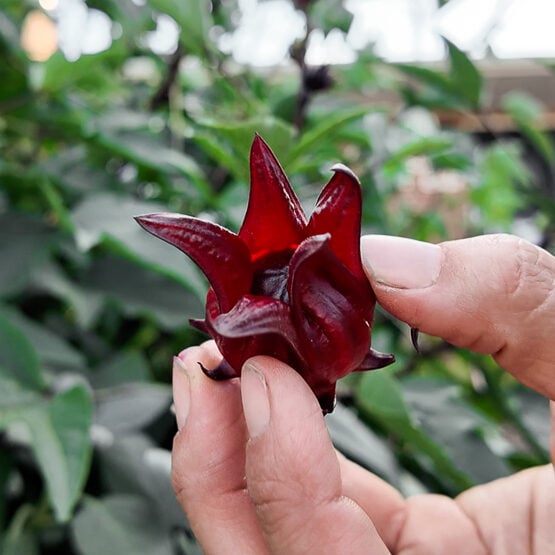
A calyx is the outer whorl of a flower. It holds the flower’s petals in place and protects the flower bud. While it’s usually green, the calyxes on Hibiscus sabdariffa are ruby red. And they, not the flowers, are what you use to make teas!

Starting seeds indoors
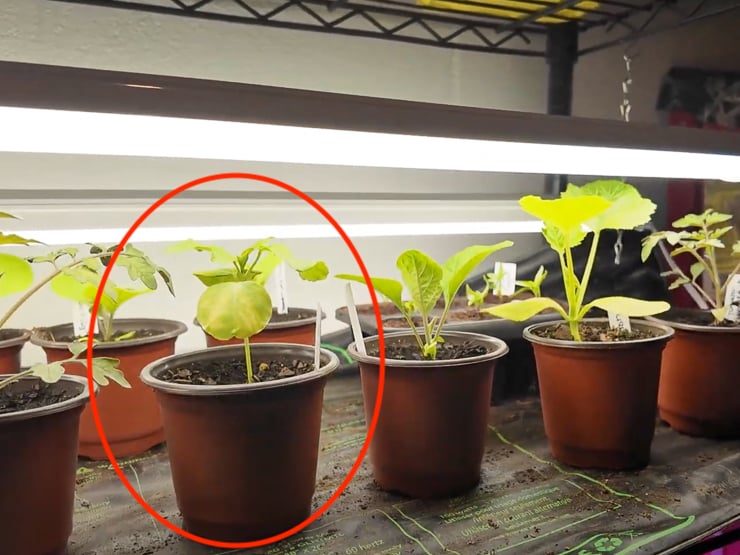
Roselle is a perennial in warmer grow zones. But in zone 7, I recommend just treating it as a warm-season annual. It’s very sensitive to frost, so the key is timing. I started seeds in my basement on a heat mat and with grow lights about 8-10 weeks before my last frost date. They germinate best when the soil temps are 75°F or higher.
I read online that these seeds germinate very easily but don’t transplant as well. So I started all of the seeds I ordered online—maybe about 10 or so. All of them geminated! I did have to end up potting them up as they grew since I started them so early, but that just meant I had more mature plants to transition to my garden.
Choosing a location
Once the danger of frost has passed and nighttime temps stay reliably in the upper 50s or 60s Fahrenheit, you can transplant your seedlings outside. Don’t forget to harden them off so the sun doesn’t scorch their leaves—do so just as you would any other seed you’ve started indoors.
They’ll need a sunny spot with rich, well-draining soil. They like heat and lots of sun. I chose a few locations with slightly different lighting conditions to see what the plant could tolerate.
I had them in four slightly different lighting conditions listed here from the most to least light, also pictured below:
- One of the sunniest spots in my yard that gets full sun from morning through early evening
- Slightly less sunny, losing sun a few hours earlier in the evening
- An area that gets afternoon sun (not pictured below)
- A spot under a young tree that gets morning light through early afternoon
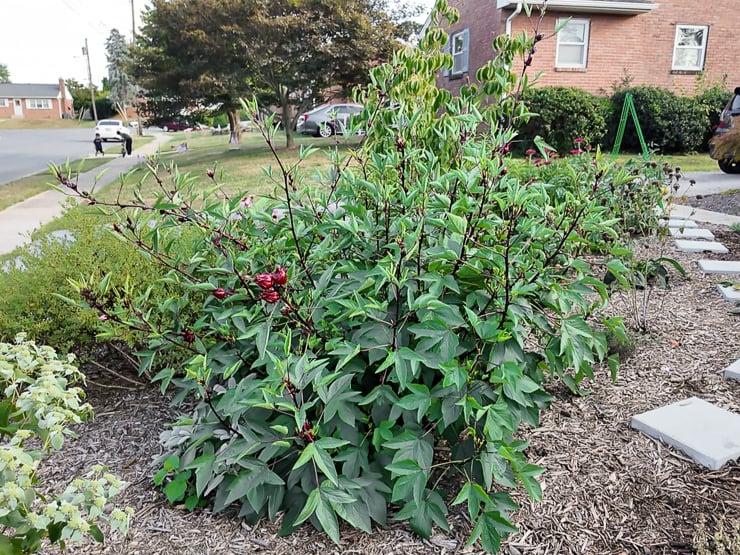
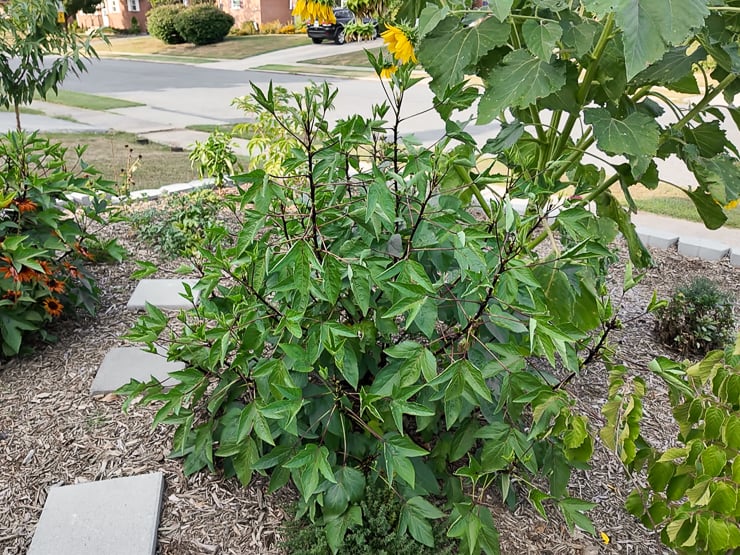
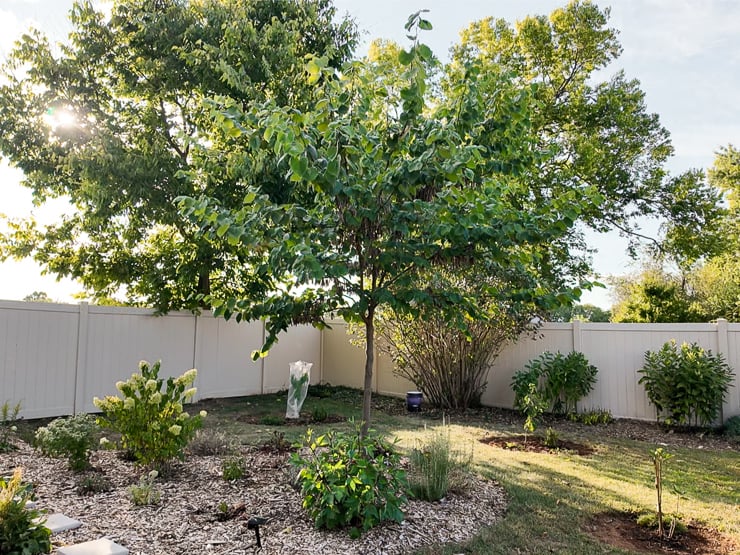
The plants flowered and produced viable calyxes in the first three conditions: full sun, slightly less sun, and some afternoon sun. However, the full sun plant produced far, far more flowers and calyxes than the rest of the plants. Therefore, if you’re looking for calyxes, I’d make sure your plant gets the most light possible.
By the way—all of my starts transplanted beautifully, and I didn’t lose any! So I’m not sure how sensitive this one actually is to transplanting. Just based on my experience this year, that is 🙂
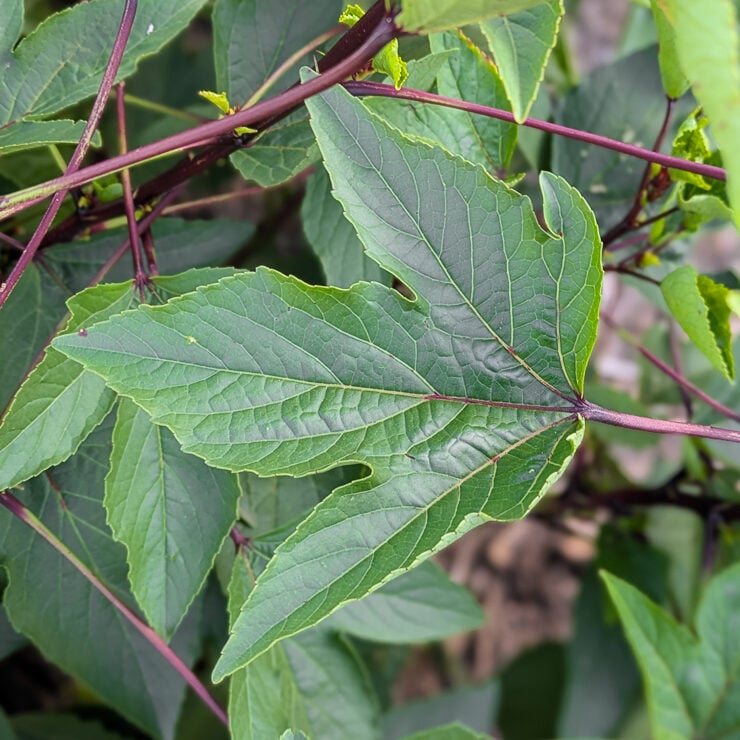
Edible foliage
However, while the plants with the most sun produced the most calyxes, all of the plants grew beautiful foliage. It’s worth noting that the foliage of this plant is also edible. The leaves have a tangy, sour taste similar to sorrel. That’s probably why it’s called Jamaican sorrel—it is used in Jamaica for a popular drink called agua de Jamaica, or iced hibiscus tea.
My husband isn’t a fan of the taste of the leaves, but I LOVE them. I like to take a few and chop them up to add to salads. The tangy taste is less overpowering when mixed in with other greens, and it adds a bit of a lemon taste. I love, love, love it. So it wasn’t a huge deal that some of my plants didn’t flower much because they still produced gorgeous foliage.
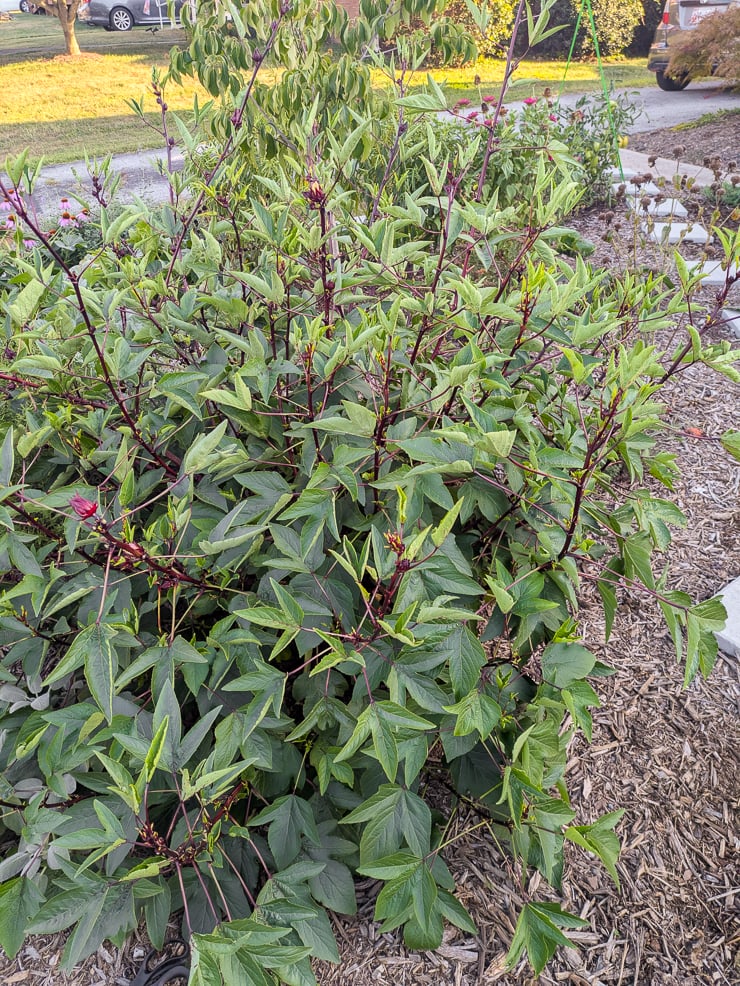
Caring for your plants
Hibiscus sabdariffa plants can get pretty big and bushy. The plant in the sunniest spot ended the season about 4 to 5 feet wide and about 4 feet tall. You can always prune them back a bit if they get too big or leggy for where you have them planted.
I make sure to ammend the native soil with some leaf compost when I planted my starts, too. We have very heavy, clay-based soil, so I wanted to make sure the roots had good drainage. I have found my plants to be considerably drought tolerant, too.
We have had many dry spells here in Maryland this summer, and I generally don’t water my plants in the front much, even during droughts. And those were some of my best-performing roselle plants! That said, make sure to monitor your plants for signs of wilting and water them if necessary.
I don’t fertilize my plants much. Once or twice a season, I will try to give annuals and newly planted perennials something to help them along—usually a concentrated fertilizer like Fox Farm Grow Big or something like a concentrated kelp fertilizer. Remember that too much nitrogen can give you lots of leaves at the expense of flowers and calyxes.
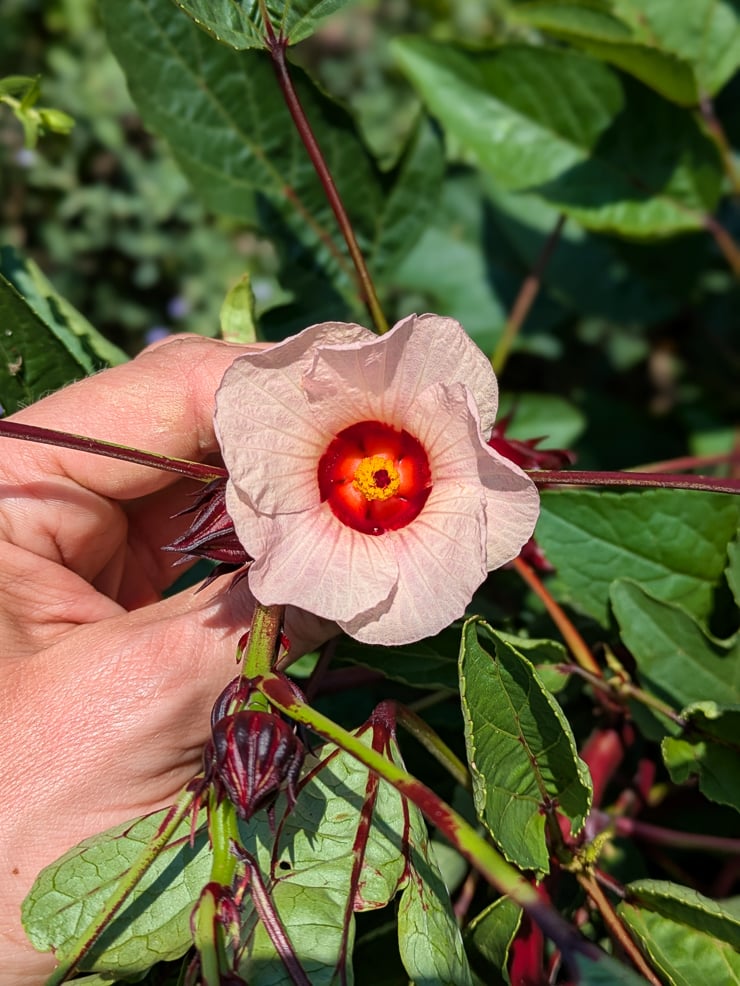
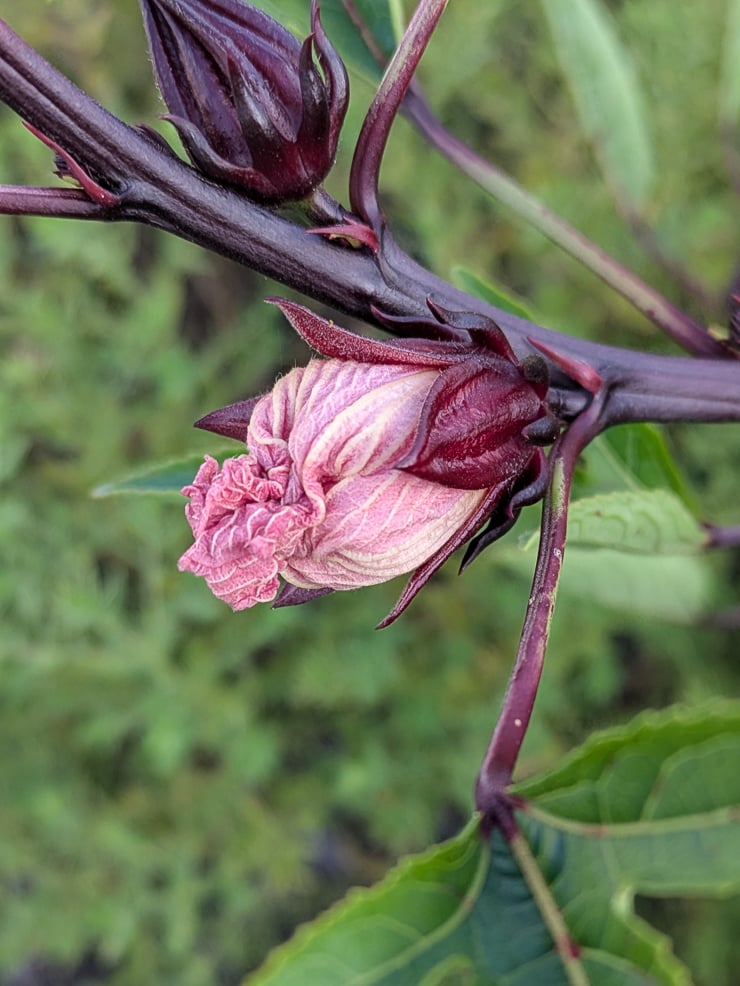
Roselle flowers
I mentioned that this plant isn’t really grown for its flowers. They are super small, not what I traditionally associate with hibiscus flowers at all. They open for roughly a day and then drop, revealing the calyx. While they aren’t flowers, they are super bright and shiny, almost waxy looking. They make a statement!
Harvesting calyxes
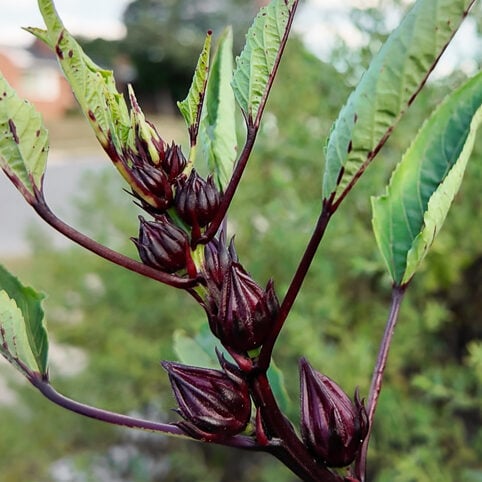
Don’t worry if you don’t see flowers or calyxes throughout the summer. Roselle typically flowers late in the season when the days start to get a bit shorter, usually around late August or September in zone 7.
After the plant drops a flower, the calyx will begin to ripen. We got our first harvestable calyxes in early August, but it was only a handful of them. I started noticing stems loaded with lines of calyxes in late August and started picking the biggest ones (the ones farthest from the stem tips).
Drying calyxes to store
I like to peel back the fleshy red “petals” on the calyxes to remove them from the seed pods. They will dry faster than if you leave them attached to the seed pods to dry. You can rinse them to clean them off, and then pat them dry.
To air dry, you can spread them out in a single later on a clean, dry towel or rack (to maximize airflow). Then let them dry. A small fan to help with air circulation will speed up the process a bit. You can also use a dehydrator on a low setting (around 100°F) for about 12 hours. The calyxes should be stiff and dry for storage.
Once they are totally dry, you can store the calyxes in an airtight container. I like used old coffee tins that I’ve thoroughly cleaned out. (Let some baking soda sit in the coffee tin with the lid on for a day or so if you can’t completely kick the coffee smell…it helps!)
Saving seeds
And if you want to save seeds for next year, just leave a few large calyxes on some of your healthiest plants. Here’s what you do from there:
- Wait for the pod should turn brown and dry on the plant before you collect it; don’t pick green pods, the seeds inside probably won’t be viable.
- Snip off the dried seed pods before they split open. They should rattle a bit when you shake them.
- Open the pods to remove the small, round, brownish seeds.
- Spread seeds out on a paper towel for a week or so to ensure there’s no moisture left before storage.
- Store in a paper bag or container for 2 to 3 years.
Like this? Pin it!

Brittany is a seasoned DIY home and garden expert, running a creative brand since 2014 that inspires others with approachable plant care guides, sustainable gardening how-tos, and DIY projects. She is a master gardener and certified project manager who has completed extensive coursework in the art and science of growing your own plants. Her favorite thing to do is inspire you! Learn more about her here.
Leave a comment